This post is about Using Nginx As A Load Balancer
Introduction
The following is a tutorial for setting up Nginx to act as a load balancer between our servers. This is also the final part of my Nginx series. Throughout this series, I’ve mentioned that Nginx is really just a reverse proxy. This is where that architecture will truly come into light. Here’s a quick rundown to what we’re going to do:
- Spin up three test servers that serve PHP files
- Configure Nginx to act as a reverse proxy sending requests to the PHP servers
- Setup load balancing to achieve redundancy in case the servers go down
- Look into load balancing options that can be used in Nginx
I’m using this article as reference.
Setting Up Test Servers
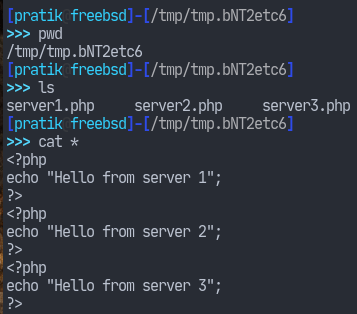
Most of the interpreters for the popular programming languages come with a built-in web server of their own. Since, we’re using PHP, we can spin up a development server using the following command line:
php -S address:port -t document_rootI have a Raspberry Pi machine running FreeBSD 13.1-RELEASE. I’ll use that as my test server. I am going to run three PHP server instances listening on different ports serving different files so that we can distinguish between them.
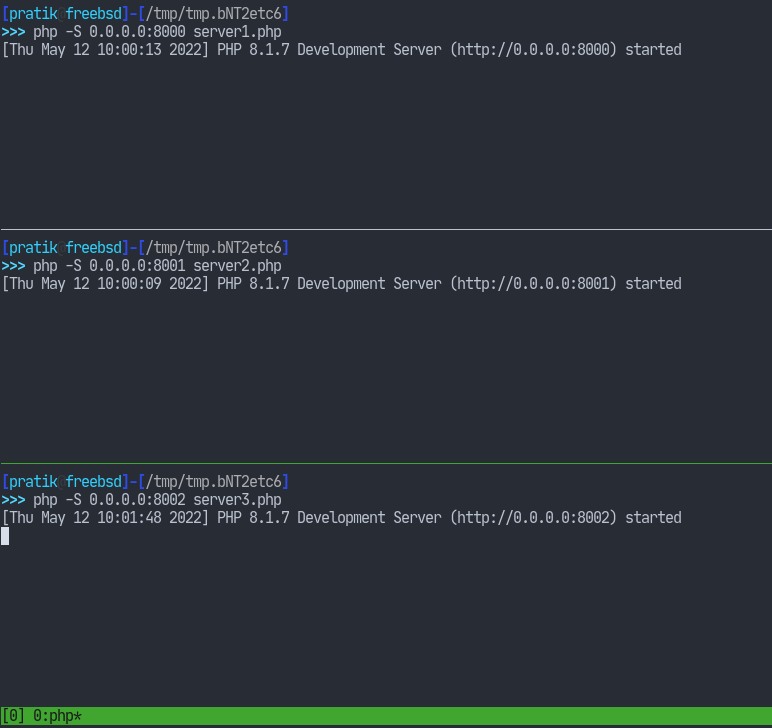
Let’s run the servers now.
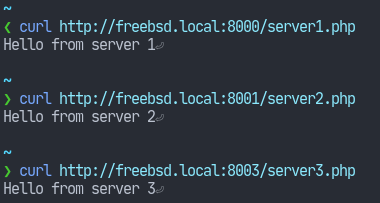
Test them out.
Now I’m going to run Nginx on my local machine. So first let’s look into configuring Nginx as a reverse proxy.
Nginx As A Reverse Proxy
Being a reverse proxy means that Nginx is going to act as an intermediary between clients and our three test servers. While we’ve already done this with php-fpm, this time we’re going to proxy the requests via HTTP instead of the FastCGI protocol. The clients will, of course, see all of the requests coming from Nginx only.
Setting up the reverse proxying is done with the proxy_pass directive which can be declared inside the location context. Here I am defining separate location blocks to access our different php servers.
events { }

http {
    server {
        listen 80;
        server_name localhost;

        location /server1 {
            proxy_pass http://freebsd.local:8000/;
        }

        location /server2 {
            proxy_pass http://freebsd.local:8001/;
        }

        location /server3 {
            proxy_pass http://freebsd.local:8002/;
        }
    }
}
Let’s test this out.
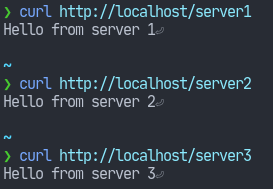
This was pretty simple. One thing we need to note is how URIs are passed by Nginx to the PHP servers. If the proxy_pass directives didn’t have trailing slashes then the PHP servers would receive the /server2 URI as well instead of just a /. So without the trailing slashes, they’d receive http://freebsd.local:8001/server1 which can be fine but that’s not what we want.
Now we can setup load balancing.
Load balancer
Nginx comes with a built-in module called ngx_http_upstream_module. This module allows us to group a set a servers under a common name. The common name can then be used in the proxy_pass directives. See here for more details. This module has its own upstream directive.
I’ll show the usage of this module by configuring it for our PHP servers.
events { }

http {

    upstream PHP_SERVERS {
        server freebsd.local:8000;
        server freebsd.local:8001;
        server freebsd.local:8002;
    }
    server {
        listen 80;
        server_name localhost;

        location / {
            proxy_pass http://PHP_SERVERS/;
        }

    }
}
Notice how I’ve given the PHP_SERVERS name after the upstream keyword. This will be the common name for three of our servers. Now I’m going to access the web service continuously using a while loop.
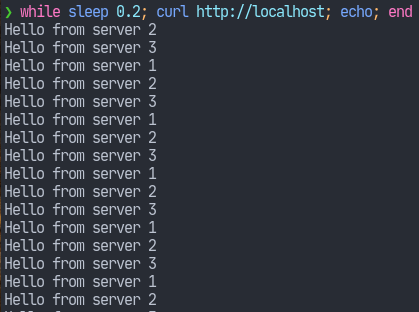
We see that we get responses from each of our three servers. The traffic is distributed evenly. With this setting, even if two of our servers fail, then the web service will still be able to serve requests. This is what’s known as round-robin. This is the default behaviour, which can be easily configurable.
Load Balancing Options
While with the round-robin mechanism Nginx would distribute the traffic to a new server with each new request, some of the servers might already be processing some task or busy with some other request. Therefore, round-robin may not be best for such situations. This is where we can use the least-connectedoption. With this discipline, Nginx will send our requests to the next least busy server thus reducing workload for a single server. To enable this option, we simply have to add an additional directive – least_conn – within the previous upstream context, like so:
upstream PHP_SERVERS {
    least_conn;
    server freebsd.local:8000;
    server freebsd.local:8001;
    server freebsd.local:8002;
}
Now while we’ve managed to reduce traffic to the servers, we face another problem. At this point, our PHP servers are simply returning text. However, in a more real-world scenario those will be handling dynamic requests in which sessions need to persist. In such a case, being directed to a new server every time we, for example, hit refresh on the browser would be a bad idea. That’s where ip hashing comes into place. We can configure Nginx to use the ip-hash mechanism to make the client’s sessions persist across different requests. This works by using the IP address of the client as a hashing key to determine which server the next request should be send to. Again, enabling this option is simply a matter of defining a directive; in this case, it’s the ip-hash directive.
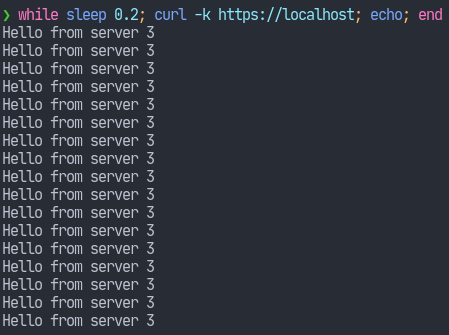
upstream PHP_SERVERS {
    ip_hash;
    server freebsd.local:8000;
    server freebsd.local:8001;
    server freebsd.local:8002;
}
Now if we run the same while loop, we get the same response every time. That’s because we’re doing the requests from the same IP.
That wraps up today’s article as well as my Nginx series. In case you’re
wondering, the following has been my Nginx series:
- Installing Nginx on OpenBSD 7.1
- Nginx – Virtual Hosts (Part 1)
- Nginx – Virtual Hosts (Part 2)
- Nginx – Virtual Hosts (Part 3)
- Serving PHP Files in Nginx
- Nginx – Optimizing Performance (Part 1)
- Nginx – Optimizing Performance (Part 2)
- Nginx – Using Apache Bench To Test FastCGI Cache
- Nginx – Using HTTP2
- Nginx – Rate Limiting
- Nginx – Improving TLS Configuration
As you can see, I’ve covered a lot of topics. So be sure to check them out. Hope you found this useful and thank you for reading.