
Hello, friends. Continuing the work and operation with Webmin in this post, you will learn how to schedule tasks with Webmin.
We already know that Webmin is a great application that allows us to manage a Debian system graphically through a very neat web interface.
One of the many things we can do with Webmin is to set a task in the system. This task is powered by Cron so if you are not very agile in this, this post will fit you like a glove.
So, let’s go for it.
Install Webmin on Debian 11
To begin with, we have to install Webmin on Debian 11 and for that, we leave you with our post where we explain in detail everything you have to do to achieve it.
How to install Webmin on Debian 11?
After this, we will be able to start working.
How to schedule tasks with Webmin
To schedule tasks using cron we need to have enough permissions. For that reason, in Webmin, I have logged in with the root user.
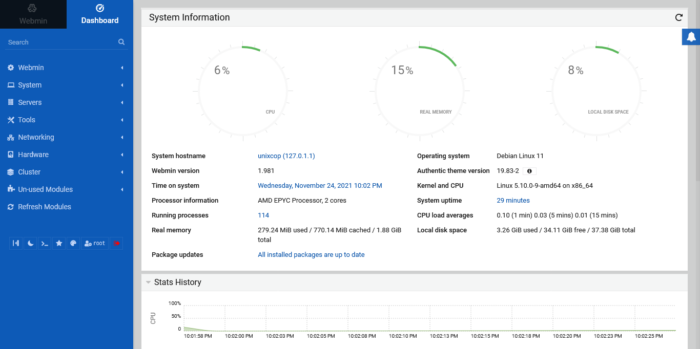
This way you will see the dashboard or the main Webmin screen. On the left side are all the Webmin options including a section for tasks.
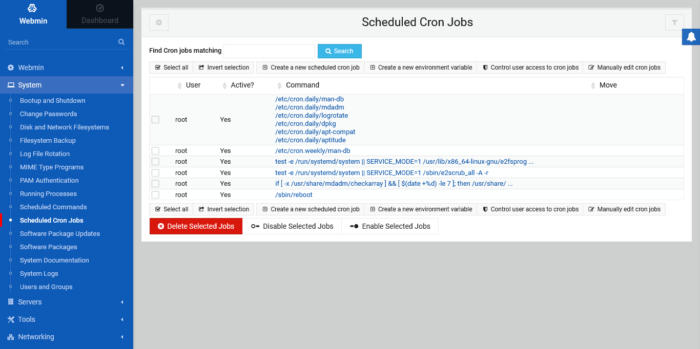
To access it, you have to click System > Scheduled cron jobs When you click on it you will see the following screen.

This screen shows the tasks that the system has already loaded and information about them. For example, the user, if it is active and the command that executes the task.
This summary is quite useful to know all the tasks and to have an overview of them.
To create a new task, click on the Create a new scheduled cron job button and you will see the following screen.
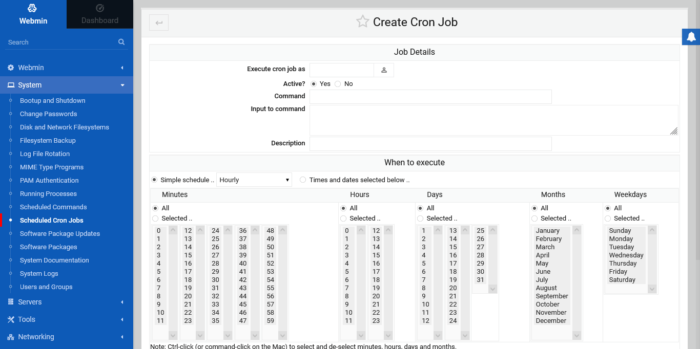
On this screen, you will be able to create a new task. Although it looks a bit overwhelming, it is actually very easy to use.
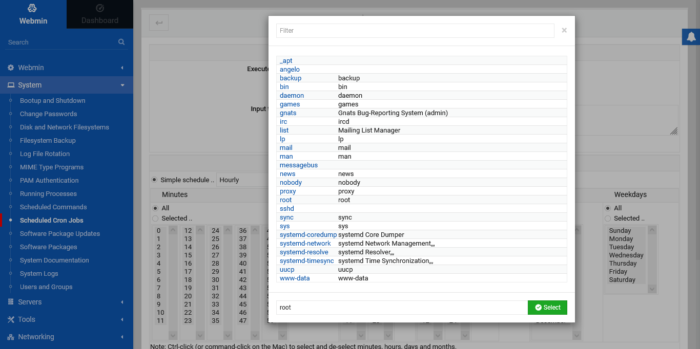
The first thing you will need to do is define which user will create the job. To do this click on the icon next to the Execute cron job as label.
Then, start defining the details of the job. First, make it active. Then set the command to be executed. In this section, you can also include the execution of a script. Also, you can add a description of the task to help identify it.
Then you will have to set when the task will be performed.
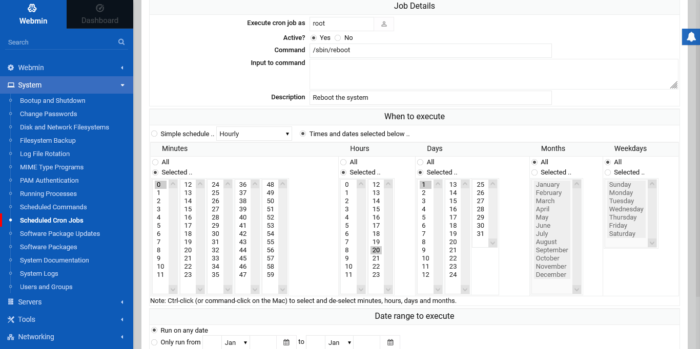
Cron allows us great flexibility for this. We can define the exact time and days, but also the months. So, this is entirely up to you. In addition to this, you can set an execution range that allows even more flexibility.
When you are ready, you can create the task by pressing the corresponding button below.
You will now see the scheduled tasks screen again, but now you will see the task you have just scheduled.
If you want to further check if the task has been added, you can then connect via SSH to the server and run
sudo crontab -e

And there you will see the task we just created.
That is, the task is ready to run.
Conclusion
With Webmin, we can do many different things and in this post, you learned how to schedule a task quickly and easily using it.
So, enjoy it.