
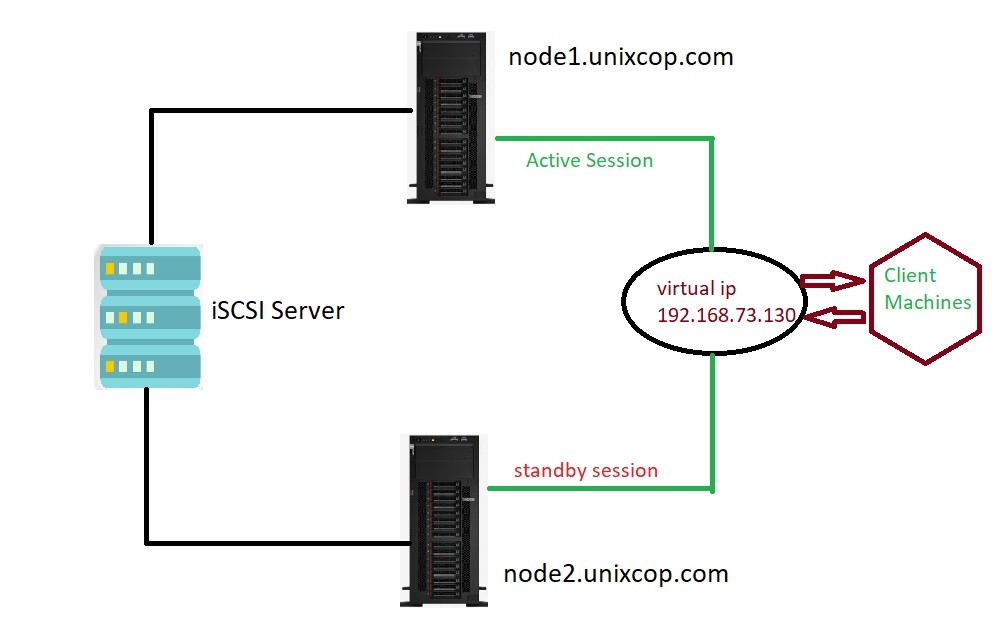
Pacemaker is a cluster resource manager. The High Availability Add-On cluster infrastructure provides the basic functions for a group of computers (called nodes or members) to work together as a cluster. High Availability(HA) cluster also known as failover cluster or active-passive cluster.
In this scenario if one node get fails then another node get active and start working.
Infrastructure :
Here we will use 4 centos8 machines.
| Machine | IP Address | HostName | Used for |
| Machine 1 | 192.168.73.51 | node1.unixcop.com | node 1 |
| Machine 2 | 192.168.73.52 | node2.unixcop.com | node 2 |
| Machine 3 | 192.168.73.128 | shared.unixcop.com | iSCSI block storage |
| Machine 4 | 192.168.73.130 | Virtual cluster IP |
Here we will setup cluster in following 8 steps:
1. Configure shared storage.
2. Configure cluster nodes hosts entries.
3. Install Packages
4. Create HA Cluster.
5. Fencing devices.
6. Create cluster resources.
7. Verify HA Cluster.
8. Test HA cluster.
1. Configure shared storage
For configuration of shared storage you can read our previous article How to install and configure iSCSI target and initiator on centos8.
2. Configure cluster nodes hosts entries
Once you will configure the iscsi server shared storage. After that you with configure both nodes. node configuration with iscsi-initiator-utils also described in above article link.
Once you will configure the shared storage with both nodes after that you need to make entry in hosts file.
# vi /etc/hostsIn this file you need to make entries as:
192.168.73.51    node1.unixcop.com     node 1
192.168.73.52    node2.unixcop.com     node 2
3. Install Packages
The High Availability repository contains the cluster packages. So first you need to configure High availability repository on your machine.
To check High Availability repositories installed in your machine, you need to run below command.
[root@node1 ~]# yum repolist all | grep -i HighAvailability
Last metadata expiration check: 0:16:25 ago on Tue 27 Apr 2021 01:28:07 AM IST.
HighAvailability               CentOS-8 - HA                      disabled
Here it is showing the repository is disabled. To install the packages you need to enable the repository.
root@node1 ~]#  dnf config-manager --set-enabled HighAvailability

root@node1 ~]# yum repolist all | grep -i HighAvailability
Last metadata expiration check: 0:17:28 ago on Tue 27 Apr 2021 01:28:07 AM IST.
HighAvailability               CentOS-8 - HA                      enabled:    99
Now you can install the packages.
# yum install pcs pacemaker fence-agents-commonIf the firewall is enable on the nodes then you need to add the high availability service in firewall.
# firewall-cmd --permanent --add-service=high-availability
# firewall-cmd --reload
Now provide the password for hacluster user.
[root@node2 ~]# passwd hacluster

New password:

Retype new password:
passwd: all authentication tokens updated successfully.
Start and enable pcs service on both machine like below.
[root@node2 ~]# systemctl start pcsd

[root@node2 ~]# systemctl enable pcsd
Created symlink /etc/systemd/system/multi-user.target.wants/pcsd.service → /usr/lib/systemd/system/pcsd.service.
4. Create pacemaker HA Cluster
Run the below command to authorized the nodes. So further we can create cluster and these machine can connect each other without any obstacles.
[root@node1 ~]# pcs host auth node1 node2
Username: hacluster
Password:
node1: Authorized
node2: Authorized
Now in next step you need to give the name of the cluster. Here I am using cluster name as unixcop_cluster.
[root@node1 ~]# pcs cluster setup --start unixcop_cluster node1 node2
No addresses specified for host 'node1', using 'node1'
No addresses specified for host 'node2', using 'node2'
Destroying cluster on hosts: 'node1', 'node2'...
node1: Successfully destroyed cluster
node2: Successfully destroyed cluster
Requesting remove 'pcsd settings' from 'node1', 'node2'
node1: successful removal of the file 'pcsd settings'
node2: successful removal of the file 'pcsd settings'
Sending 'corosync authkey', 'pacemaker authkey' to 'node1', 'node2'
node1: successful distribution of the file 'corosync authkey'
node1: successful distribution of the file 'pacemaker authkey'
node2: successful distribution of the file 'corosync authkey'
node2: successful distribution of the file 'pacemaker authkey'
Sending 'corosync.conf' to 'node1', 'node2'
node1: successful distribution of the file 'corosync.conf'
node2: successful distribution of the file 'corosync.conf'
Cluster has been successfully set up.
Starting cluster on hosts: 'node1', 'node2'...
Now you need to enable the cluster on both nodes.
[root@node1 ~]# pcs cluster enable --all
node1: Cluster Enabled
node2: Cluster Enabled
Cluster is created , now you need to check cluster status by using below command.
[root@srv16 ~]# pcs status
Cluster name: unixcop_cluster

WARNINGS:
No stonith devices and stonith-enabled is not false

Stack: corosync
Current DC: node2 (version 2.0.2-3.el8_1.2-857a80d733) - partition with quorum
Last updated: Tue Apr 27 02:17:39 2020
Last change: Tue Apr 27 02:16:24 2020 by hacluster via crmd on node2

2 nodes configured
0 resources configured

Online: [ node1 node2 ]

No resources

Daemon Status:
  corosync: active/disabled
  pacemaker: active/disabled
  pcsd: active/enabled
5. Fencing devices
This demo cluster is running on top of the VMware and doesn’t have any external fence device to set up. Which don’t support any hardware stonith device.
Since we are not using fencing, disable it (STONITH). You must disable fencing to start the cluster resources, but disabling STONITH in the production environment is not recommended.
You can see there is one Warning related to “stonith-enabled is no false” , you need to make it false.
[root@node1 ~]# pcs property set stonith-enabled=false6. Create cluster resources
Install Apache web server on both nodes. And edit the configuration file.
# yum install -y httpd
# vi /etc/httpd/conf/httpd.conf
Add below content at the end of the file on both cluster nodes.
<Location /server-status>
    SetHandler server-status
    Require local
</Location>
Edit the Apache web server’s logrotate configuration to tell not to use systemd as cluster resource doesn’t use systemd to reload the service.
Change the below line.
FROM:
/bin/systemctl reload httpd.service > /dev/null 2>/dev/null || true
To:
/usr/sbin/httpd -f /etc/httpd/conf/httpd.conf -c "PidFile /var/run/httpd.pid" -k graceful > /dev/null 2>/dev/null || true
Now, you need to use the shared storage (Configured in first step) for storing the web content (HTML) file. Perform below operation in any one of the nodes.
[root@node1 ~]# mount /dev/shared_storage /var/www/
[root@node1 ~]# mkdir /var/www/html
[root@node1 ~]# mkdir /var/www/cgi-bin
[root@node1 ~]# mkdir /var/www/error
[root@node1 ~]# restorecon -R /var/www
[root@node1 ~]# cat <<-END >/var/www/html/index.html
<html>
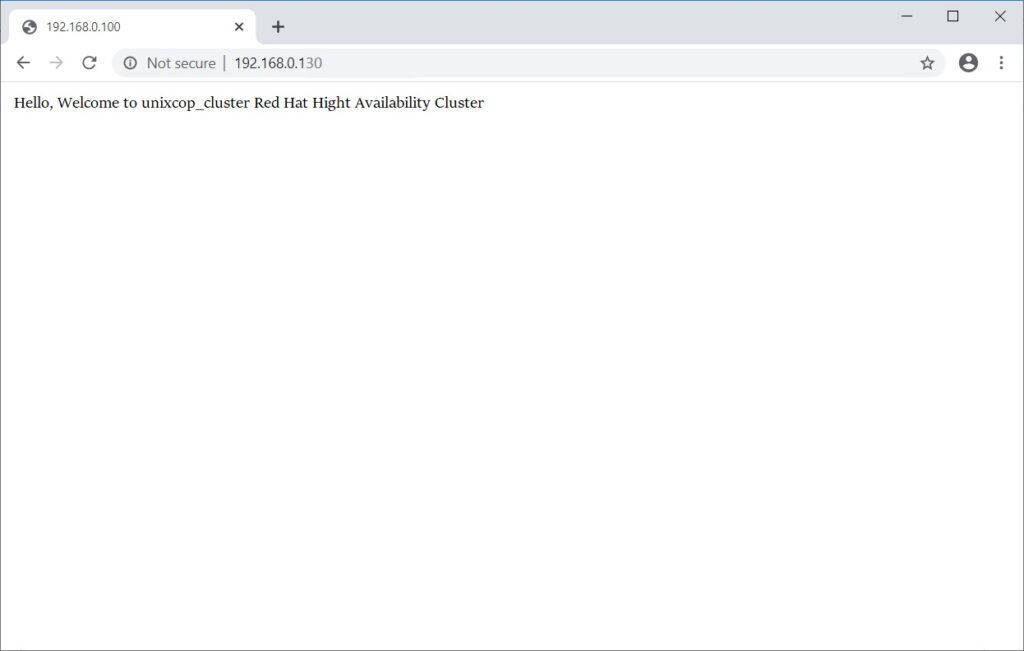
<body>Hello, Welcome to unixcop_cluster Red Hat Hight Availability Cluster</body>
</html>
END
[root@node1 ~]# umount /var/wwwAdd apache service in Firewall.
# firewall-cmd --permanent --add-service=http

# firewall-cmd --reload
Create resources :
First you need to create a filesystem resource for the Apache server. Use the shared storage coming from the iSCSI server.
[root@node1 ~]# pcs resource create httpd_fs Filesystem device="/dev/shared_storage" directory="/var/www" fstype="ext4" --group apache

Assumed agent name 'ocf:`heartbeat`:Filesystem' (deduced from 'Filesystem')
Create an IP address resource. This IP address will act as a virtual IP address for the Apache, and clients will use this ip address for accessing the web content instead of an individual node’s ip.
[root@node1 ~]# pcs resource create httpd_vip IPaddr2 ip=192.168.0.130 cidr_netmask=24 --group apache

Assumed agent name 'ocf:`heartbeat`:IPaddr2' (deduced from 'IPaddr2')
To monitor the status of the Apache server you need to create an apache resource, that will move the resource to another node in case of any failure.
[root@node1 ~]# pcs resource create httpd_ser apache configfile="/etc/httpd/conf/httpd.conf" statusurl="http://127.0.0.1/server-status" --group apache

Assumed agent name 'ocf:`heartbeat`:apache' (deduced from 'apache')
Check the cluster status now.
[root@node1 ~]# pcs status

Cluster name: unixcop_cluster
Stack: corosync
Current DC: node1.unixcop.com (version 2.0.2-3.el8_1.2-744a30d655) - partition with quorum
Last updated: Mon Apr 26 08:09:17 2021
Last change: Mon Apr 30 08:29:46 2021 by root via cibadmin on node1.unixcop.com

2 nodes configured
3 resources configured

Online: [ node1.unixcop.com node2.unixcop.com ]

Full list of resources:

 Resource Group: apache
     httpd_fs   (ocf:💓Filesystem):    Started node1.unixcop.com
     httpd_vip  (ocf:💓IPaddr2):       Started node1.unixcop.com
     httpd_ser  (ocf:💓apache):        Started node1.unixcop.com
Daemon Status:
  corosync: active/enabled
  pacemaker: active/enabled
  pcsd: active/enabled
7. Verify pacemaker HA Cluster
Once cluster is up and running you need to use virtual IP and put it into browser. Now you will see the apache web page like below.
8. Test pacemaker HA cluster
For testing of HA cluster to check the failover of the resources you need to put the active node (where all resources are running) in standby mode.
[root@node1 ~]# pcs node standby node1.unixcop.com
great article, very helpful. thankyou.