
Introduction
Public and private keys GnuPG each have a specific role when encrypting and decrypting documents. A public key may be thought of as an open safe. When a correspondent encrypts a document using a public key, that document is in the safe, the safe shut, and the combination lock spun several times. The corresponding private key is the combination that can reopen the safe and retrieve the document. In other words, only the person who holds the private key can recover a document encrypted using the associated public key. The procedure for encrypting and decrypting documents is straightforward with this mental model. If you want to encrypt a message to Alice, you encrypt it using Alice’s public key, and she decrypts it with her private key.
Likewise, if you want to send a message, she encrypts it using your public key, and you decrypt it with your key.
To encrypt a document, the option –encrypt is used. It would be best if you had the public keys of the intended recipients. The software expects the document’s name to encrypt as input or, if omitted, on standard input. The encrypted result is placed on standard output or specified using the option –output. The document will be compressed for additional security in addition to encrypting it.
Prerequisites
- Ensure that you have Python 3 and pip installed
- Create a GnuPG key pair
Set Up GnuPG Keys
To begin using GPG to encrypt your communications, you need to create a key pair. You can do this by issuing the following command:
# sudo yum install gnupg2
# gpg --full-generate-key
This will take you through a few questions that will configure your keys:
- Please select what kind of key you want: (1) RSA and RSA (default)
- What keysize do you want? 4096
- Key is valid for? 1y (expires after one year. If you are testing, you may want to create a short-lived key the first time by using a number like “3” instead.)
- Is this correct? y
- Real name: your real name here
- Email address: your_email@address.com
- Comment: Optional comment that will be visible in your signature
- Change (N)ame, ©omment, (E)mail or (O)kay/(Q)uit? O
- Enter passphrase: Enter a secure passphrase here (upper & lower case, digits, symbols)
Let’s describe the options on the full generate option:
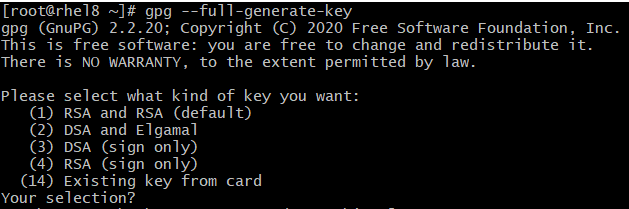
The first question is what kind of key algorithm you want. Defaults are that for a reason. Unless you have a company policy that specifies otherwise, choose the default of RSA and RSA for your multi-use or email exchange key pair.

Next is the key size. Longer is not always better, but I would go with 2048 or 4096. The Red Hat security keys we imported in the last article are 4096 in length.
Please specify how long the key should be valid.
         0 = key does not expire
      <n>  = key expires in n days
      <n>w = key expires in n weeks
      <n>m = key expires in n months
      <n>y = key expires in n years
Key is valid for? (0)
Key does not expire at all
Is this correct? (y/N)
The next set of prompts constructs the identity.
GnuPG needs to construct a user ID to identify your key.

Real name: Best User
Email address: [email protected]
Comment: Best Company
You selected this USER-ID:
    "Best User (Best Company) <[email protected]>"

Change (N)ame, (C)omment, (E)mail or (O)kay/(Q)uit?
After confirming the settings, you are prompted for a passphrase for the private key. The gpg command requires an agent for this, so you may find that you need to be logged indirectly as the user. The agent may be a graphical pop-up box if you are on a graphical desktop such as GNOME. Once completed, the key information is displayed on the screen.
We need to generate a lot of random bytes. It is a good idea to perform
some other action (type on the keyboard, move the mouse, utilize the
disks) during the prime generation; this gives the random number
generator a better chance to gain enough entropy.
We need to generate a lot of random bytes. It is a good idea to perform
some other action (type on the keyboard, move the mouse, utilize the
disks) during the prime generation; this gives the random number
generator a better chance to gain enough entropy.
gpg: key D3E96450EDA1FF23 marked as ultimately trusted
gpg: directory '/root/.gnupg/openpgp-revocs.d' created
gpg: revocation certificate stored as '/root/.gnupg/openpgp-revocs.d/E199624B2C27EE940D3C6DF4D3E
96450EDA1FF23.rev'
public and secret key created and signed.

pub   rsa2048 2022-02-13 [SC]
      E199624B2C27EE940D3C6DF4D3E96450EDA1FF23
uid                      Neil Camara (gpg create) <[email protected]>
sub   rsa2048 2022-02-13 [E]

[root@rhel8 ~]#
Retrieving Key Pair Information
# gpg --list-keys
gpg: checking the trustdb
gpg: marginals needed: 3  completes needed: 1  trust model: pgp
gpg: depth: 0  valid:   1  signed:   0  trust: 0-, 0q, 0n, 0m, 0f, 1u
/root/.gnupg/pubring.kbx
------------------------
pub   rsa2048 2022-02-13 [SC]
      E199624B2C27EE940D3C6DF4D3E96450EDA1FF23
uid           [ultimate] Neil Camara (gpg create) <[email protected]>
sub   rsa2048 2022-02-13 [E]
Installing Python-GnuPG and Signing Files
With your keys in place, you can install the python-GnuPG module, which acts as a wrapper around GnuPG to enable interaction between GnuPG and Python 3. Using this module, you will be able to create Python scripts that do the following:
- Create detached signatures for files, adding a layer of security to the signature process by decoupling signatures from files.
- Encrypt files.
- Decrypt files.
- Verify detached signatures and scripts.
Importing and receiving keys
import gnupg
from pprint import pprint

gpg = gnupg.GPG(gnupghome='/home/unixcop/.gnupg/')
key_data = open('unixcopkey.asc').read()
import_result = gpg.import_keys(key_data)
pprint(import_result.results)
List Keys
import gnupg
from pprint import pprint

gpg = gnupg.GPG(gnupghome='/home/unixcop/.gnupg/')
public_keys = gpg.list_keys()
private_keys = gpg.list_keys(True)
print 'public keys:'
pprint(public_keys)
print 'private keys:'
pprint(private_keys)
Encrypt File
import gnupg

gpg = gnupg.GPG(gnupghome='/home/unixcop/.gnupg/')
open('unixcop-unencrypted.txt', 'w').write('You need to go Unixcop.com.')
with open('unixcop-unencrypted.txt', 'rb') as f:
    status = gpg.encrypt_file(
        f, recipients=['[email protected]'],
        output='unixcop-encrypted.txt.gpg'
    )
    print 'ok: ', status.ok
    print 'status: ', status.status
    print 'stderr: ', status.stderr
Decrypt File
import gnupg

gpg = gnupg.GPG(gnupghome='/home/unixcop/.gnupg/')
with open('unixcop-encrypted.txt.gpg', 'rb') as f:
    status = gpg.decrypt_file(f, passphrase='unixcop', output='unixcop-decrypted.txt')
    print 'ok: ', status.ok
    print 'status: ', status.status
    print 'stderr: ', status.stderr
Encrypt String
import gnupg

gpg = gnupg.GPG(gnupghome='/home/unixcop/.gnupg/')
unencrypted_string = 'Who are you? How did you get in my house?'
encrypted_data = gpg.encrypt(unencrypted_string, '[email protected]')
encrypted_string = str(encrypted_data)
print 'ok: ', encrypted_data.ok
print 'status: ', encrypted_data.status
print 'stderr: ', encrypted_data.stderr
print 'unencrypted_string: ', unencrypted_string
print 'encrypted_string: ', encrypted_string
Decrypt String
import gnupg

gpg = gnupg.GPG(gnupghome='/home/unixcop/.gnupg/')
unencrypted_string = 'Who are you? How did you get in my house?'
encrypted_data = gpg.encrypt(unencrypted_string, '[email protected]')
encrypted_string = str(encrypted_data)
decrypted_data = gpg.decrypt(encrypted_string, passphrase='unixcop')

print 'ok: ', decrypted_data.ok
print 'status: ', decrypted_data.status
print 'stderr: ', decrypted_data.stderr
print 'decrypted string: ', decrypted_data.data
Also, check Securing FTP on Ubuntu.