
This post is about Installing Nagios on OpenBSD 7.1
Introduction
Nagios is regarded as the industry standard for IT infrastructure monitoring. It’s fairly easy to use, flexible and provides a ton of extensibility. In this article, we’re going to see how to install nagios on OpenBSD 7.1.
A Note on Flavours
The default installation of OpenBSD comes with the httpd web server daemon. By default, it works in a chroot environment. OpenBSD, besides the normal one, has the chroot flavour of Nagios which is designed to operate with the previously described httpd.
Package Installations
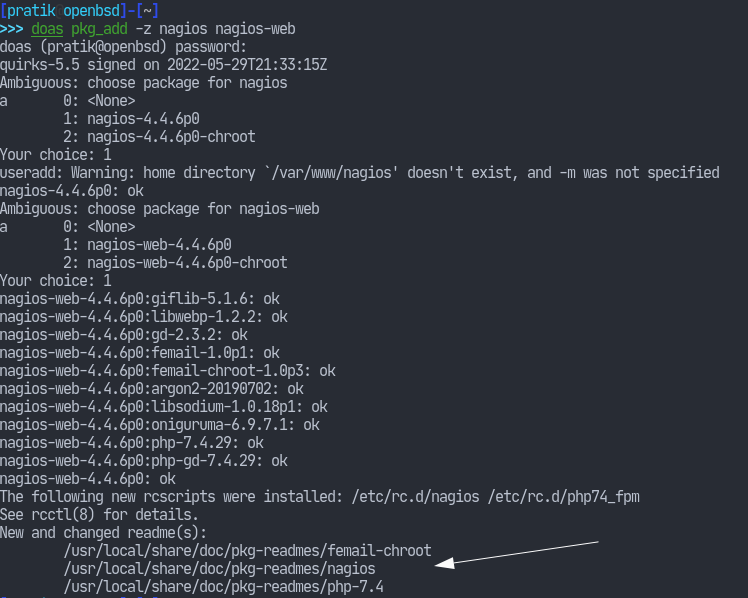
Packages in OpenBSD are primarily installed using the pkg_add(8) utility. We can query packages using pkg_info like so:
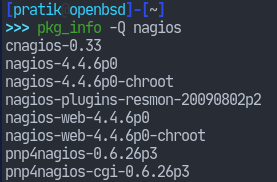
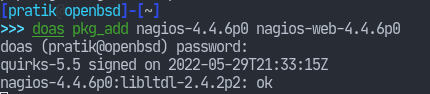
This shows us the various packages that match the word nagios in its name. We can copy the names of the packages we want and give it to pkg_add:
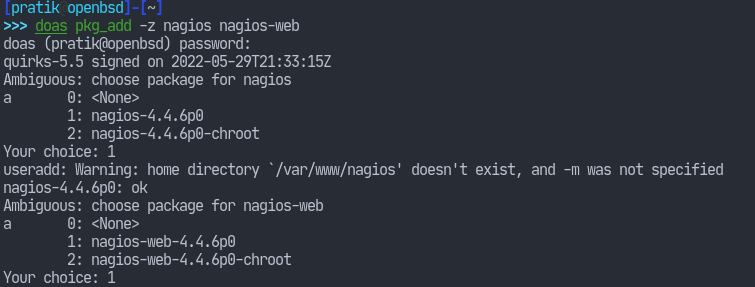
We can also avoid having to use the exact package names by letting pkg_add ask us interactively. This can be done by matching the names fuzzily, with the -z flag.
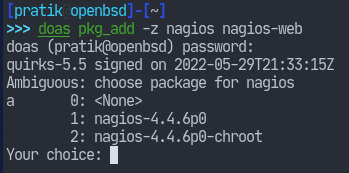
Give a choice at the promt. I went with 1 and the installation will start. It will similarly ask for the other packages that we’ve specified.
After the installation is complete, we can see that some READMEs have been installed alongside those packages. We should go ahead and read them.
I’ve read those documents and will proceed according to what they’ve suggested.
Nagios comes also with a web interface for adminstration. We’ve installed the web package already so we need only to install and configure our web servers.
I will not cover configuring the web servers in this article but I’d like to leave a few notes.
If you would like to use OpenBSD’s native httpd, then I recommend installing the chroot flavours of nagios. This will install the various package files inside /var/www/ which will be the location httpd will be chrooted into. If you don’t want the chroot versions, then we can go with the Apache web server. Of course, it’s ultimately your choice.
To install the Apache web server, run the following command. We’ll also need php.
# pkg_add -z apache-httpd php-apache-7.4Then enable nagios-web by linking the provided configuration files.
# ln -s /var/www/conf/modules.sample/nagios.conf /var/www/conf/modulesWe’ll probably also have to enable the Apache module for php as specified in the readme at /usr/local/share/doc/pkg-readmes/php-7.4.
# ln -sf /var/www/conf/modules.sample/php-7.4.conf /var/www/conf/modules/php.confCreate a password file for the web-interface:
# touch /etc/nagios/htpasswd.users
# htpasswd /etc/nagios/htpasswd.users <username>
Then start the services.
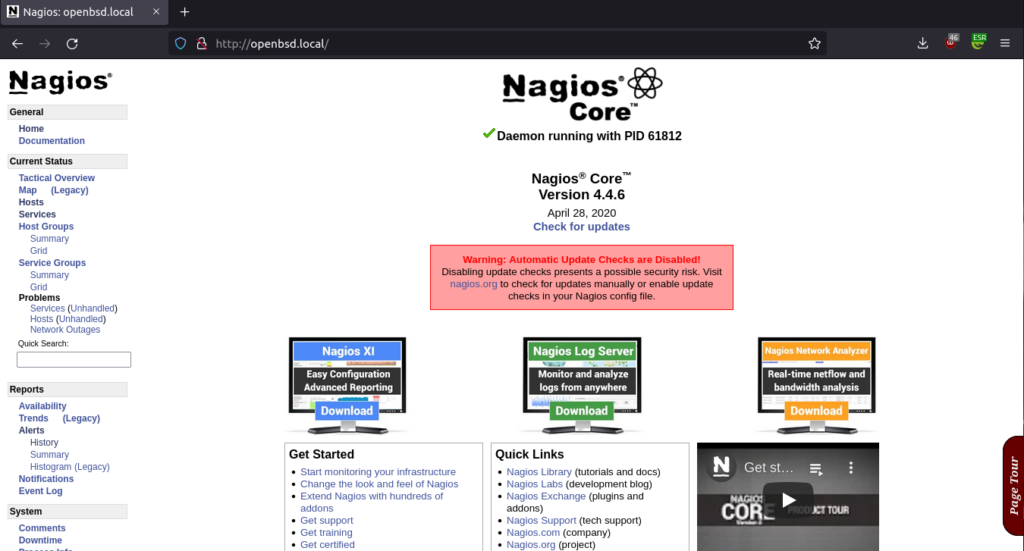
# rcctl start nagios apache2Now you should be able to access the nagios interface at localhost/nagios/.
That’s it for this article. Thank you for reading.