
Hello, friends. In this post, you will learn how to install Proxmox on a completely clean server. For this, then I will use a virtual machine but the procedure is simple and the same as on a real physical server.
What is Proxmox?
Proxmox VE “Virtual Environment” is a powerful enterprise-level virtualization platform 100% free and unlimited in its use.
Of course, it has a license that allows us to obtain additional features that facilitate the administration of it. But in general, we can use it in many of our projects for free.
Proxmox is essentially a Debian that adds KVM virtualization and Container-based Virtualization. Therefore the whole base is Free and this makes it possible for the final product to be free. How is it supported? The proxmox business model is based on training, certifications, and support and as I mentioned an enterprise license.
One of the main advantages of Proxmox is that it has a JavaScript web interface. This has an intuitive design where all KVM clients, Linux containers, storage units, and clusters are displayed.
So, let’s go for it.
Install Proxmox
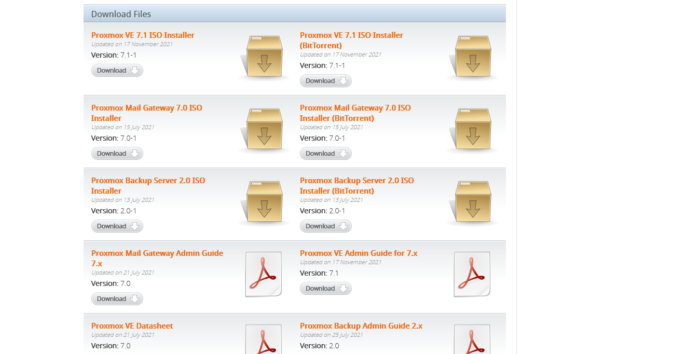
The first thing we have to do is to download the Proxmox ISO image from the project website. In my case, I have chosen the option Proxmox VE 7.1 ISO Installer (BitTorrent).
After you have it downloaded you have to burn it on a disk or a memory stick and make the server boot with it.
When you do so, you will see the following welcome screen.
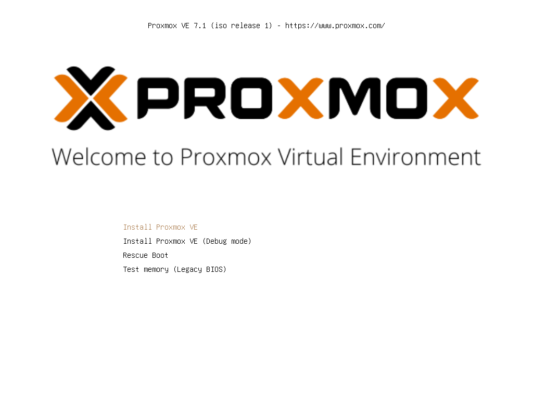
To start the installation you have to choose the Install Proxmox VE option which is the first one.
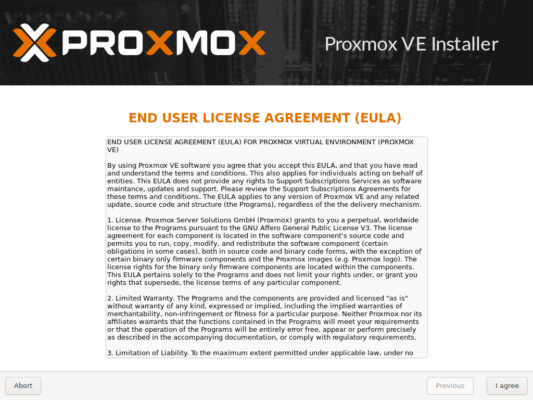
Then, you will see the license terms of the tool. If you agree, then click on I Agree.
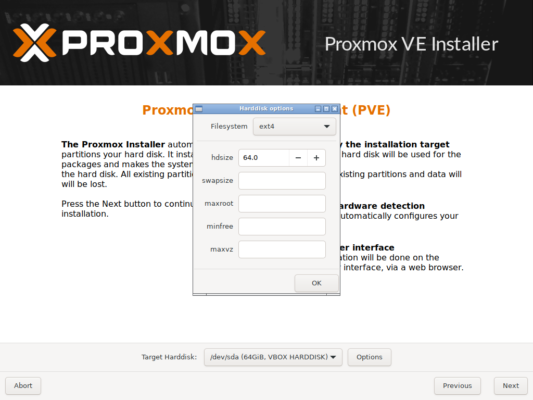
On the next screen, we are asked to verify the hard disk where it will be installed. Remember that I am using a virtual machine but a real server will have many hard disks loaded. So, choose which one it will be installed on.
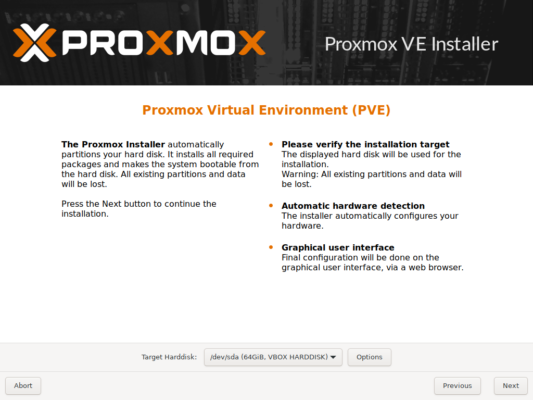
If you click on the Options button you will see how you can distribute it. Since this is a blank disk, I have left everything the same so the installer can do what it thinks is right.
More configurations…
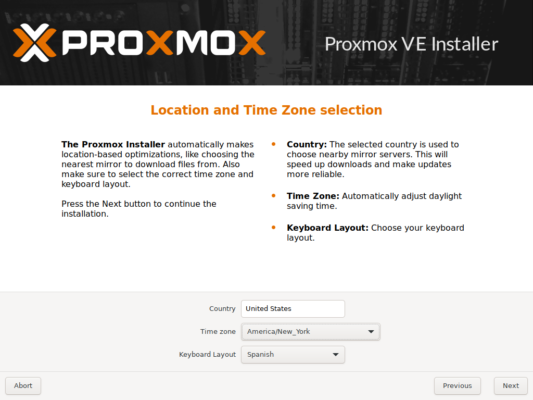
After you have clicked on Next you have to choose the location and choose the time zone. So, choose your country, time zone, and keyboard layout.
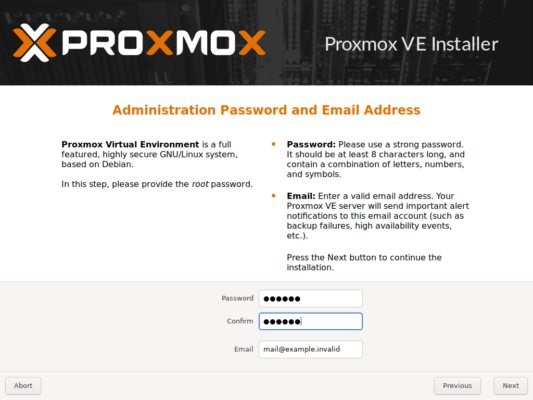
Then, it’s time to create the user and password. You also have to define a valid email address for alerts.
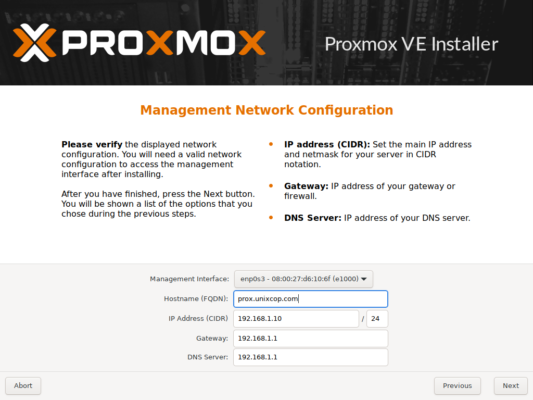
The next step is to configure the network. This step is also very important because it is the one that can guarantee communication in some possible clusters. Set the hostname as well as the dedicated network interface to use, IP address, Gateway, and DNS Server.
In the end, you will see a summary of the installation.
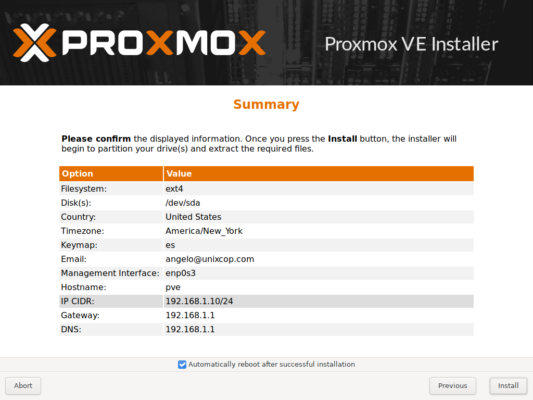
If you are sure of all the options, then click on the Install button.
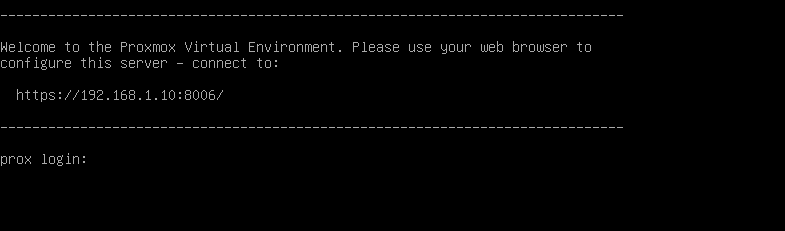
When the process is finished, the machine will reboot.
At startup, you will see a Linux console where you can log in like any other system.
Right there you will see the IP address where from a browser you will have to access to see the web interface of the application.
Access to the Proxmox interface
In a web browser on a computer that is on the same network as the Proxmox server access https://ipserver:8006.
First, you will see a warning but by accepting and adding the exception you will be able to continue.
When you do so, you will see this screen.
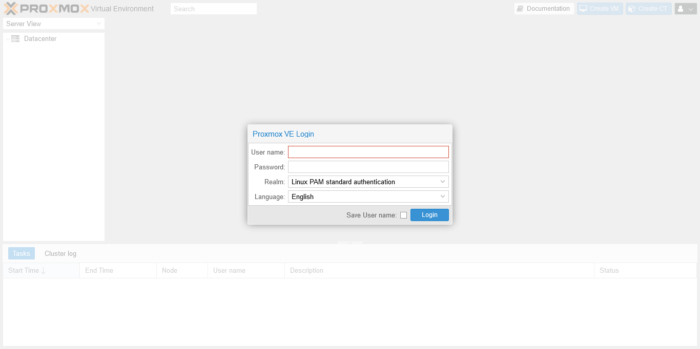
Where you will have to choose the language and enter the credentials that you created earlier. Remember that the user is root and the password you defined.
We will then be warned that we do not have a subscription.
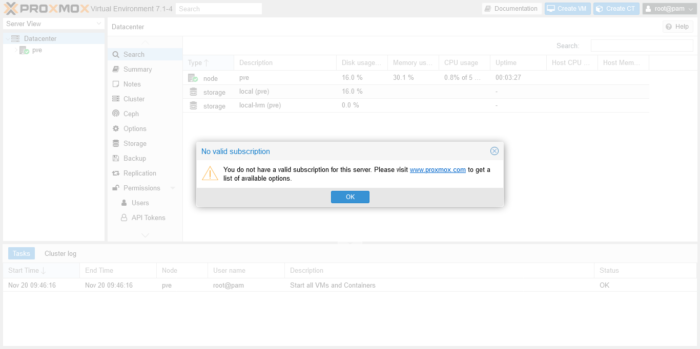
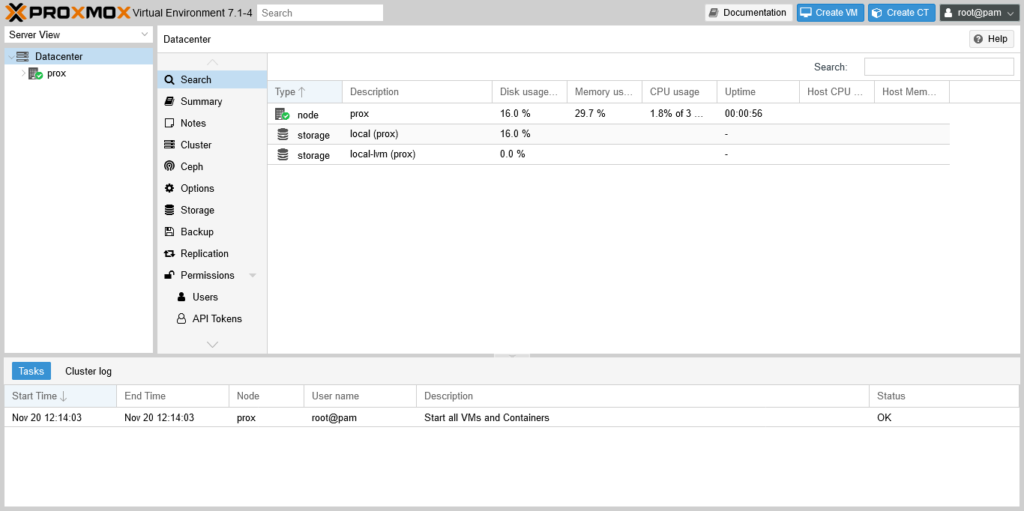
And finally, we have the Proxmox interface ready for battle.
Conclusion
Proxmox is a professional virtualization solution at our fingertips. In this tutorial, we have learned how to install it on a computer.