
Introduction
What is a Virtual Machine (VM)?
A virtual machine (VM) is a virtual environment that functions as a virtual computer system with its own CPU, memory, network interface, and storage, created on a physical hardware system (located off- or on-premises). Software called a hypervisor separates the machine’s resources from the hardware and provisions them appropriately so they can be used by the VM.
How do VMs Work?
Virtualization technology allows you to share a system with many virtual environments. The hypervisor manages the hardware and separates the physical resources from the virtual environments. Resources are partitioned as needed from the physical environment to the VMs.
What is a KVM?
KVM or (Kernel-based Virtual Machine) is a full virtualization solution for Linux. That is included in the Linux kernel since 2.6.20 and is stable and fast for most workloads.
Lets Start our Procedures:
Step 1: Checking hardware virtualization extensions
For Intel-based hosts, verify the CPU virtualization extension [vmx] are available.
For AMD-based hosts, verify the CPU virtualization extension [svm] are available.
Also Verify that KVM modules are loaded in the kernel.
RHEL or Ubuntu
root@W10GCHF473:~# grep -c vmx /proc/cpuinfo
8
root@W10GCHF473:~#
root@W10GCHF473:~#
root@W10GCHF473:~# kvm-ok
INFO: /dev/kvm exists
KVM acceleration can be usedStep 2: Install KVM Packages and tools
We will install qemu-kvm and qemu-img packages at first. These packages provide the user-level KVM and disk image manager.
Ubuntu:
root@W10GCHF473:~# apt install qemu-kvm libvirt-daemon-system libvirt-clientsRHEL:
[root@rhelab~]# yum install qemu-kvm qemu-img
we will also install most important tools for managing VMs:
- virt-manager provides a GUI tool to administrate your virtual machines.
- libvirt-client provides a CL tool to administrate your virtual environment this tool called virsh.
- virt-install provides the command “virt-install” to create your virtual machines from CLI.
- libvirt provides the server and host side libraries for interacting with hypervisors and host systems.
RHEL:
[root@rhelab ~]# yum install virt-manager libvirt libvirt-python libvirt-client Step 3: Enable and Start the Virtualization Service (libvirtd)
RHEL/Ubuntu
[root@rhelab ~]#systemctl enable libvirtd
[root@rhelab ~]#systemctl restart libvirtd
libvirtd.service - Virtualization daemon
Loaded: loaded (/usr/lib/systemd/system/libvirtd.service; enabled)
Active: active (running) since Mon 2021-04-26 15:48:46 EET; 14s ago
Main PID: 15401 (libvirtd)Step 4: Start Building your VM
Part1:
You Can build you machine using virt-manager.
Although virt-manager is a GUI based tool, we also could launch/start it from terminal as well as from GUI.
RHEL/UBUNTU
root@W10GCHF473:~# virt-manager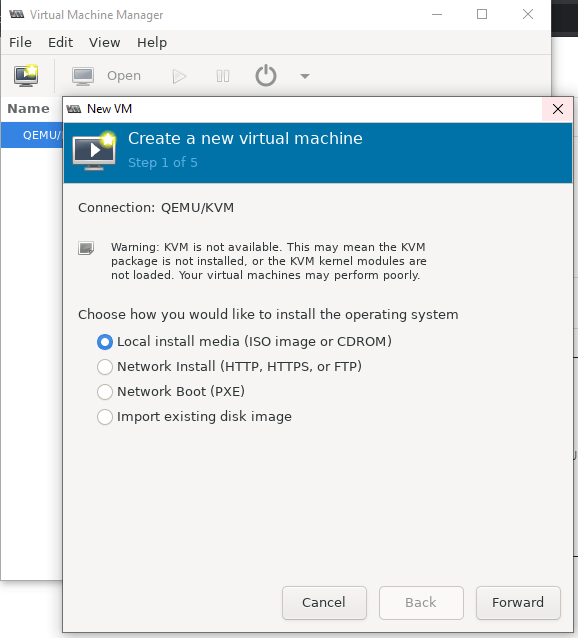
You can choose the best way for installation the OS
- ISO Image or CDROM
- Import existing Disk Image
- PXE , HTTP, NFS and FTP
Part 2 :
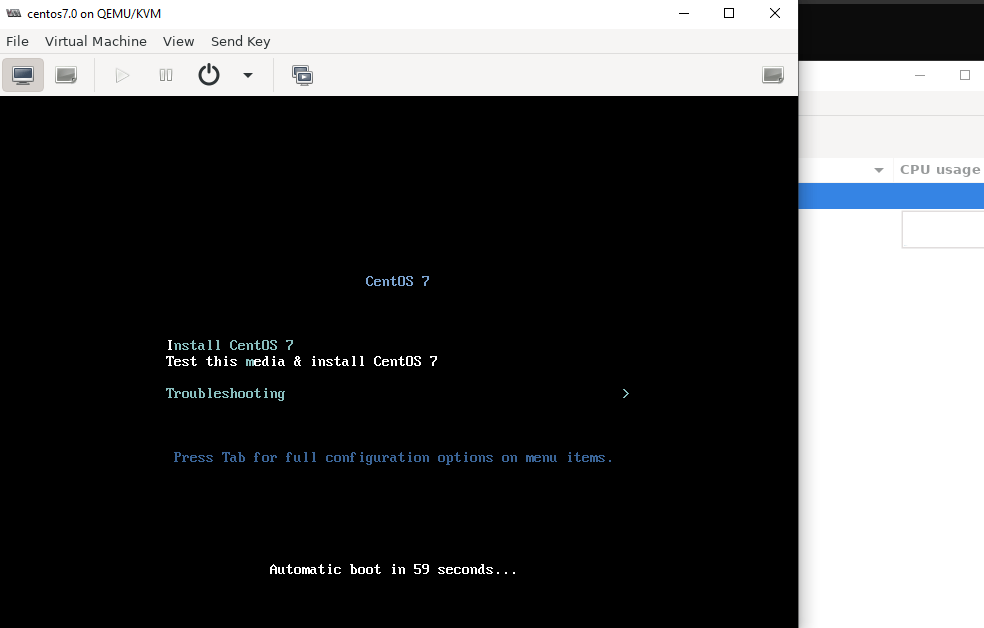
Build your VM using qemu
Qemu is a very old and big project which has different user bases and intersecting with different projects. Qemu is used in the Linux Kernel Virtualization project named KVM. So this project also provides Qemu with different command names but with more features.qemu_system_x86_64 is the binary or command for Qemu which is used to create 64-bit x86 VMs
root@W10GCHF473:~# qemu-system-x86_64 -bios Data/OVMF.fd -drive file=CentOS-7-x86_64-DVD-1708.iso,media=cdrom,readonly -net nic -net user -m 5172 -vga qxl --enable-kvm -smp 4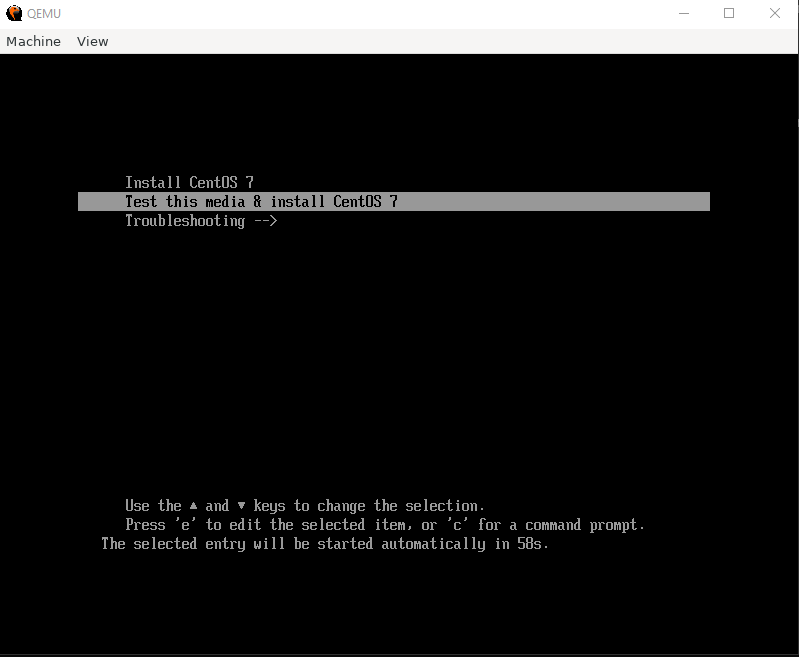
You can know every option using -h option with qemu-system-x86_64 command
root@W10GCHF473:~# qemu-system-x86_64 -h|more
QEMU emulator version 4.2.1 (Debian 1:4.2-3ubuntu6.14)
Copyright (c) 2003-2019 Fabrice Bellard and the QEMU Project developers
usage: qemu-system-x86_64 [options] [disk_image]

'disk_image' is a raw hard disk image for IDE hard disk 0

Standard options:
-h or -help     display this help and exit
-version        display version information and exit

 ...
                memory-encryption=@var{} memory encryption object to use (default=none)
-cpu cpu        select CPU ('-cpu help' for list)
...
-m [size=]megs[,slots=n,maxmem=size]
                configure guest RAM
                size: initial amount of guest memory
                slots: number of hotplug slots (default: none)
                maxmem: maximum amount of guest memory (default: none)
...