
Hello, friends. In this post, we will help you to install Fail2ban on Debian 11. Thanks to this tool you will be able to prevent many attacks on your server. Like all tools, it is not perfect but at least it adds more security to the server so we can be a bit more relaxed.
What is Fail2ban?
Fail2ban is a Linux tool that helps to prevent SSH attacks on your system. This is not only very important, but it also helps us to verify conditions for SSH connection to the server.
Fail2Ban is able to reduce the rate of incorrect authentications attempts however it cannot eliminate the risk that weak authentication presents. Configure services to use only two-factor or public/private authentication mechanisms if you really want to protect services.
This tells us that Fail2ban is not a miracle worker. Security will always depend on us and how seriously we take it for our system.
So, how does Fail2ban work?
Fail2ban scans log files (e.g. /var/log/apache/error_log) and bans IPs that show the malicious signs – too many password failures, seeking for exploits, etc.
Out of the box, Fail2Ban comes with filters for various services (apache, courier, ssh, etc).
So, let’s install it.
Install Fail2ban on Debian 11
Since it is such an important utility and with excellent Linux treatment, we will be able to find it in the official Debian 11 repositories.
So, before installing it, you have to update the server completely.
sudo apt update
sudo apt upgrade
Then you have to execute the following command to install it.
sudo apt install fail2ban
Reading package lists... Done
Building dependency tree... Done
Reading state information... Done
Suggested packages:
  mailx monit sqlite3
Recommended packages:
  whois python3-pyinotify python3-systemd
The following NEW packages will be installed:
  fail2ban
0 upgraded, 1 newly installed, 0 to remove and 0 not upgraded.
Need to get 451 kB of archives.
After this operation, 2,142 kB of additional disk space will be used.
This way, Fail2ban will be on the system. The way to manage it is like a system service. Something similar to how Apache or MariaDB is managed.
So, to start it, you have to run
sudo systemctl start fail2ban
Also, be sure to enable it to start with the system.
sudo systemctl enable fail2ban
And finally, check the status of the service to make sure it is running correctly.
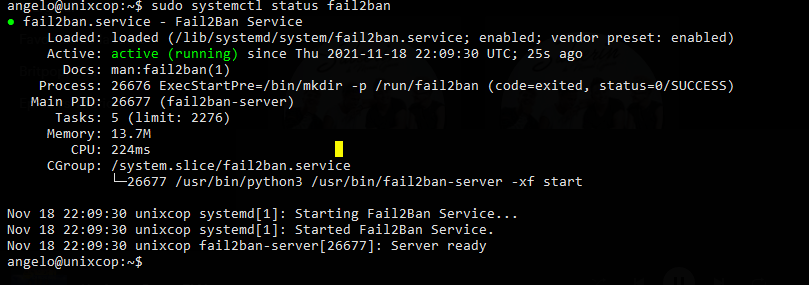
sudo systemctl status fail2ban
If you get an output similar to this, then Fail2ban is properly installed and the service is running properly.
Now it’s time to do some configuration.
Configuring Fail2ban on Debian 11
The configuration resides mainly in the /etc/fail2ban/jail.conf file which we can back up before modifying.
sudo cp /etc/fail2ban/jail.conf /etc/fail2ban/jail.conf.bak
After this, we can edit it to set our preferences for the behavior of the tool.
sudo nano /etc/fail2ban/jail.conf

Now let’s examine some of the main directives.
The first thing will be to determine the ban time of the alleged attacker. To do this locate bantime and give it a suitable value like two hours.
bantime = 120m
To avoid repeated attacks you can set a findtime.
findtime = 5m
That is, if the attacker repeats the attack in less than 5 minutes he is banned, otherwise the counter will start again.
The Max Retry directive sets the number of failures before the IP is banned.
If you have a trusted network or host you can make Fail2ban ignore them with the ignoreip directive.
ignoreip = 192.168.1.2
In this case, the above IP address will be ignored by all these rules.
If you continue to scroll down you will see the settings for each service you have Fail2ban. For example SSH or Apache.
In the end, you can save the data and apply these changes, just restart the service.
sudo systemctl restart fail2ban
If you want to enable Fail2ban modules, then you have to edit the /etc/fail2ban/jail.d/defaults-debian.conf file.
sudo nano /etc/fail2ban/jail.d/defaults-debian.conf
For example, to enable SSH, you could
[sshd]
enabled = true
Save the changes and close the editor.
With this, you can now leave Fail2ban ready for battle.
Conclusion
Security cannot be taken lightly and although it doesn’t always work out well, we can have tools to help us with the process and Fail2ban is one of them.