
Introduction:
SSH, also known as Secure Shell or Secure Socket Shell, is a network protocol that gives users, particularly system administrators, a secure way to access a computer over an unsecured network.
Secure Shell provides strong password authentication and public key authentication, as well as encrypted data communications between two computers connecting over an open network, such as the internet.
SSH tunneling is a method of transporting arbitrary networking data over an encrypted SSH connection. It can be used for numerous reasons mainly to add encryption to legacy applications, to be used as virtual private network and access intranet services across firewalls. It also provides a way to secure the data traffic of any given application using port forwarding, basically tunneling any TCP/IP port over SSH. This means that the application data traffic is directed to flow inside an encrypted SSH connection so that it cannot be eavesdropped or intercepted while it is in transit.
Prerequisites:
- SSH server listening for SSH connections, (X11Forwarding must be enabled, you can check it in sshd config file)
- SSH client to forward traffic from a local listening port, through the SSH server, to the application server
- Destination server offering services (http, vnc, etc.)
The SSH server and the destination server can be on the same machine or on different machines accessible via network. Below diagram depicts the SSH server and the application servers are on different machine and connected on network and the client machine is accessing the SSH server via internet.

Let’s create a setup where client wants to connect to a service that does not natively use encryption but does not want the traffic to be sent unencrypted through the Internet. The environment for this scenario is as below.
SSH server: SSH is listening on port 22 at IP address 192.168.1.1
Destination server: VNC service is listening on port 5900 at IP address 192.168.1.2
Client machine: SSH and VNC clients installed
Creating Tunnel using PuTTY:
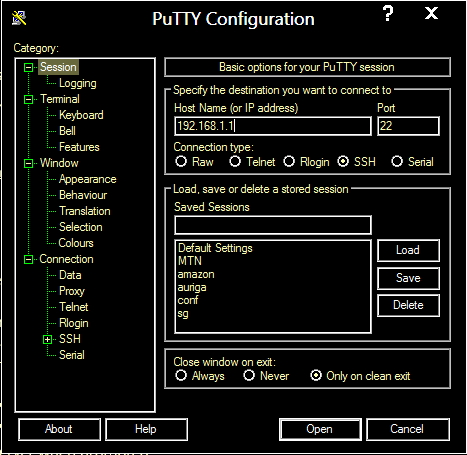
- Open the PuTTY client user interface
- In the Session window, under “Basic options for your PuTTY session”, enter the IP address and listening port for the SSH server as can be seen in the below image:
3. In the left pane, select Connection->SSH->Tunnel
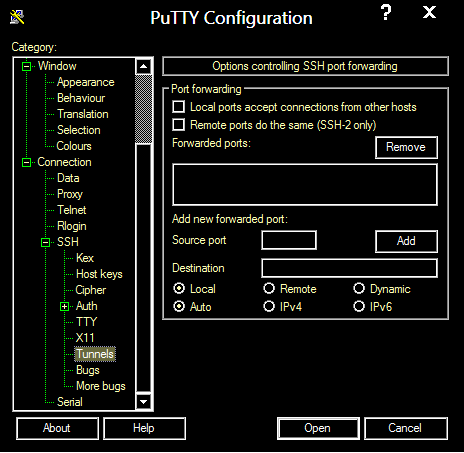
4. Under “Options controlling SSH port forwarding”, enter the following settings.
5. Source port: Pick an arbitrary port, not in use on your client; the example uses 1590.
6. Destination: IP address and listening port for the destination server, 192.168.1.2:5900.
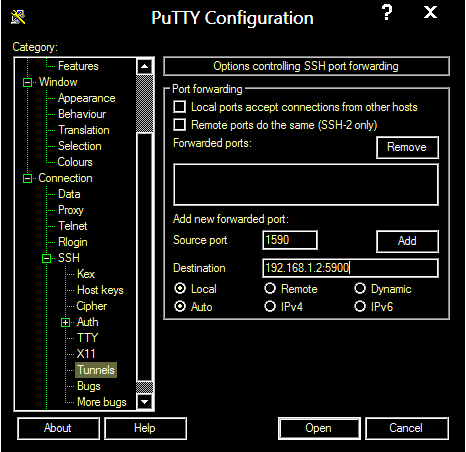
7. Leave “Local” and “Auto” radio buttons selected.
8. Click “Add” to save these settings.
9. Click “Open” to create the SSH tunnel. Enter your username and password for the SSH server when prompted.
Creating SSH tunnel using OPENSSH:
SSH tunnel can be created using below command using OPENSSH client.
ssh -L 1590:192.168.1.2:5900 192.168.1.1
Here -L 1590 indicates the Local Port
192.168.1.2:5900 indicates the IP and port of the destination server
192.168.1.1 Indicates the SSH server IP address
After entering the command login using your credentials to the SSH Server.
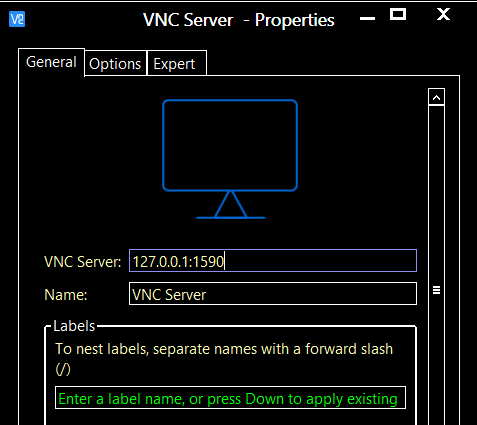
Connecting the VNC service using SSH Tunnel:
After successful login to the SSH Server configure your VNC Client to login to the destination server using Local port.
Use the local Loopback address 127.0.0.1 and port 1590
The example showed the tunneling for VNC port, the same settings can be used to access any service by changing the ports and IPs.
SSH Reverse Tunneling:
Reverse tunneling is sort of the same but in this case the destination server can use the tunnel to access services hosted at the source network or machine itself.
Lets consider an example,
Suppose you have a server on a remote network behind a firewall and only SSH (port 22) is open from the remote network to your network, but you want to access a http service running on port 80 hosted on your linux box.
For scenarios like this Reverse tunneling is handy, lets see below how to do it securely and easily.
Use below command on your Linux Box where your http service is hosted…
ssh -R 180:localhost:80 [email protected]
Where -R 180:localhost is the remote port and IP / hostname (will be used by the remote server to access the http service)
And [email protected] is the IP and username of the remote server from where you will want to access your web service
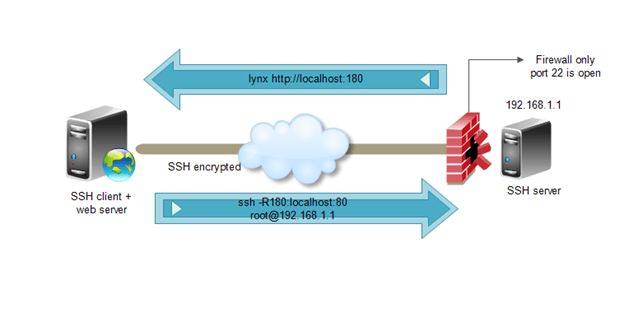
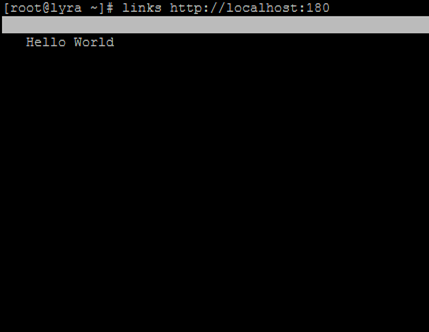
After entering the command login with the credentials,
Now you can access your webserver from the remote server.
There are can be a lot of scenarios where SSH Tunneling and reverse tunneling can be used to access the inaccessible too 🙂 with the ease and security of ssh behind it.