
Introduction
What is Quay.io?
Project Quay is the open-source distribution of Red Hat Quay optimized for the secure distribution of container images no matter whether you are scaling from a small department to the public internet. In addition, project Quay offers a consumer-grade web UI, image vulnerability scanning, and enterprise-grade data storage and protection.
Quay constantly scans your containers for vulnerabilities, providing you complete visibility into known issues and how to fix them. Also, try the haproxy tutorial made by yours truly.
Create an account in https://quay.io
Login podman to quay.io
# podman login quay.io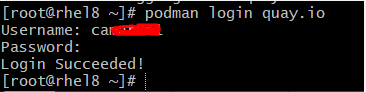
Log in to your Quay.io account and start a container using the image available at quay.io/redhattraining/httpd-parent. The -p option allows you to specify a redirect port. In this case, Podman forwards incoming requests on TCP port 8180 of the host to TCP port 80 of the container.
# podman run -d --name official-httpd \
> -p 8080:80 quay.io/redhattraining/httpd-parent
0702d732c7f92130bd009868fe8b83e7b894be391e2f506e45a41fc2df5d3170
Your last line of output is different from the last line shown above. Note the first twelve characters.
Create an HTML page on the official-httpd container
Access the shell of the container by using the podman exec command and creating an HTML page.
# podman exec -it official-httpd /bin/bash
bash-4.4# cat /var/www/html/index.html
Hello from the httpd-parent container!
bash-4.4# echo "WELCOME UNIXCOP.com" > /var/www/html/index.htmlExit from the container
Ensure that the HTML file is reachable from the workstation machine by using the curl command.
# curl localhost:8080
Use the podman diff command to examine the differences in the container between the image and the new layer created by the container.
# podman diff official-httpd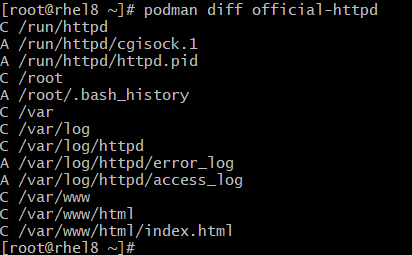
Create a new image with the changes created by the running container
Stop the official-httpd container
# podman stop official-httpd
official-httpd
Commit the changes to a new container image with a new name. Use your name as the author of the changes.
# podman commit \
> -a "Neil Unixcop" official-httpd unixcop-custom-httpd
Getting image source signatures
Copying blob 24d85c895b6b skipped: already exists
Copying blob c613b100be16 skipped: already exists
Copying blob 574bcc187eda skipped: already exists
Copying blob 7f9108fde4a1 skipped: already exists
Copying blob 428e2fca760a done
Copying config 33f70632ea done
Writing manifest to image destination
Storing signatures
33f70632ea9100d83214062ee37f24caab3ab4c622cf8939aecff3e6bc2b029c
List the available container images.
# podman images
Publish the saved container image to the container registry. To tag the image with the registry host name and tag, run the following command.
# podman tag unixcop-custom-httpd \
> quay.io/QUAY_USER/unixcop-custom-httpd:v1.0
Run the podman images command to ensure that the new name has been added to the cache.
# podman images
Publish the image to your Quay.io registry.
Pushing the unixcop-custom-httpd image creates a private repository in your Quay.io account. Currently, private repositories are disallowed by Quay.io free plans. You can either create the public repository prior to pushing the image or change the repository to the public afterward.
# podman push \
> quay.io/QUAY_USER/unixcop-custom-httpd:v1.0
Getting image source signatures
Copying blob 428e2fca760a done
Copying blob 574bcc187eda skipped: already exists
Copying blob c613b100be16 skipped: already exists
Copying blob 24d85c895b6b skipped: already exists
Copying blob 7f9108fde4a1 skipped: already exists
Copying config 33f70632ea done
Writing manifest to image destination
Copying config 33f70632ea [--------------------------------------] 0.0b / 4.2KiB
Writing manifest to image destination
Storing signatures
Verify that the image is available from Quay.io. The podman search command requires the image to be indexed by Quay.io. That may take some hours to occur, so use the podman pull command to fetch the image. This proves that the image is
available.
# podman pull \
> quay.io/QUAY_USER/unixcop-custom-httpd:v1.0
Trying to pull quay.io/QUAY_USER/unixcop-custom-httpd:v1.0...
Getting image source signatures
Copying blob 8ac692d1d86e skipped: already exists
Copying blob 787f47dbeaac skipped: already exists
Copying blob 6a5240d60dc4 skipped: already exists
Copying blob 08b8c9fdec44 [--------------------------------------] 0.0b / 0.0b
Copying blob 408208567b9a [--------------------------------------] 0.0b / 0.0b
Copying config 33f70632ea done
Writing manifest to image destination
Storing signatures
33f70632ea9100d83214062ee37f24caab3ab4c622cf8939aecff3e6bc2b029c
Create a container from the newly published image. Use the podman run command to start a new container. Use your_quay_username/unixcop-custom-httpd:v1.0 as the base image.
# podman run -d --name test-httpd -p 8280:80 \
> quay.io/QUAY_USER/unixcop-custom-httpd:v1.0
71917815aab93f04d8703519d15b5276953f103f4346f304b514711397c516b6
Use the curl command to access the HTML page. Make sure you use port 8280. This should display the HTML page created in the previous step.
# curl http://localhost:8280