
Introduction
HAProxy a load balancer. A load balancer handles more web traffic to avoid downtime. It receives traffic from the Internet or your internal network load balancing an internal service and then forwards traffic to the web.
The benefits of using a load balancer once deployed on multiple servers. The load balancer can relay traffic to grow your capacity to serve numerous clients without directly connecting to each server. HAProxy receives and forward traffic and then balances the load across your servers. This technique hedges against any of your servers failing since the load balancer can detect if a server becomes unresponsive and automatically stops sending traffic. HAProxy is used to balance the traffic to any number of web applications using a single configuration.
HAProxy is the fastest and most widely used load balancer and application delivery controller. Written in C, efficient processor and memory use. It can run at either layer 4 (TCP) or layer 7 (HTTP) and additional features for inspecting, routing, and modifying messages.
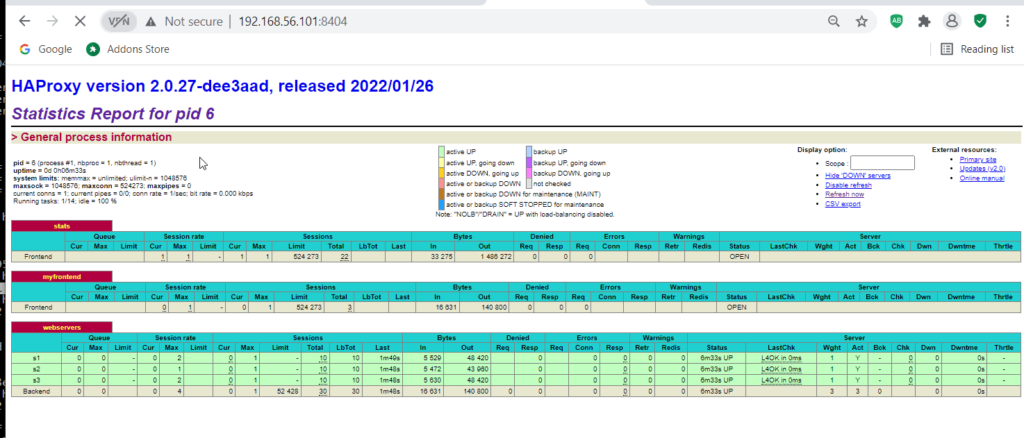
It is bundled with a web UI called the HAProxy Stats page that you can use to monitor error rates, traffic volume, and latency. In addition, it updates a single configuration file, which provides a syntax for defining routing rules, rate limiting, access controls, etc.
To guarantee truly reliable service, at run least two instances of HAProxy with an active-active or active-standby setup. Learn how to do with HAProxy Enterprise by reading the official docs. Check container apache tutorial.
When configuring HAProxy, typically start with the following:
- Specific IP addresses and ports HAProxy to receive traffic;
- Servers to which HAProxy will relay traffic;
- When a client request to go pool of servers.
Other features include:
- SSL/TLS termination
- Gzip compression
- Health checking
- HTTP/2
- gRPC support
- Lua scripting
- DNS service discovery
- Automatic retries of failed conenctions
- Verbose logging
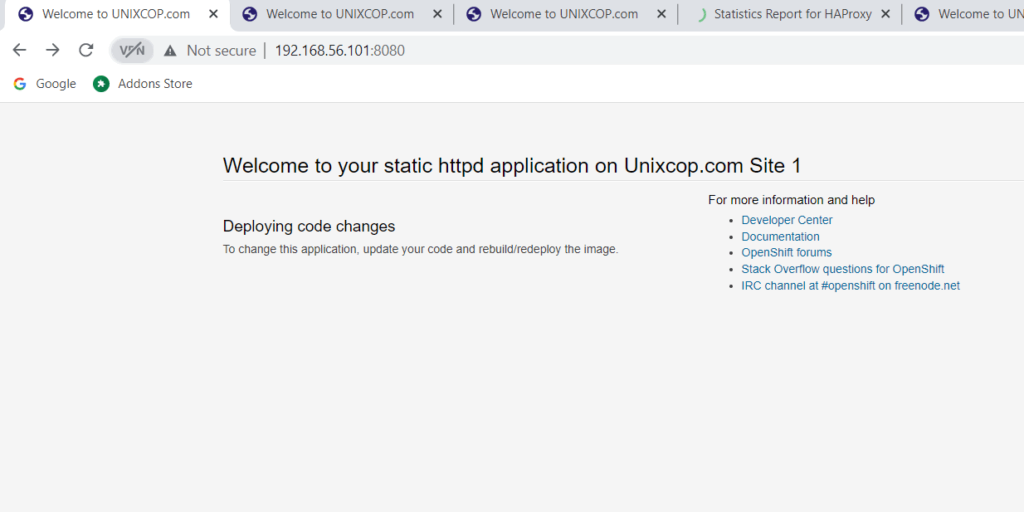
These containers listen on port 8080, but we did not map those ports to the host, so they are not routable. Instead, we’ll relay traffic to these containers via the HAProxy load balancer. Next, let’s add HAProxy in front of them. Create a file named haproxy.cfg in the current directory and add the following to it:
Get the HAProxy image
# podman pull haproxytech/haproxy-alpine:2.4Create custom image for your HAProxy requirement
# mkdir -p /haproxy/etc/haproxy/
# cd /haproxy/etc/haproxy/
# ls
Dockerfile haproxy.cfg
Create Docker image for your requirement needs
# cat /haproxy/etc/haproxy/Dockerfile
FROM haproxytech/haproxy-alpine:2.4
COPY haproxy.cfg /usr/local/etc/haproxy/haproxy.cfg
Create haproxy configuration of your choosing
# cat /haproxy/etc/haproxy/haproxy.cfg
global
  stats socket /var/run/api.sock user haproxy group haproxy mode 660 level admin expose-fd listeners
  log stdout format raw local0 info

defaults
  mode http
  timeout client 10s
  timeout connect 5s
  timeout server 10s
  timeout http-request 10s
  log global

frontend stats
  bind *:8404
  stats enable
  stats uri /
  stats refresh 10s

frontend myfrontend
  bind :80
  default_backend webservers

backend webservers
  server s1 http-server1:8081 check
  server s2 http-server2:8082 check
  server s3 http-server3:8083 check
Build the haproxy image
# cd /haproxy/etc/haproxy/
# podman build -t my-haproxy .
Create the HAproxy server
# podman run --name haproxy-server -p 80:80 -p 8404:8404 -d localhost/my-haproxyCreate pod for each web server
Apache servers
# podman pull centos/httpd-24-centos7

# podman pod create --name httpapp1 -p 8081:8080 --network bridge
# podman run --pod httpapp1 --name http-server1 -v /wwwdata1:/var/www:Z -d centos/httpd-24-centos7

# podman pod create --name httpapp2 -p 8082:8080 --network bridge
# podman run --pod httpapp2 --name http-server2 -v /wwwdata2:/var/www:Z -d centos/httpd-24-centos7


# podman pod create --name httpapp3 -p 8083:8080 --network bridge
# podman run --pod httpapp3 --name http-server3 -v /wwwdata3:/var/www:Z -d centos/httpd-24-centos7
Conclusion
HAProxy inside of a container can simplify its deployment and lifecycle management. Provides a standard for deploying applications, making the process repeatable and testable. The CPU overhead of running is negligible, it can incur extra network, will impact depends on your use case and throughput needs.
A simply create an HAProxy configuration file and then call the podman run command with the name of the HAProxy image. HAProxy Technologies supplies up-to-date images.
HAProxy Enterprise powers modern applications at any scale and in any environment, delivering the utmost performance, observability, and security for your critical assistance. You can harness its cutting-edge features and enterprise suite of add-ons, which are backed by authoritative, expert support and professional services.