
Introduction
Why OpenLDAP?
The project is to copy the LDAP reference source code. OpenLDAP is the abbreviation of Lightweight Directory Access Protocol. LDAP is a vendor-neutral application protocol that lets you assess and maintain distributed directory information services over an ISP. There are many different ways to provide a directory. For example, using LDAP helps you to provide a central place to store usernames and passwords.
So, many various applications and services could connect to the LDAP server to validate users. LDAP servers are widely used in Organizations to store the User name and password in a Centralized Server against which the User can authenticate further to programs and services present on the network. Furthermore, we will be using Symas OpenLDAP packages for the standard software maintenance commands native to your operating system. OpenLDAP is the principal contributor in writing 90% of OpenLDAP code. Also, check Tutorial OpenLdap on RHEL8 and OpenLDAP Documentation.
Pros of OpenLDAP
It is for free. Similar to Linux is open source. Standard protocol. Second, addition, it is easy to bind authentication to many applications. Customizable and lightweight.
Cons of OpenLDAP
It would be best if you did prepare. In addition to Your infrastructure support all requirements. Policies and security rules in place. So Databases or ActiveDirectory should always store data. All attributes and policies will break if the current information is not in place. Assuming Microsoft in your area, grants for the OpenLDAP with Active Directory.
Get OpenLDAP image
#podman pull osixia/openldap:latest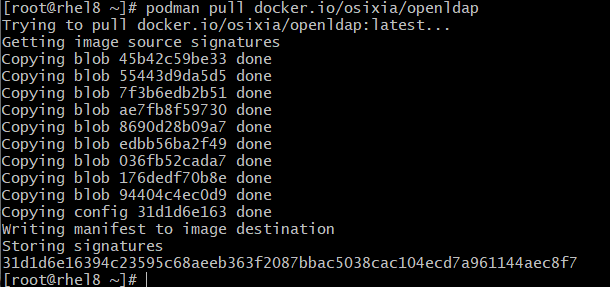
Create pod
Do not forget to add the port mapping for both ports 389 and 636 if you wish to access the ldap server from another machine.
# podman pod create --name openldapapp -p 389:389 -p 636:636 --network bridgeCreate the openldap container
This is the default behavior when you run this image. It will create an open ldap for Unixcop.com. And the domain example.com. By default, the admin has the password admin. All those default settings can be changed at the docker command line, for example:
podman run --pod openldapapp --name openldap-server --uts=private --hostname=openldap.example.com \
--env LDAP_ORGANISATION="My UnixCop" --env LDAP_DOMAIN="example.com" \
--env LDAP_ADMIN_PASSWORD="UnixCop@SoFreaky" --env LDAP_TLS=false \
--env LDAP_READONLY_USER=ldapuser01 --env LDAP_CONFIG_PASSWORD="UnixCop@SoFreaky" \
--env LDAP_READONLY_USER_PASSWORD="UnixCop@SoFreaky" \
--env LDAP_READONLY_USER_PASSWORD="UnixCop@SoFreaky" \
--env LDAP_BASE_DN="cn=admin,dc=example,dc=com" -d osixia/openldap:latest
The directories /var/lib/ldap (LDAP database files) and /etc/ldap/slapd.d (LDAP config files) are used to persist the schema and data information. They should be mapped as volumes, so your ldap files are saved outside the container (use an existing ldap database). However, it can be useful not to use volumes if the image should deliver the image complete with test data – this is especially useful when deriving other images from this one.
This image can load ldif and schema files from an internal path at startup. Additionally, you can copy certificates from an internal directory. This is useful if a continuous integration service automatically mounts the working copy (sources) into a docker service, which relates to the ci job.
For example, GitLab cannot mount custom paths into docker services of a ci job, but Gitlab automatically scales the working copy in every service container. So the working copy (sources) are accessible under /built-in every service of a ci job. Certificate directory can obtain the path to the working copy via ${CI_PROJECT_DIR}. See also: https://docs.gitlab.com/runner/executors/docker.html#build-directory-in-service
This may also work with other CI services if they automatically mount the working directory to the services of a ci job as Gitlab ci does.
To seed ldif or schema files from the internal path, you must set the specific environment variable LDAP_SEED_INTERNAL_LDIF_PATH and LDAP_SEED_INTERNAL_SCHEMA_PATH. If selected, this will copy any files in the specified directory into the default seeding directories of this image.
 LDAP_SEED_INTERNAL_LDAP_TLS_CRT_FILE: "${CI_PROJECT_DIR}/docker/certificates/certs/cert.pem"
 LDAP_SEED_INTERNAL_LDAP_TLS_KEY_FILE: "${CI_PROJECT_DIR}/docker/certificates/certs/key.pem"
 LDAP_SEED_INTERNAL_LDAP_TLS_CA_CRT_FILE: "${CI_PROJECT_DIR}/docker/certificates/ca/ca.pem"
 LDAP_SEED_INTERNAL_LDAP_TLS_DH_PARAM_FILE: "${CI_PROJECT_DIR}/certificates/dhparam.pem"
Add group to openldap container
# cat group.ldif
dn: ou=People,dc=example,dc=com
objectClass: organizationalUnit
ou: People

dn: ou=othergroup,dc=example,dc=com
objectClass: organizationalUnit
ou: othergroup
Can be done inside of the container
# podman exec -it openldap-server /bin/bash
/# ldapadd -x -W -D "cn=admin,dc=example,dc=com" -f /tmp/new-user.ldif -H ldap://openldap.example.com
Adding user to openldap container
# cat new-user.ldif
dn: uid=ldapuser,ou=People,dc=example,dc=com
objectClass: top
objectClass: account
objectClass: posixAccount
objectClass: shadowAccount
cn: adam
uid: adam
uidNumber: 16859
gidNumber: 100
homeDirectory: /home/ldapuser
loginShell: /bin/bash
gecos: ldapuser
userPassword: {crypt}x
shadowLastChange: 0
shadowMax: 0
shadowWarning: 0
