
Hello, friends. We have already shown you how to install Proxmox and we noticed that the process is easier than you might think. Now I will show you how to upload an ISO image to the Proxmox server. To do this, I will use the graphical method or through the terminal.
With Proxmox we will be able to virtualize systems professionally and to do many things more like cluster, backups, and others. However, to start with the virtualization we have to have an ISO image of the system.
So, with a server that is far away from our location, how to do it? How to have the ISO image on the server so that Proxmox can manage it? Well, that’s what I will show you today.
Let’s go for it.
Upload an ISO Image on Proxmox
The first thing we have to do is to access the Proxmox web interface using a web browser.
Now in the left pane where the datacenter and nodes are displayed. Inside that section, you will find ISO Images as shown in the image.

Now on the right side, you will have two buttons enabled. The first one is Upload that will allow us to upload the image directly from our computer using the local network or the Internet if necessary.
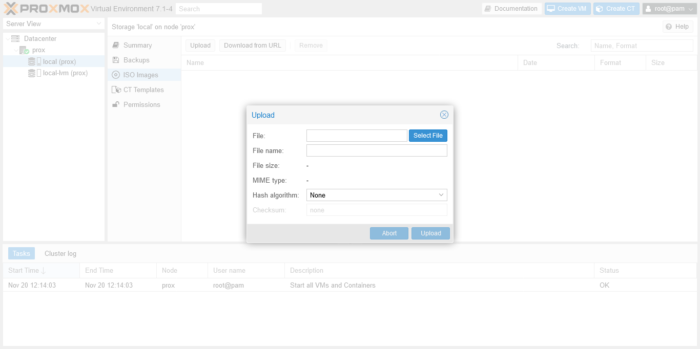
If you click on Upload you will see the following screen wherewith the Select File button you will be able to choose the ISO image.
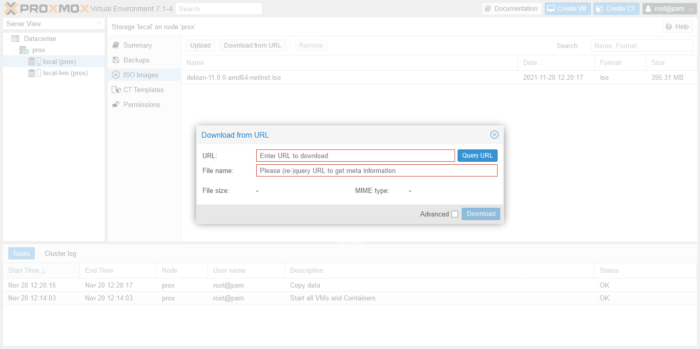
Another option is to download the ISO image directly from where it is hosted to Proxmox. To do this instead of clicking Upload you have to choose Download From URL.
In this case, you will see this screen
But, in my case, I have chosen to upload it locally by clicking Upload and selecting a Debian image I had.

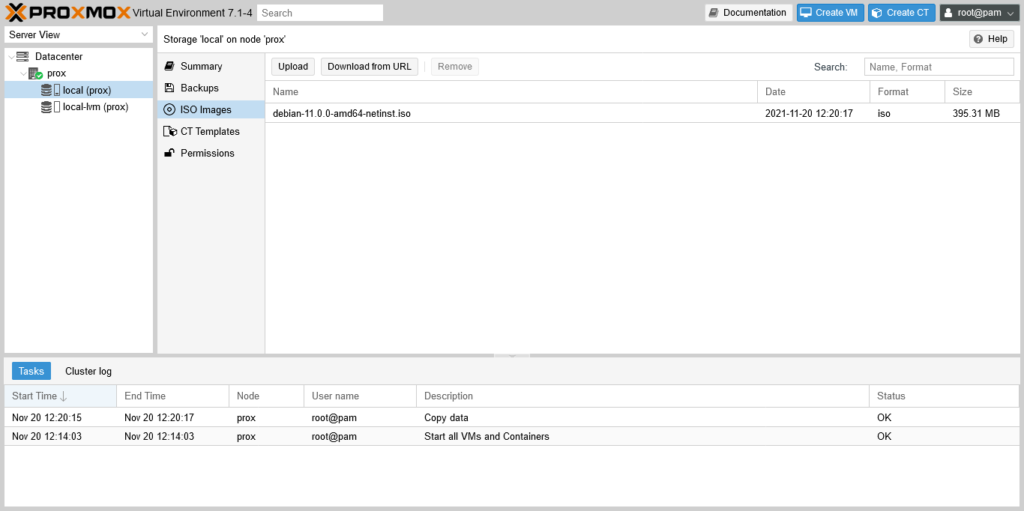
Then, click on Upload to accept the process. At the end, you will see the following screen where the TASK OK indicates that the upload was successful.
And the screen will look like this.

This indicates that the process has been successful.
How to upload an ISO image to the Proxmox server using the terminal
It is also possible to use the terminal for this process although we have several ways to do it.
In summary, the directory where Proxmox stores ISO images is /var/lib/vz/template/iso.
So, all we have to do is copy the image to that directory, either via FTP or with the scp command.
Another alternative is to connect via SSH to the server and place yourself in the directory indicated and from there with the command wget.
For example
cd /var/lib/vz/vz/template/iso
wget [iso_url]
So when the download or copy is finished you will also be able to see it from the web interface.
Conclusion
In this post, you learned how to upload an ISO image to a proxmox server. Now you can create a new virtual machine.
So, enjoy it.
You made a mistake bro!
The path is not /var/lib/vz/vz/template/iso it’s /var/lib/vz/template/iso
Thenk you. Great post.