
Photon OS is a Linux distribution created by VMware that is optimized for VMware vSphere with focus on docker containers. Here I’ll demonstrate how to install Photon OS on vSphere and some basic use.
Download
You can download Photon from here: https://github.com/vmware/photon/wiki/Downloading-Photon-OS
There are several ‘flavors’ available to download. If you don’t want to read the description on the download page, I copied and pasted it here:
- ISO Image: Contains everything needed to install either the minimal or full installation of Photon OS.
- OVA: Pre-installed minimal environment, customized for VMware hypervisor environments. These customizations include a highly sanitized and optimized kernel to give improved boot and runtime performance for containers and Linux applications.
- Amazon AMI: Pre-packaged and tested version of Photon OS made ready to deploy in your Amazon EC2 cloud environment.
- Google GCE Image: Pre-packaged and tested Google GCE image that is ready to deploy in your Google Compute Engine Environment, with all modifications and package requirements.
- Azure VHD: Pre-packaged and tested Azure HD image that is ready to deploy in your Microsoft Azure Cloud, with all modifications and package requirements.
- Raspberry Pi Image: Pre-packaged and tested Raspberry Pi Image (Version 3.0 onwards) on ARM64 architecture.
You know the saying «When in Rome, do as the Romans do». If this distribution is being developed by VMware, for use (among other platforms of course) in VMware… well I just downloaded the OVA, open virtual appliance.
Anyway, I don’t have an AWS, Google cloud or Azure subscription. I own a Raspberry Pi but this is my retro video game ‘console’ and nobody will change that.
Install
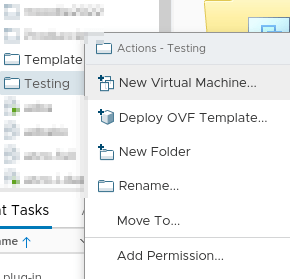
To install Photon OS on vSphere is pretty easy: right click on the virtual machines lists and choose the option “Deploy OVF template…”
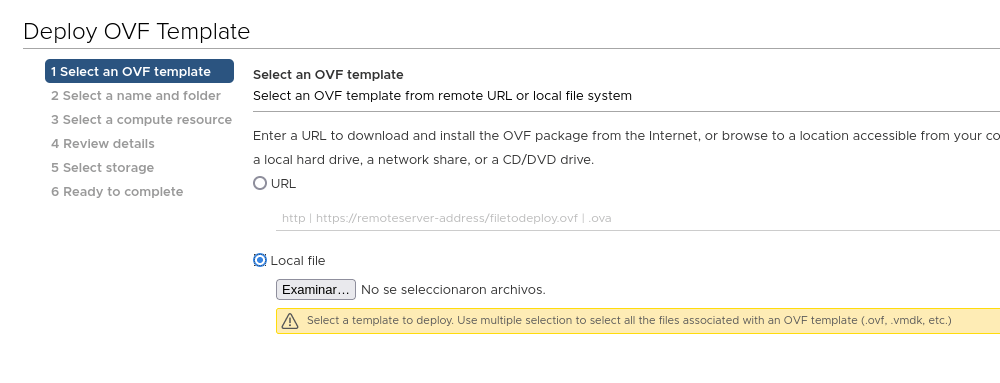
Next, choose the previously downloaded file.
I’ve never deployed before an OVF|OVA template, at seeing the other option on this screen makes me think I didn’t need to download anything. I’ll keep that option in mind for my next deployment.
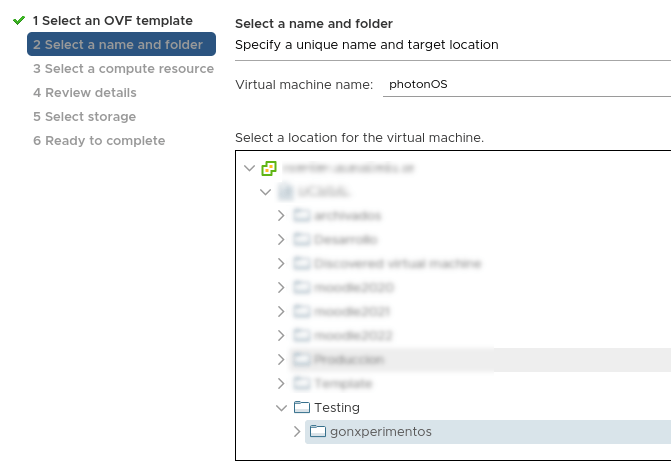
The next step is to choose a good name and a location. I very imaginatively named the new virtual machine photonOS. Also located the VM in a folder where I keep my personal experiments to later convince my boss to use it, or to not use it.
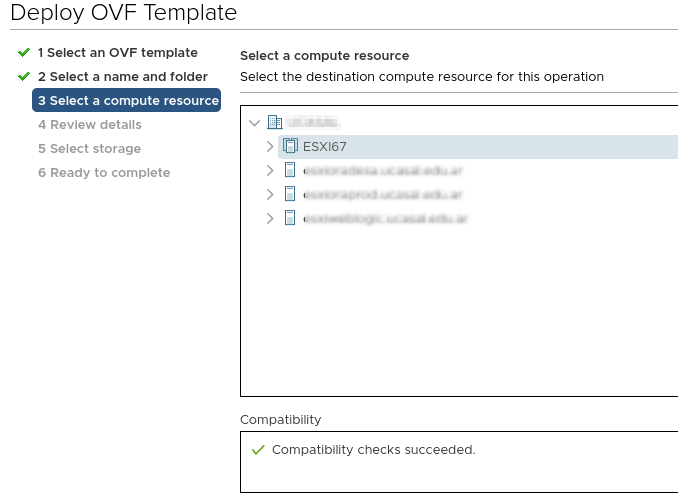
The third step is select a server or server pool where the VM is going to run.
The fourth step isn’t actually an step. It’s just a review of the VM description. The fifth step is to accept the license.

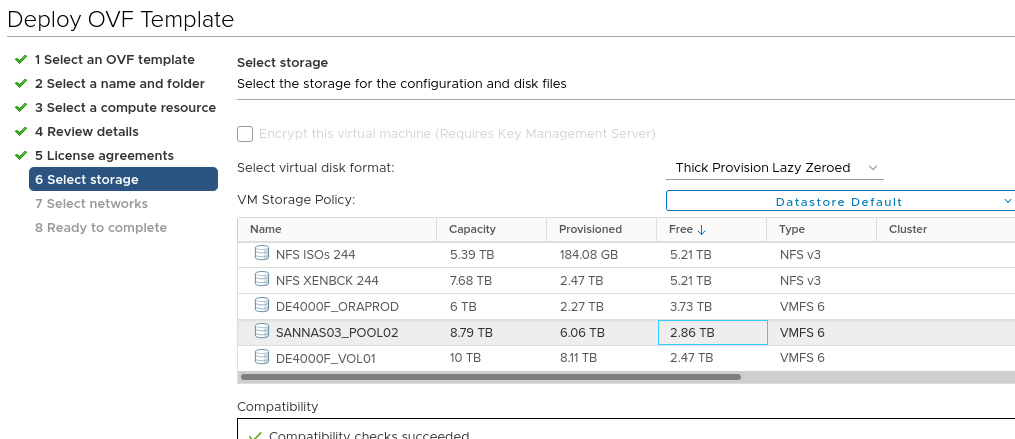
For the sixth step select an storage with enough free space.
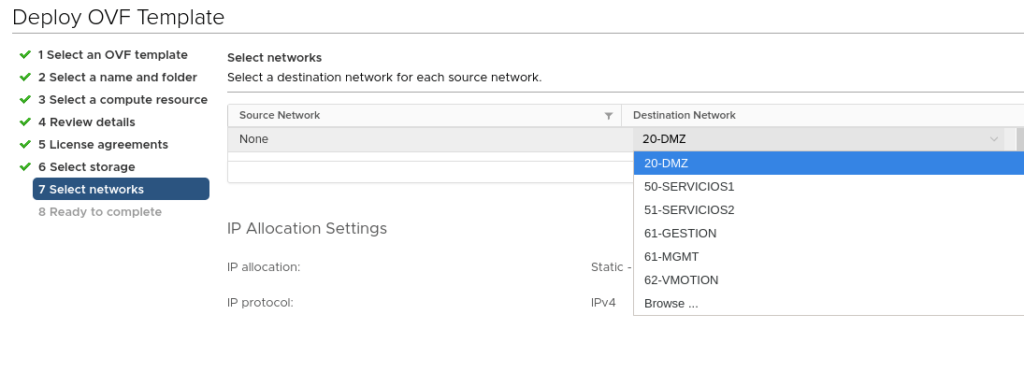
The seventh step is to select a network interface to connect to.
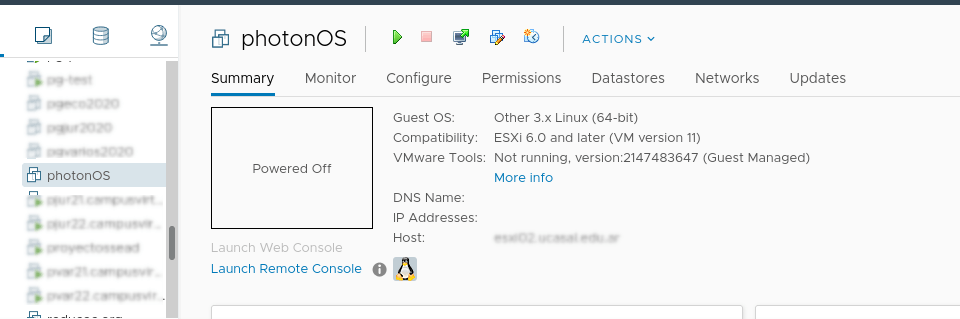
The last step of this wizard is a summary of the VM and then you just need to wait a couple of minutes until is ready.

First steps
You can find a detailed administration guide here: https://vmware.github.io/photon/docs/administration-guide/
Change default password
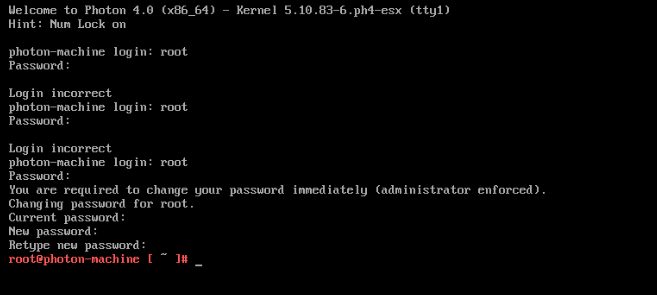
After power on and log in the virtual machine (the initial root password is changeme), the system will ask for a password change:
Configure the network
Now I need to configure the network. Photon OS comes ready to connect to a DHCP server but in my work we don’t set a dhcp server for our servers network. If you use DHCP you can skip this section.
So, my first step is to disable dhcp. Edit /etc/systemd/network/99-dhcp-en.network and find the line:
DHCP=yes
and change to no
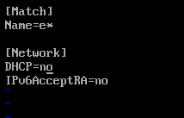
The second step is to find the ethernet link name with: networkctl.
The third step is to create a network configuration file:
cat > /etc/systemd/network/10-static-en.network << "EOF"
[Match]
Name=eth0 #should match the interface name in the previous step

[Network]
Address=ip/mask #in CIDR format
Gateway=gw ip
EOF
The last step to configure the network is set permissions to 644 and restart the network service.

Containers
As this is a distribution with focus on “the cloud”¹ and containers, let’s try it a little.
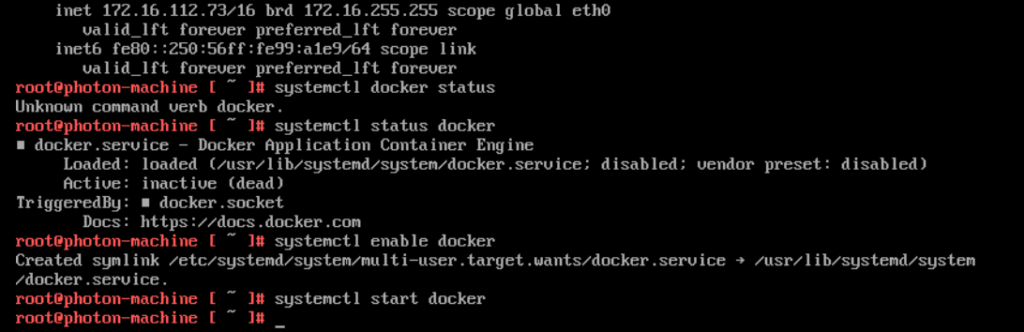
1st step: make sure the docker service is running:
systemctl status docker
2nd step: on the minimal version (the one i’m using) is not started by default, so enable and start:
systemctl enable docker
systemctl start docker
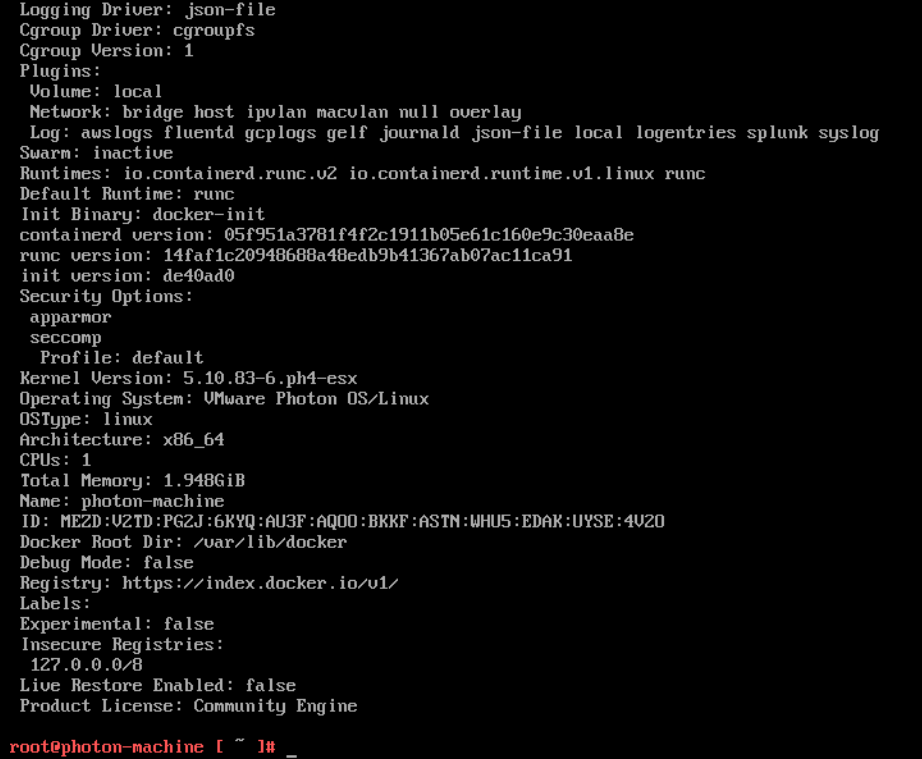
Now we can get some docker information with docker info:
With the service running, of course our first container should be a hello world one:
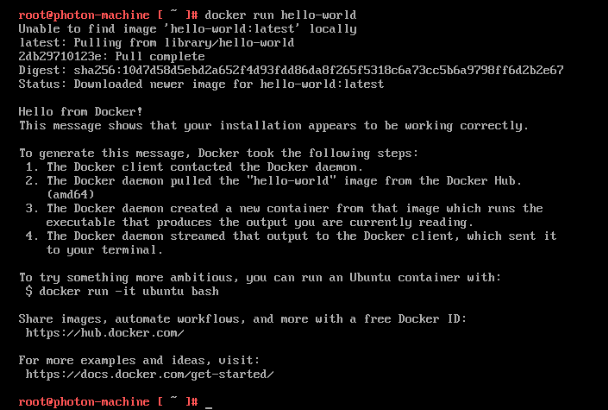
The hello world container suggest something more ambitious, like ubuntu, but how about Photon OS contained on a virtualized Photon OS on vSphere? like that movie with dreams inside other dreams.

¹ I rather name the cloud as “someone else’s computer“. But some people without real IT background aren’t ready for this discussion.
Epilogue
For some personal reasons this article took me ages to complete. I’ve used some of my work’s servers and not my faithful gnome-boxes. Anyway, one of the developers asked for a docker host and here we are 😉 .
To read more about Photon OS you can go to the documentation. To learn more about docker containers, here on unixcop we have a lot of articles.