
Hello dear readers, today we are going to migrate a virtual machine from VMware ESXi to Proxmox VE.
Today we are not working on our lab environment but on production environment. We have scheduled downtime for this migration process. We are migrating a virtual NTP Server from our old ESXi to new Proxmox Cluster.
Preparing for migration
We have RAID5 disk array as datastore for our older ESXi hypervisor and Gluster FS Replicated Storage as shared storage in Proxmox Cluster. We know VMware ESXi stores VM Disks in VMDK image format and for Proxmox we need QCOW2 disk image format. So, we will change the image format from VMDK to QCOW2. To learn more about Proxmox you may visit our other posts on Proxmox.
We can directly import the VMware disk to Proxmox Hypervisor but it will use the full disk size allocated for the virtual disk image. Importing the disk image as thin provisioned would save some disk space and allow us to overcommit disk space between virtual machines.
To import a virtual machine disk as thin provisioned and remove unnecessary disk space used by the disk image we will use another intermediate CentOS Virtualization host with qemu-img utility and virt-sparsify, pigz compression tool installed in it.
In this article we perform all operation from command line interface. So, we will need shell access for all 3 hosts. To enable SSH access in VMware ESXi please check this document. We will also need to allow SSH Client to SCP disk image files from ESXi host; go to Networking -> Firewall rules -> SSH Client in ESXi host portal. Click Actions and then Enable.
Preparing VMware ESXi Disk Image
Identify the target VM inside ESXi.
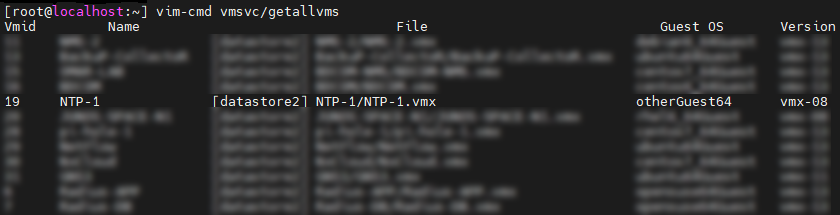
# vim-cmd vmsvc/getallvms
Or use grep to filter out unnecessary outputs
# vim-cmd vmsvc/getallvms | grep -i ntp
![]()
Here we found the VM ID is 19 and it’s configuration file is located inside datastore2/NTP-1 directory.
Now shutdown the target virtual machine and check VM power status
# vim-cmd vmsvc/power.getstate 19
![]()
Navigate to VM directory and determine the virtual disk name

VMware usages VMDK disk image format to store data. In ESXi it usages a metadata file and actual disk image names as IMAGENAME-flat.vmdk. Here we find that we have such 2 files, NTP-1.vmdk (metadata) and NTP-1-flat.vmdk.
As the Virtual Disk NTP-1-flat.vmdk has a bigger size we are going to compress it so that it would not cost us more time in transferring data from ESXi to the CentOS host.
# pigz -v -1 -k -p8 NTP-1-flat.vmdk
![]()
Note: If you have high speed network connections between servers you may skip compressing.
After completion of compression we SCP the Compressed disk image and metadata file to our Intermediate CentOS Virtualization host to convert and sparsify the disk image.

Convert VMDK to QCOW2 and sparsify the QCOW2 disk image
To convert disk image from VMDK to QCOW2 format we will need qemu-img utility which should be pre-installed in CentOS Virtualizations host. You may install it by below command also
# yum install -y qemu-img
Navigate to disk image directory and decompress the disk image file
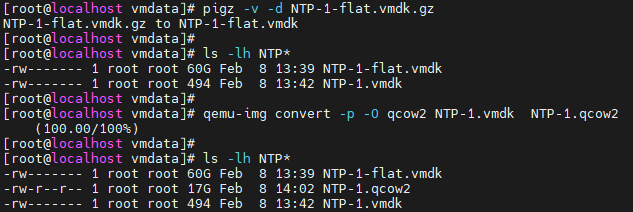
# pigz -v -d NTP-1-flat.vmdk.gz
Convert file format from VMKD to QCOW2
# qemu-img convert -p -O qcow2 NTP-1.vmdk NTP-1.qcow2
Install virt-sysprep tools in CentOS host
# yum install -y /usr/bin/virt-sysprep
To avoid temp directory size issue we are creating a tmp directory inside our vmdata directory and full permission for all users
# mkdir /vmdata/tmp
# chmod 777 -R tmp
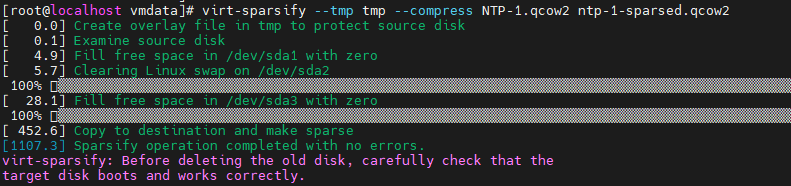
Sparse the qcow2 formatted disk image file
# virt-sparsify --tmp tmp --compress NTP-1.qcow2 ntp-1-sparsed.qcow2
Upload the new sparsed disk image file to Proxmox VE Host
Deploy VM in Proxmox VE from existing QCOW2 disk image
Let’s create a VM in Proxmox VE
qm create 120  --name ntp-1  \
    --sockets 1 --cores 2 --vcpus 2 --cpu host \
    --memory 4096 \
    --ostype l26 --arch x86_64 \
    --agent enabled=1 \
    --scsihw virtio-scsi-pci \
    --bootdisk scsi0 \
    --boot c
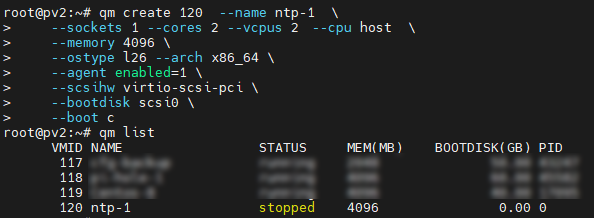
Here 120 is the VM ID in Proxmox
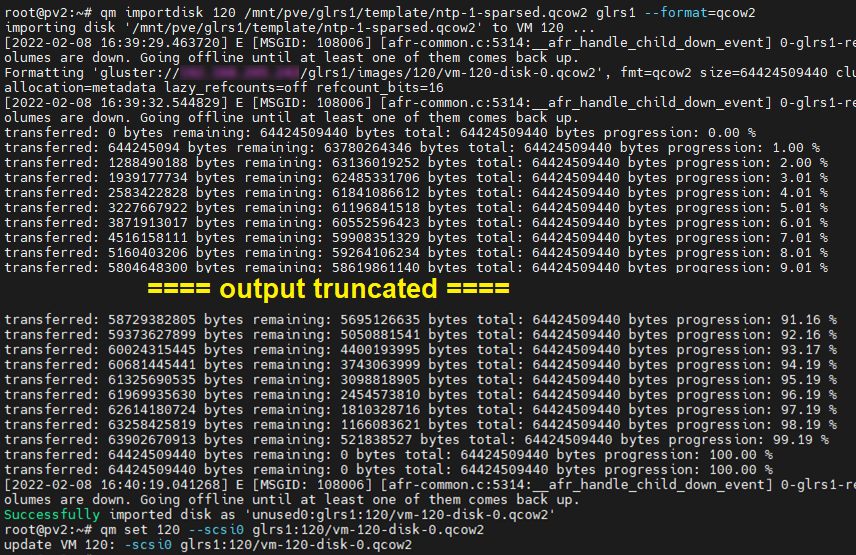
Import ntp-1-sparsed.qcow2 disk image into the VM
# qm importdisk 120 /path/to/image/ntp-1-sparsed.qcow2 glusterFSname --format=qcow2
# qm set 120 --scsi0 glusterFSname:120/vm-120-disk-0.qcow2
Config networking for the VM
# qm set 120 --net0 model=virtio,bridge=vmbr0,firewall=1,tag=10
Here we have used VLAN ID 10 for Server LAN, use your VLAN-ID for tagged/trunk switchport type.
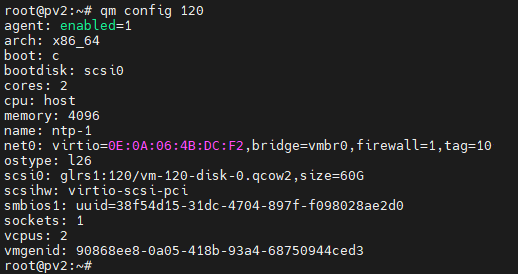
Verify VM Config
# qm config 120
Start the VM
# qm start 120
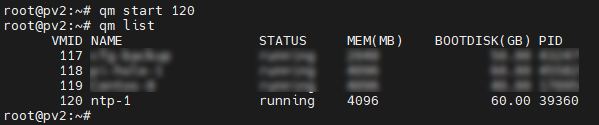
That’s it, your VM is successfully migrated from VMware ESXi to Proxmox VE.