
This post is about Jenkins Role-Based Access Control
RBAC is a Role-Based Access Control in which we can create the User and assign the customized permissions on the basis of Global roles, Item roles, and Node Roles.
Jenkins Role-Based Access Control
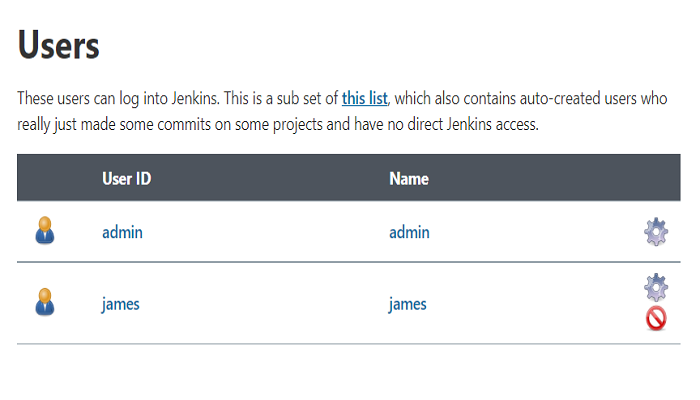
Step 1: Navigate to Manage Jenkins > Manage Users > Create User. Enter the Username, Password, Full Name and E-mail address then click Create User.
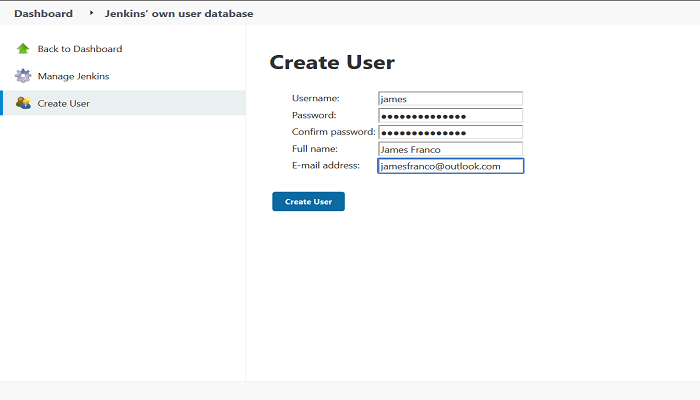
This User will get admin permission.
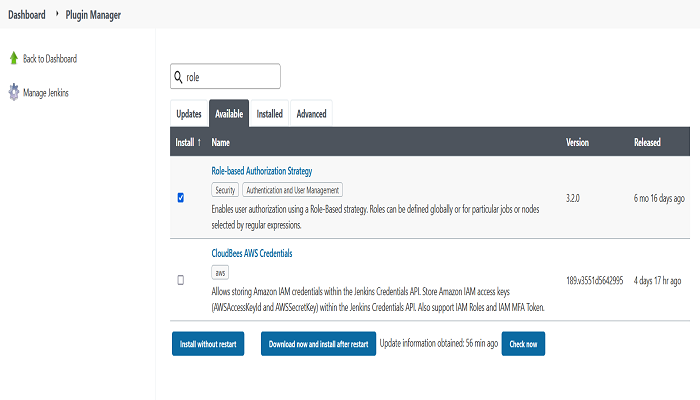
Step 2: Go to Manage Jenkins > Plugin Manager > Available and search for Role in the search box and in the dropdown list, select Role-based Authentication Strategy plugin, proceed by clicking on Install without restart.
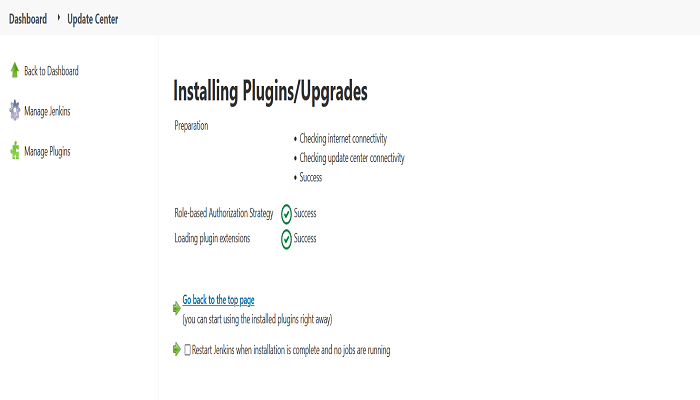
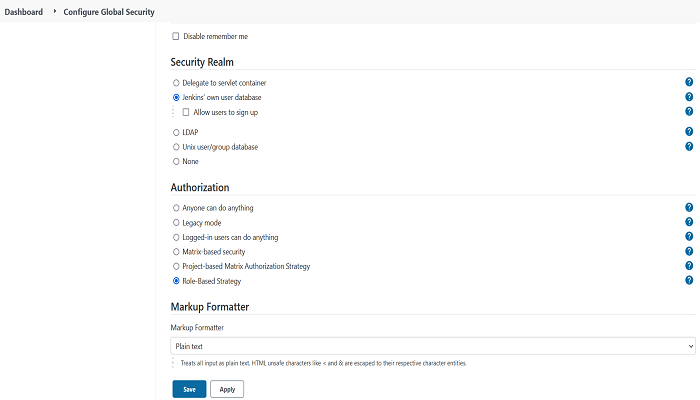
Step 3: After successful installation of this plugin, Go to Manage Jenkins > Configure Global Security and select the Role-Based Strategy under the Authorization section, click on Apply and Save.
NOTE: “Logged-in users can do anything” option would already be selected before selecting Role-Based Strategy.
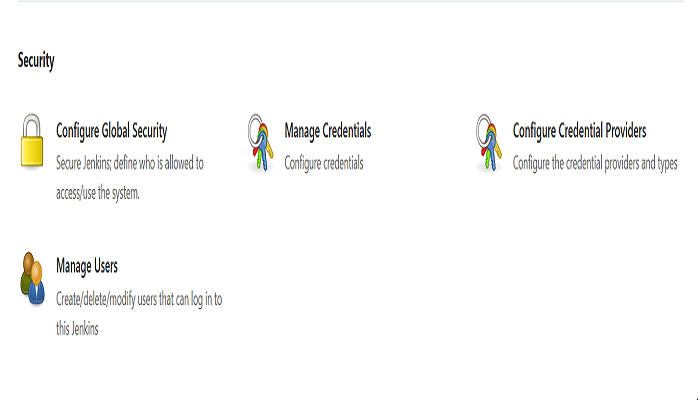
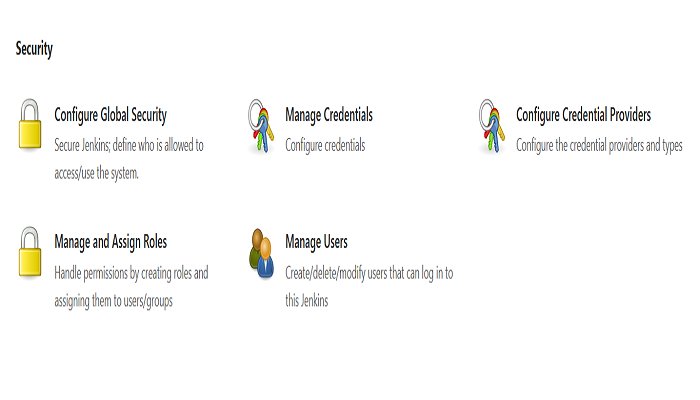
Step 4: Now, the new option will be added into the Security with the name of Manage and Assign Roles. This will appear after the installation of the plugin which was Role-Based Strategy. We can see the screenshot below
Before Step3
After Step3
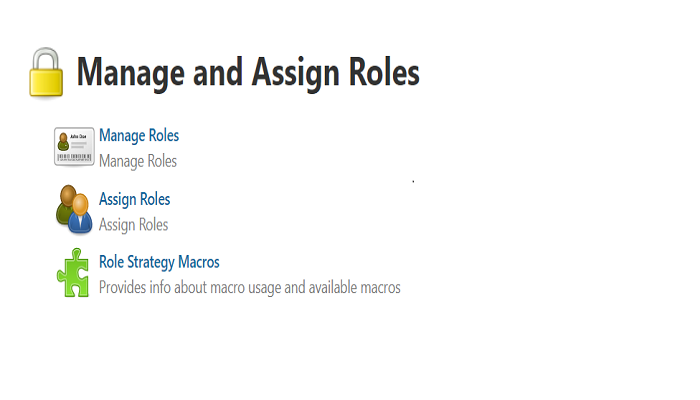
Now, Click on Manage and Assign Roles where it shows 3 categories:
- Manage Roles
- Assign Roles
- Role Strategy Macros
Manage Roles, permits to create or delete the roles, and Item Roles allow them authorizations. It consists of 3 roles:
• Global Roles
• Item Roles
• Node Roles
Role Strategy Macros: The use of Macros is done to extend the permission model by custom logic in plugins. Roles and Assignments clarify the criteria , which a user needs to fulfil, only then the role membership check is assigned to the extension. This will further make inferences in relation to instance and parameters.
Let’s understand with an example.
Click on Global Role, Just type the role name(I entered as Developer) under Role to add box then click on add.
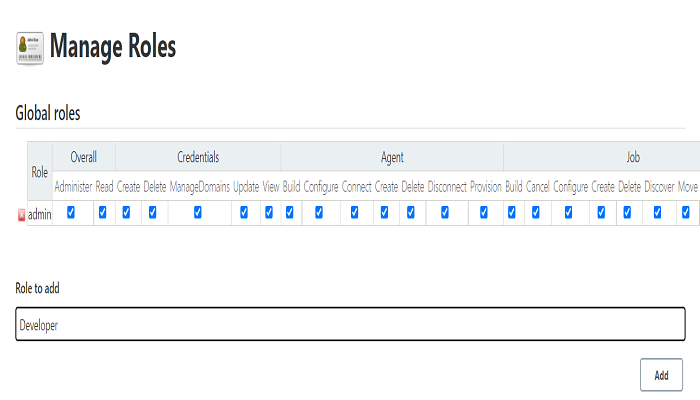
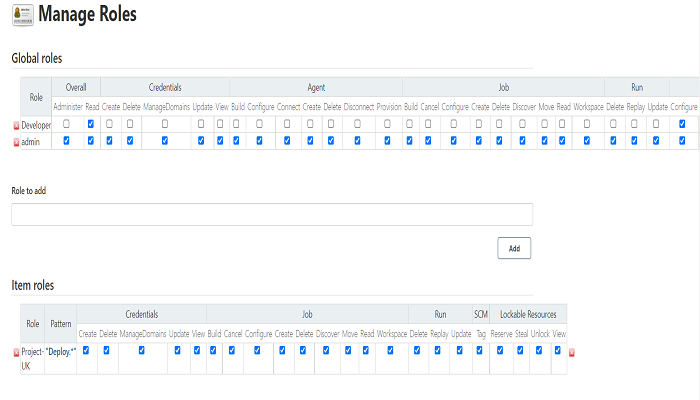
After adding the role, take a look at the suitable boxes and give the ideal permissions before clicking on Apply and Save.
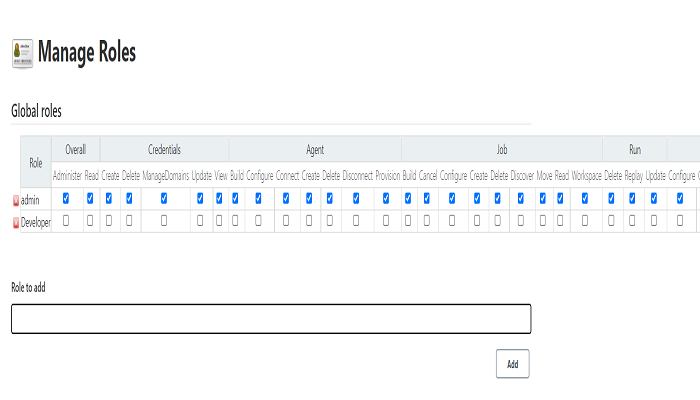
• Overall; all permissions like admin or only read.
• Credentials; permissions related to Manage Credentials under Manage Jenkins.
• Agent; permission related to Manage Nodes and Clouds under Manage Jenkins.
• Job; permission related to jobs created by users.
• Run, View, SCM, Lockable resources; Permission related to these resources under Jenkins dashboard.
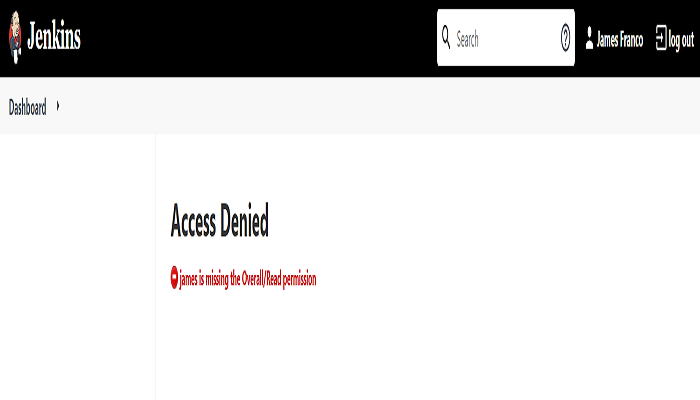
Login with the newly created user (as in step1) and it shows Access Denied (This is because I only created the Developer Role but didn’t assign it to the new user).
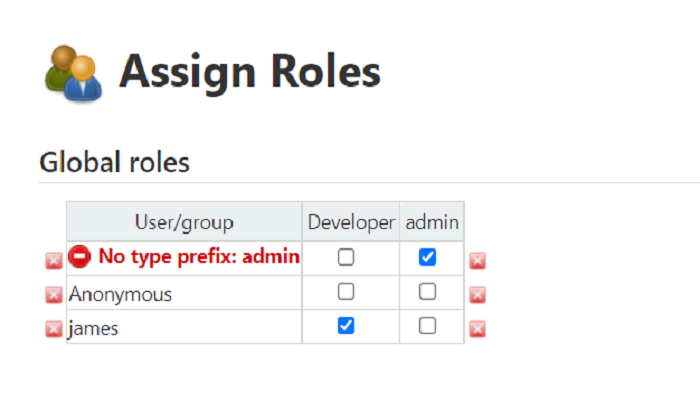
Allocate the global role to user. Navigate to Manage Jenkins > Manage and Assign Roles > Assign Roles.
Type the user name created in step1 and click on add.
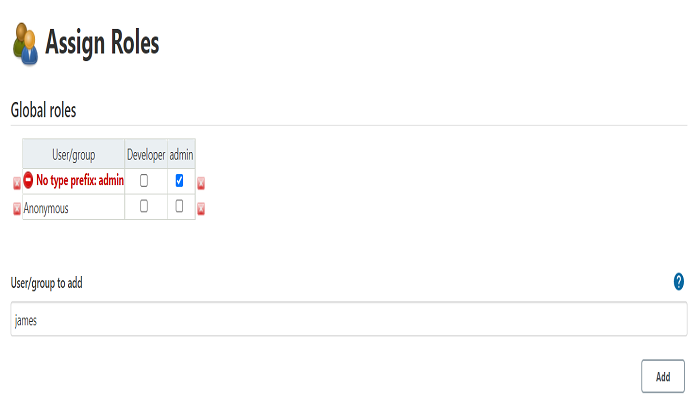
Now, the Username will show in the Global roles user/group section. Select the role for the user (I selected Developer role for user james) then click on Apply and Save.
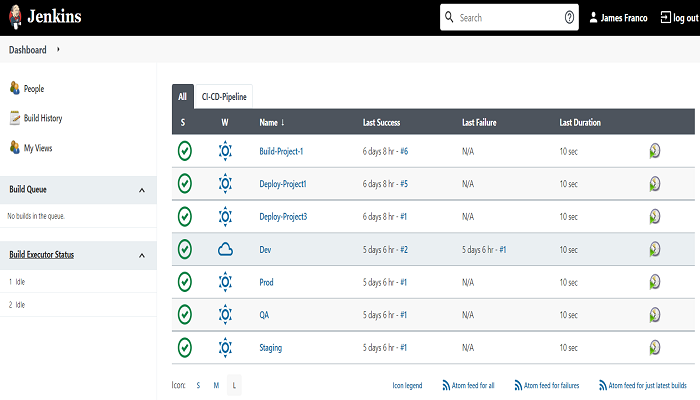
Reload the Jenkins dashboard page that is signed-in by new user and it shows the option assigned by the Developer role.
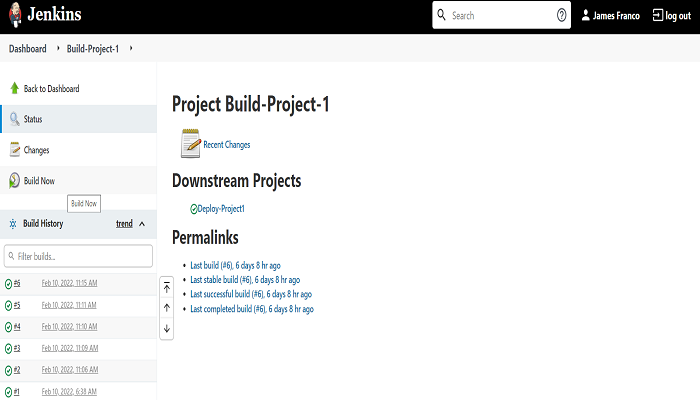
Open any job and it will show the options as defined in the Developer role.
Item Roles, where the user will get the item or Jenkins job-based permission. In order to create an Item role, go to Manage Jenkins > Manage and Assign Roles. Type the Role name under Role to add box and enter the pattern that would be matching with the Jenkins job (I have entered the Deploy.* pattern because I have two Jenkins jobs that start with Deploy) then click on add.
The main precious field is Pattern. The role will match all the Jenkins jobs that start with abc If the pattern would be abc.* which is case-sensitive.
To avoid the case-sensitive pattern, just add the (?i) before the pattern. For example:- (?i)abc.*
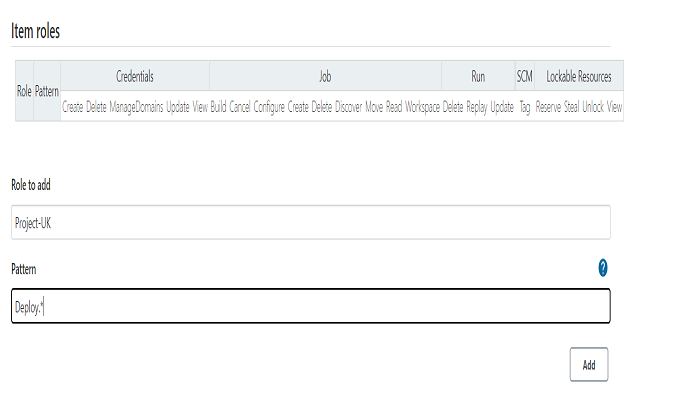
After that, give the appropriate permissions to the Item role (Project-UK) then click on Apply and Save.
In the next step, Go to Assign Role, add the username under Item roles in User/group to add box then click add.
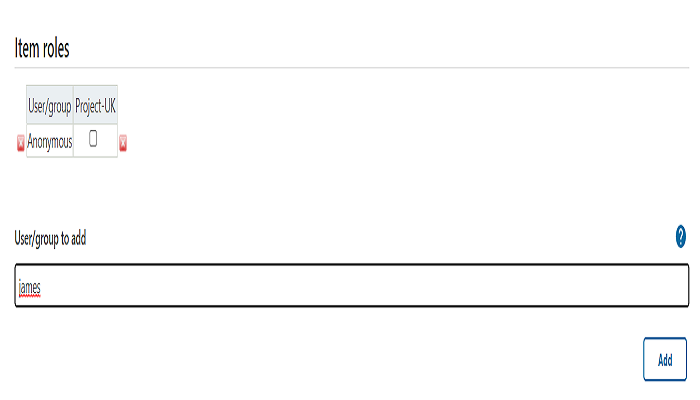
Select the permission to User then click on Apply and Save.
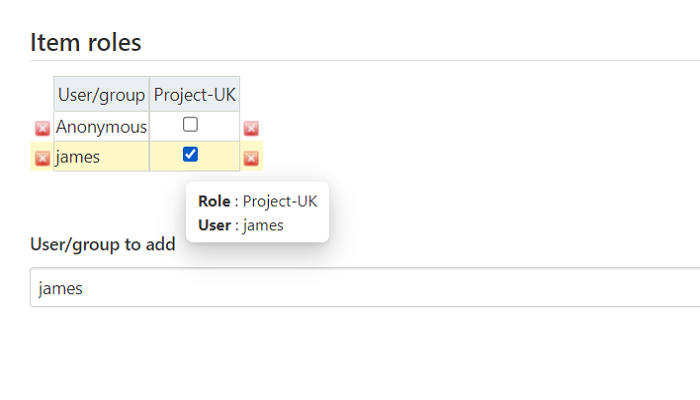
Reload the user(james) login Page and it will show the jobs which are matching with the pattern.

Node Roles, which is also known as Slave roles, simply view the undertaking with permission to administrator nodes.