
In this post, you will learn how to install OpenNMS
OpenNMS (Open Network Management System) is a free, open-source, enterprise-grade platform and cross platform java-based networking management system is designed to monitor and analyze large amount on data on remote servers and can generate data in simple form for you to easily analyze it. It gathers the information of remote hosts by using JMX (Java Management Extensions and SNMP. It runs both on Window & Linux Servers which includes web-based console for administrating networks and applications
Requirements :
- Ubuntu 16.04 or greater or Debian 9 or greater
- 1GB of RAM or greater (The more the better the performance)
- 2 Core CPU & 15GB Disk Space
Step 1 : Updating your Server
First step is to update your server and look for newer packages and security releases for your distribution, Run the following commands to update your server.
apt-get update -y
apt-get upgrade -y
Step 2 : Installing and Configuring OpenJDK
The second step is to install OpenJDK on your server, Run the following command to install OpenJDK
apt-get update
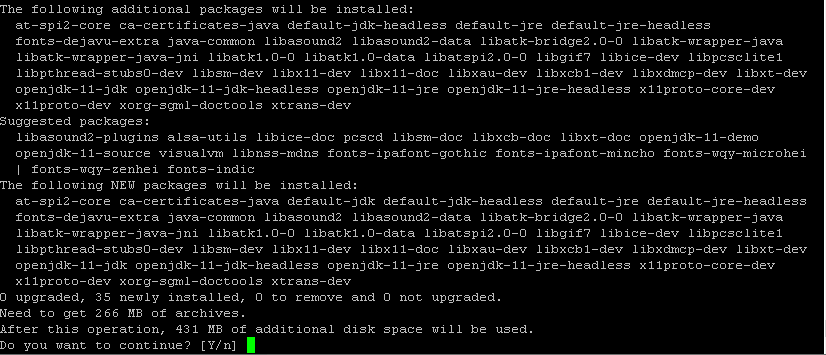
apt-get install default-jdk
Run the following command to know what version of OpenJDK is installed and in which directory its installed
update-alternatives –config java

Next step is to copy the following directory location into our /etc/enviroment file
nano /etc/environment
Add the following line to the file
JAVA_HOME=”/usr/lib/jvm/java-11-openjdk-amd64″
Your file will look like this:

Save the file and run the following command :
source /etc/environment
Step 3 : Downloading & Installing OpenNMS
By default, OpenNMS is not available in Ubuntu or Debian packages, So we would need to install its repository file so we can download and install OpenNMS
Create a new file using the following command:
nano /etc/apt/sources.list.d/opennms.list
Paste the following content into the file:
deb https://debian.opennms.org stable main
deb-src https://debian.opennms.org stable main
Run the command to add the GPG Repository key
wget -O – https://debian.opennms.org/OPENNMS-GPG-KEY | sudo apt-key add –
Now we installed the Repository Key, Now we can install the OpenNMS directly
apt-get update
apt-get install opennms
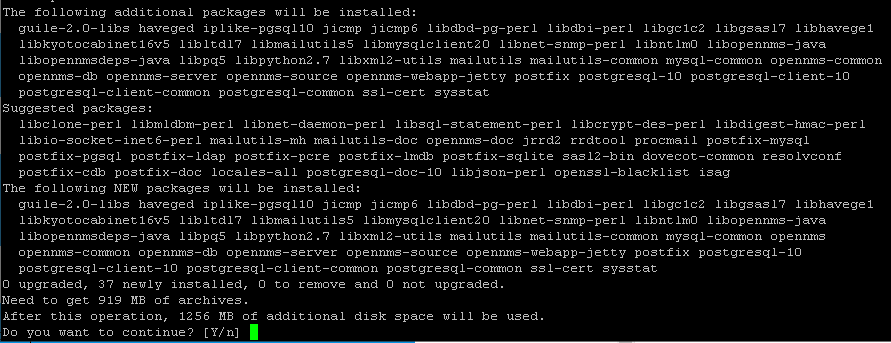
It will take a bit of a time to install as it installs over 1.2GB of content. Many things are installed with OpenNMS which includes PostreSQL
Run the following command to start your PostreSQL server
systemctl start postgresql
Change the password for PostreSQL by running the following command
passwd postgres
Switch to the PostGres user
su -l postgres
createuser -P opennms
createdb -O opennms opennms
Set the password for the Postgres user
psql -c "ALTER USER postgres WITH PASSWORD 'YOURPASSWORDHERE';"
Edit the OpenNMS Database File and change the fields accordingly
nano /etc/opennms/opennms-datasources.xml
The content of the file should look this :
<jdbc-data-source name="opennms"
        database-name="opennms"
        class-name="org.postgresql.Driver"
        url="jdbc:postgresql://localhost:5432/opennms"
        user-name="opennms"
        password="OpenNMS DB Password"/>

<jdbc-data-sourcename="opennms-admin"
        database-name="template1"
        class-name="org.postgresql.Driver"
        url="jdbc:postgresql://localhost:5432/template1"
        user-name="postgres"
        password="PostGres Password Here"/>
Save and exit!
Now run the following command to initialize the setup of Database
/usr/share/opennms/bin/install -dis
You will see the following output :

Enable OpenNMS on boot and start it
systemctl enable opennms
systemctl start opennms
OpenNMS is fully installed, Now you can access your webpage at : http://localhost:8980
You will see a login screen like this

The default username and password is
Username : admin
Password : admin
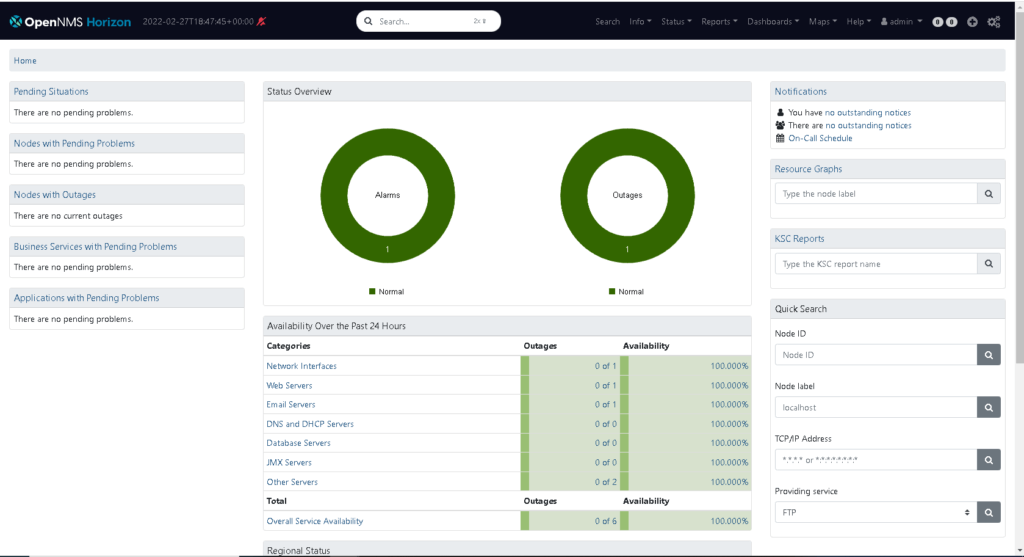
You will see a screen like this after logging in, This mean the OpenNMS is fully working
Conclusion:
OpenNMS server is fully operating and ready to monitor things. This tutorial assumes that you are on root!