
Hello, friends. In this post, you will learn how to install Let’s Encrypt on Nginx. This allows us to install certificates and access via HTTPS.
Before we start, we need to have a fully functional domain available.
Install Nginx on Linux
The first thing to do is to install Nginx on your Linux distribution. Almost all distributions have this application packaged in their official repositories.
About Debian, Ubuntu and all members of this family you have to run
sudo apt update
sudo apt install nginx
Regarding the Red Hat family, just run
sudo dnf install nginxYou can then check the status of the service.
sudo systemctl status nginxThe next step is to open ports 80 and 443 on the firewall. The procedure will depend on your Linux distribution.
Install Certbot on Linux
Certbot is a client for easy installation of Let’s Encrypt certificates. This is the recommended method for the tutorial.
In the case of Debian, Ubuntu and family members, certbot is installed as well as its Nginx plugin. So all that remains is to run.
sudo install certbot python3-certbot-nginxJust like that, we have the client installed.
Regarding RHEL, Rocky Linux and other members of the family, we have to add the EPEL repository.
sudo dnf install epel-release And then install certbot without any problems using the command
sudo dnf install certbot python3-certbot-nginxThis way we will have it installed on the system without any problems.
Now, let’s secure Nginx by installing Let’s Encrypt certificates.
how to install Let’s Encrypt on Nginx
Once certbot is installed, the next step is to install the certificates with the following command
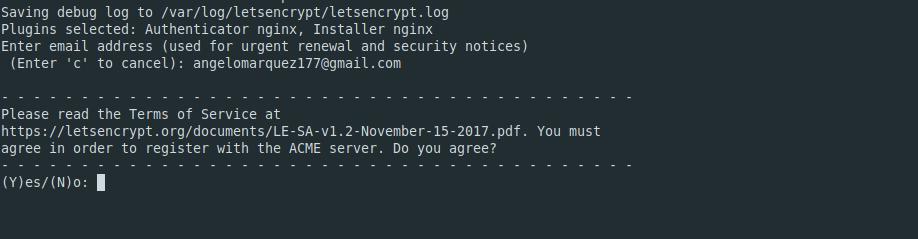
sudo certbot --nginx -d domainThis will start the whole process. First type in the site administrator’s email address.
Then accept the license terms and finally the process will continue.
When it finishes, you will get an output like this
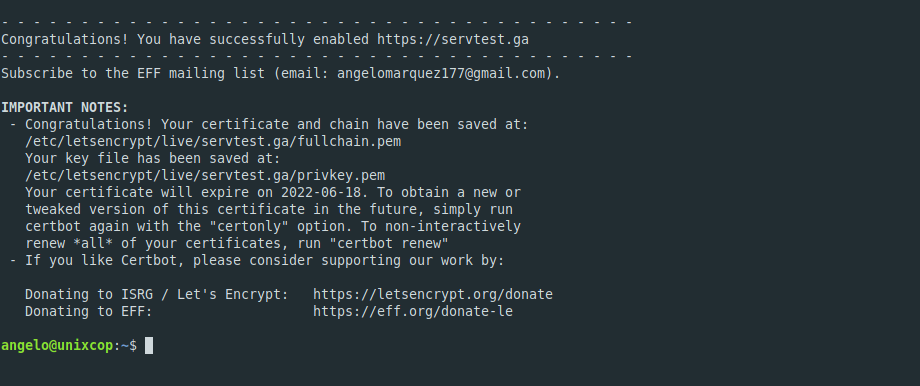
And you are done.
Renewing the certificate
Nowadays, thanks to the good work of Certbot, the renewal is automatic every 90 days. However, you can run the following command to check for any errors
sudo certbot renew --dry-run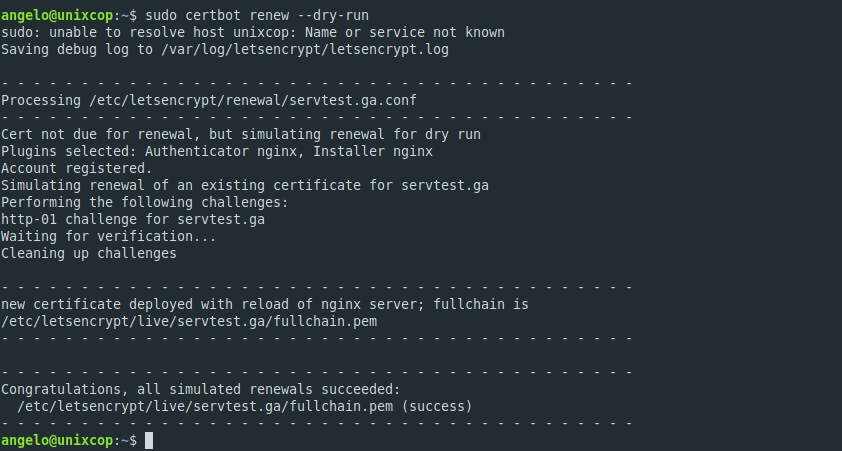
This indicates that there will be no error when renewing the certificate.
Checking for changes
To find out if the entire process was successful, open a web browser and visit https://your-domain.
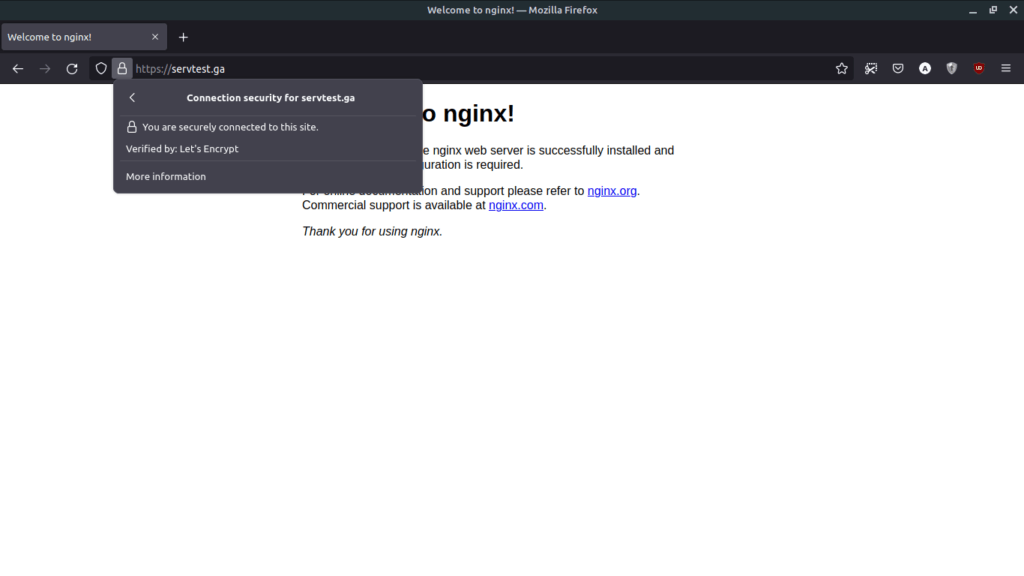
And see how in the connection section, it indicates that it is secure thanks to Let’s Encrypt.
Conclusion
In this short post, you learned how to secure Nginx with Let’s Encrypt. You can also learn other tutorials with Nginx.
sudo install certbot python3-certbot-nginx correct to
sudo apt install certbot python3-certbot-nginx