
Introduction
When a user opens up a browser and types the domain of the site s/he would like to visit, very little is know to most of the average user how the request is managed once it leaves the user’s computer and races through the wire. Where does it race to? The server. A special computer probably sitting in another part of the world waiting for a request and once it gets it, work starts for it prepare a nice little response and serve it to the user.
When a user opens up a browser and types the domain of the site s/he would like to visit, very little is know to most of the average user how the request is managed once it leaves the user’s computer and races through the wire. Where does it race to? The server. A special computer probably sitting in another part of the world waiting for a request and once it gets it, work starts for it prepare a nice little response and serve it to the user.
Tools required, and local vs. server environment
If you are following the article from your own computer, then you already have a Linux distro installed I assume. If you are installing the stack on the server, the same thing applies. You will need a Linux distro/server installed to follow the rest of the article, which is Ubuntu 20.04 in this case. For the sake of this article, we will use Nano editor to create/edit files. You can use Vim or whichever you are comfortable with.
What the hell is LAMP stack
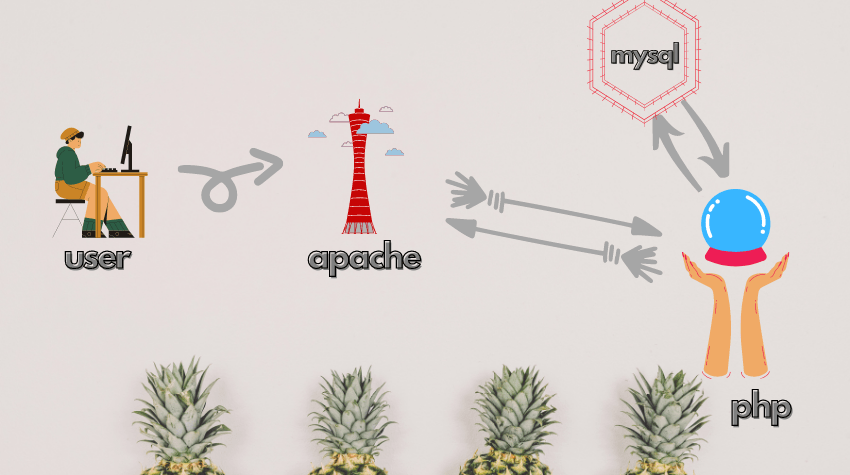
So, LAMP stack. It’s a group of software which works together to serve web applications developed with PHP programming language. L stands for Linux operating system where the rest of the stack is installed. A stands for Apache which is responsible for receiving the page request from the user (client) and serving the page back to the user when it’s ready. M stands for MySQL which is responsible for storing the dynamic data. And finally P stands for PHP, which takes the page request from Apache, finds the files involved in the project folder and processes them to make a nice HTML page for user to view from their browser.
Think of the stack as this. Say you have a Twitter account. When you type the link in the browser, the request goes to the Twitter server, Apache receives it, passes it to PHP, PHP processes the files to make an HTML page as your browser can only understand HTML (and CSS + JavaScript), while doing so, PHP talks with MySQL to get what is your username, list of tweets etc. stored in MySQL. That’s how the whole stack works.
Now that we understand the stack, let’s install the components one by one.
Install the L – which Linux server to host the rest of the stack on
We will assume that you already have Linux (Ubuntu 20.04) installed in your machine or in the server you will install the stack on, as installing and configuring Linux is a whole different topic by itself.
Install the A – Apache, the big brother in server world
First we will install Apache. Apache is the big brother among web servers and it’s inception dates back in 1995. It’s one of the most popular server, the most robust one and best of all, it’s open-source. Let’s install the beast. Open up the terminal if you are in your local Ubuntu machine or SSH into the server and run this command-
sudo apt update
sudo apt install apache2
If you are not the root user, then the terminal will prompt you to provide the password for using sudo command. Please note that the password you type won’t give any clue that you are typing, so just go ahead and type the password. Press Enter , that will run the command and install Apache. It will also ask you to confirm that you want Apache installed. For this, type Y and press enter. That will install Apache.
Now to check if the installation was successful and Apache is ready to serve web pages, you can go to-
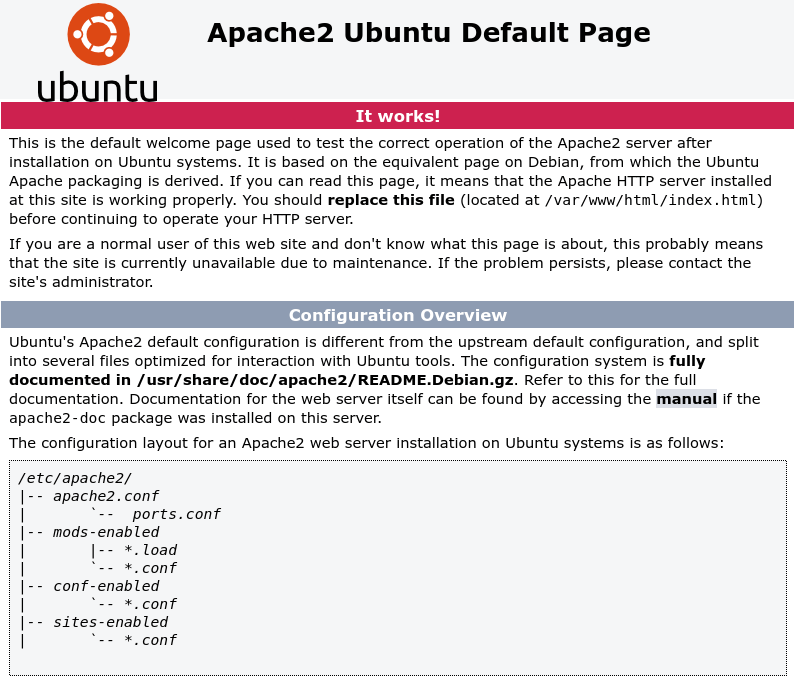
http://localhost (if you are on your local machine)http://SERVER_IP or http://DOMAIN_NAME (if you are installing the stack on the server)from your favorite browser tab. That will bring you a page like the image below and it means Apache is serving it’s default page, hence working.
If you cannot see the page and most possibly you won’t if it’s a new server installation, that is because server takes requests for different applications through ports and Apache listens to port 80 by default as user’s browsers requests a page by appending the port 80 . It might give a 404 error as port 80 needs to be opened. That’s taken care of by firewalls and you can change the firewall settings in Ubuntu using a piece of program called UFW. Apache makes it even easier by adding profiles based on which ports you want opened. That way you don’t have to tweak the port settings one by one. You set the predefined Apache profile and UFW will take care of that. So, to open port 80 , you run the command below.
sudo ufw allow in "Apache"To view the status of the ports, you run the command below.
sudo ufw statusThis will allow you to view the page above as now we change the firewall setting to allow traffic into the server through port 80 where Apache is listening to serve response of the requests coming in.
Install the M- MySQL
We have Apache. Now, time to install MySQL or MariaDB. They both were the same initially when MariaDB was forked from MySQL after Oracle acquired MySQL so that it always stays open-source if in future Oracle decided to make MySQL proprietary.
The licensing differs for both of them and the technology differs to. One thing stayed common, My and Maria are the name of the daughter of the creator of MySQL. Later, he forked MySQL to create MariaDB.
We will install MySQL in this walk-through. MySQL is a popular DBMS or database management system. We will use it to store our data so that PHP can look into it to get the data to serve to our users. Let’s get to work.
sudo apt install mysql-serverYou will prompted to allow the installation continue, type Y and press Enter to do so. This will install MySQL. Now, to make the installation secure, you should run another script which comes with MySQL. To do so, run-
sudo mysql_secure_installationThis will prompt you to decide if you want to configure VALIDATE PASSWORD PLUGIN. If you want to make sure all the database users must set strong password whenever new MySQL user is created, you can type Y for yes or any other key to avoid configuring it. Let’s press Y.
VALIDATE PASSWORD PLUGIN can be used to test passwords and improve security. It checks the strength of password
and allows the users to set only those passwords which are secure enough. Would you like to setup VALIDATE PASSWORD plugin?
Press y|Y for Yes, any other key for No:
Now, you will be asked to set the level of password strength, ranging from LOW,MEDIUM and STRONG. Go ahead and enter 1 to select MEDIUM and then press Enter.
There are three levels of password validation policy:
LOW
Length >= 8
MEDIUM Length >= 8, numeric, mixed case, and special characters
STRONG Length >= 8, numeric, mixed case, special characters and dictionary file
Please enter 0 = LOW, 1 = MEDIUM and 2 = STRONG: 1
Now it will ask you to set a password for root user of MySQL. As we have selected the password to be MEDIUM above, you must set a password which has a mixed characters of number, uppercase letter and lowercase letter, and symbols. Please set the password and press Enter. The terminal will show you the password strength you have just set. Press Y. Then it will ask three more question to let you remove anonymous users from the database, remove test databases and disable remote login. Type Y and press Enter for all of them. On the last step, type Y and press Enter to reload privileges to have the new configuration applied.
Now enter the command below to log into MySQL to verify we have a successful installation with proper configuration-
sudo mysqlYou will see that you are logged into MySQL command line interface. You didn’t need to provide any password. This is because by default MySQL’s admin user’s authentication method is unix_socket . That’s why you could log into MySQL through unix_socket from this machine. As long as you don’t change the authentication from unix_socket to password, it will work this way. But, there is one catch. We will install PHP in the next step. PHP needs access to MySQL database and MySQL won’t let PHP to access it as PHP runs under a different system user. This is actually good. To let PHP access MySQL databases, you will have to create new user in MySQL and give it proper privileges to let PHP access the database though that user. That makes MySQL more secure as the web application will only be able to access those databases which you you will give the new user privilege of.
Type Exit and press Enter to exit MySQL and come back to our terminal.
Install the P – PHP, the language that runs most of the web (till now)
The last bit of the stack we need to install is PHP. Apache handle the requests and routes the users to proper address or files. But Apache cannot really process or interpret all those files that need to be interpreted and a response file prepared. So, in this stack, PHP will take care of processing the PHP files and generating an HTML response (I am of course generalizing for the sake of brevity). Then Apache takes the response and serves it to the user (client). So, let’s install PHP now.
The last bit of the stack we need to install is PHP. Apache handle the requests and routes the users to proper address or files. But Apache cannot really process or interpret all those files that need to be interpreted and a response file prepared. So, in this stack, PHP will take care of processing the PHP files and generating an HTML response (I am of course generalizing for the sake of brevity). Then Apache takes the response and serves it to the user (client). So, let’s install PHP now.
sudo apt install php libapache2-mod-php php-mysqlThe php package will install PHP and all its dependencies. Now, let’s check if PHP has been installed correctly. To verify, run-
php -vThis will print the version info. That means we have successfully installed PHP. To verify the installation, you can create a page and view it from your browser. To do so, we will have to configure a vhost in Apache. Virtual host in web server means you can map different folders for different domains and Apache will receive the request, see that this request is asking pages from a specific domain and serve that page looking into the folder set in the vhost configuration of Apache. Let’s create a vhost to test our PHP installation.
To do so, we need to first create a PHP page in a folder somewhere. For Ubuntu, generally application files are placed inside /var/www folder . Let’s create a folder for our site there named unixcop.com with-
sudo mkdir /var/www/unixcop.comNow, let’s create a file named index.php with-
nano /var/www/unixcop.com/index.phpThe file will be created and opened by nano editor. Paste this bit of code given below inside the file and press CTRL + X to exit and then type Y to save while exiting and then press Enter to save the file and get back to the command line-
<?php echo phpinfo(); ?>Now, we have the file and our site folder. Next in line is to let Apache know that it will have to serve this folder if somebody visits our IP/Domain. Let’s do so now. We need to run this command to create a configuration file inside Apache’s configuration folder-
sudo nano /etc/apache2/sites-available/unixcop.com.confThis will create the file and open it. Let’s paste this configuration below into the file and press CTRL + X to exit and then type Y to save the file while exiting. Lastly, press Enter to get back to the command line after saving-
<VirtualHost *:80>
    ServerAdmin [email protected]
    ServerName unixcop.com
    ServerAlias www.unixcop.com
    DocumentRoot /var/www/unixcop.com/
    ErrorLog ${APACHE_LOG_DIR}/unixcop.com_error.log
    CustomLog ${APACHE_LOG_DIR}/unix.com_access.log combined
</VirtualHost>
Let’s walk through this configuration file line by line. The VitualHost block is configuring the directives written inside it. *:80 means any request received by Apache on port 80 will evaluate this vhost configuration. The ServerAdmin directive
is setting the server admin email in case system needs to send status report to the system admin. The ServerName directive is setting the server name so that Apache will know that if somebody visits our IP with the domain unixcop.com, it will serve the folder set in the DocumentRoot directive below. ServerAlias is just setting an alias for www.unixcop.com to unixcop.com. ErrorLog and CustomLog are just setting the log directories. Now, as we don’t own the domain unixcop.com, we can leave these two line out. I included those for reference so that if you have a domain name mapped into the server with DNS settings configured in your domain vendor, you can use this configuration to test the site out.
So, we have our site folder, and also our virtual host configuration. Now we have to enable it. To do so, run this command-
sudo a2ensite unixcop.com.confTo see if we did any typo or mis-confuguration, run-
sudo apache2ctl configtestApache will say configuration ok or log the error in the terminal. If all ok, run this to have the new configuration take effect-
sudo systemctl reload apache2Now if we visit the IP/Domain name from our browser, Apache will serve the page we created above and it will look like the image below.

This means, we have properly configured the stack to serve PHP sites. If you get a 404 page, that mean there might be some permission issue and PHP cannot access and read the file. So fix this, you will have to change file/folder permission. That’s a
topic for another day.
Final words
We have installed LAMP stack successfully following the above steps. Now that we have the LAMP stack installed, in our next post, we will make a WordPress installation works in this save setup. For this, we will have to work with Apache configuration files, create MySQL users and databases and finally serve PHP file. Till then, happy coding!