
Hello, friends. In this post, you will learn how to install Homebrew on Rocky Linux 9 / CentOS 9 Stream. Sounds interesting? Let’s see.
Introduction
According to the project’s website
Homebrew is The Missing Package Manager for macOS (or Linux)
Homebrew installs packages to their directory and then symlinks their files into /usr/local. This means that we don’t have to use sudo or have root privileges to be able to install certain applications from their large catalog.
For example, thanks to Homebrew we will be able to get recent versions of curl or wget because the application downloads, compiles, and installs from source code using formulas which are scripts made in Ruby.
The way Homebrew works is summarized in Git and Ruby, so hack away with the knowledge that you can easily revert your modifications and merge upstream updates.
Although it was intended for macOS, the fact is that we can also install it on Linux, giving us the following advantages.
- You can install software to your home directory and so does not require
sudo. - Install software not packaged by your host distribution or Install up-to-date versions of software when your host distribution is old.
- Also, you can use the same package manager to manage your macOS, Linux, and Windows systems.
So, let’s get to it.
Installing Homebrew on CentOS 9
The Homebrew installation process is easy to do on CentOS. First, open up a terminal and update the system
sudo dnf updateThen, install all the packages needed for building applications with the following command
sudo dnf groupinstall "Development Tools"Then these other packages that although they are not so necessary, it is always good to have them.
sudo dnf install tar curl nano gitAfter this, you can proceed with the installation. How? Well, using a script that the developers have prepared for us.
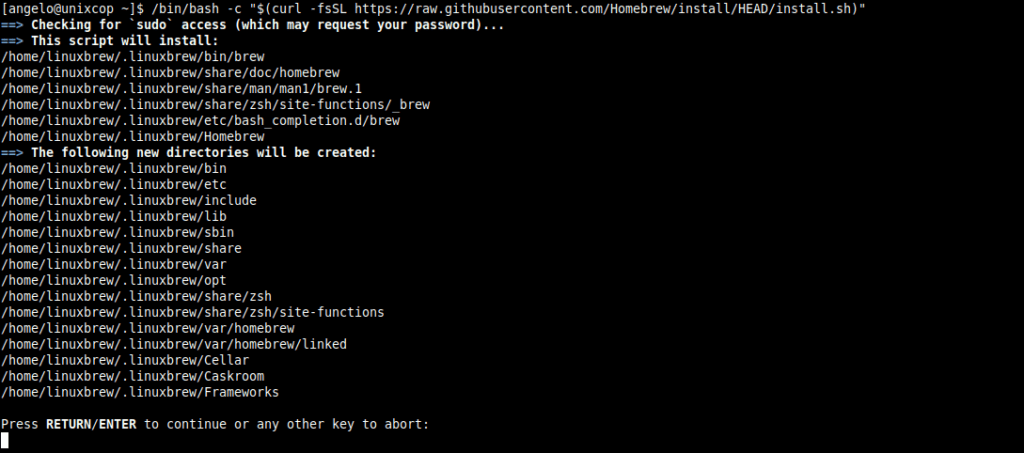
Just run
/bin/bash -c "$(curl -fsSL https://raw.githubusercontent.com/Homebrew/install/HEAD/install.sh)"At the end you will see a screen like this
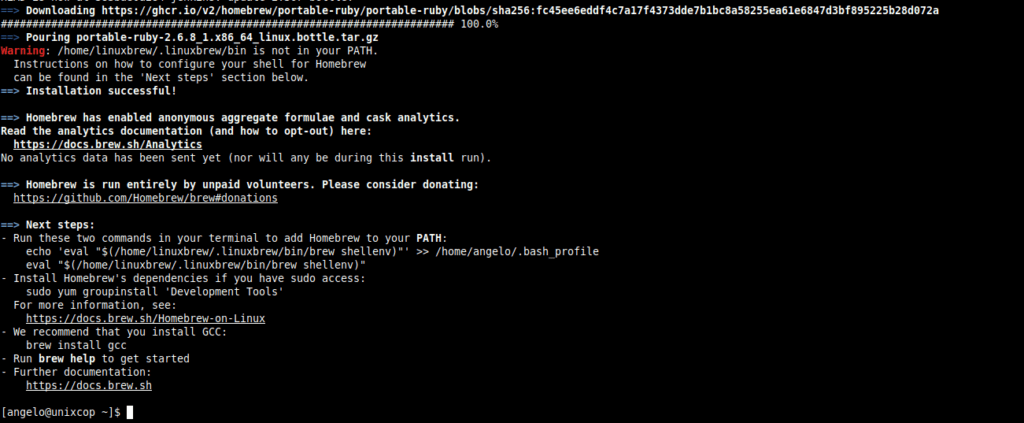
As you can see, you have to add the Homebrew directory to the PATH. To achieve this, open the configuration file.
nano ~/.bashrcAnd add this line to the end of the file
export PATH=$PATH:/home/linuxbrew/.linuxbrew/binSave the changes and close the editor.
Apply the changes by running
source ~/.bashrcNow we just need to test it….
To achieve this, install the hello package, which is the test executable.
brew install helloAfter it finishes, run it
helloyou will get an output screen like this:
hello, world!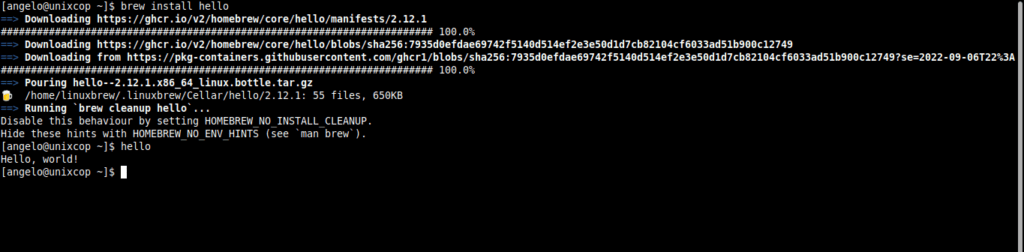
So, Homebrew is ready for you to use.
Conclusion
In this post, you learned about Homebrew. Now you know how to install it on a system like CentOS 9 Stream and in this way, have access to new programs.