
Counter-Strike:Global Offensive (CSGO) is a first person shooter game developed and released by Valve. Like previous Counter-Strike Games, It also allows us to host our own dedicated server which gives us full control to our server. We can install custom plugins which gives our server a new look or we can configure our server for different modes like Tournament Matches, Better Deathmatch etc.
Requirements for setting up a CSGO Server:
- Minimum of 2GB RAM and 2vCore and minimum of 50GB of Disk (CSGO Server is heavily takes alot of CPU and RAM as soon as the more players starts to join)
- A Steam account with CSGO for generating (GSLT), Without a GSLT Token your server will be accessible only to LAN Players. To get it working and up for internet gameplay, You need to have GSTL Token.
Install Counter-Strike Server
Step 1 : Configuring the Firewall
sudo iptables -R INPUT 5 -p udp -m udp –dport 26900:27030 -j ACCEPT
Step 2 : Preparing the Server
First, We need to prepare our server for our server installation. We need to update our server and install a package which may be used by the server and SteamCMD
apt-get update
apt-get install lib32gcc1 lib32stdc++6

Step 3 : Downloading/Installing SteamCMD
SteamCMD is a command-line version of SteamClient. We can use the software to install or update various dedicated servers just by mentioning the AppID of the game. The following steps can be done with a root user but it is recommended to do it with a non-root user.
useradd -m steamcmd
Then we to switch to our newly created user!
su – steamcmd
mkdir steamcmd && cd steamcmd
Then, We have to download the latest version of the SteamCMD directly from the Steam Servers.
wget https://steamcdn-a.akamaihd.net/client/installer/steamcmd_linux.tar.gz
tar xf steamcmd_linux.tar.gz
Step 4 : Installing CSGO Server using SteamCMD
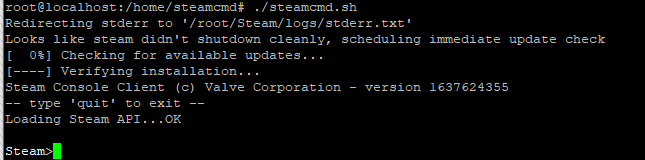
First, We have to run SteamCMD using the following command
./steamcmd.sh
First SteamCMD will update itself then we will see a prompt like this!
Steam>
We have to login on the Steam Servers either using our own account or we can login anonymously to install or update our servers. It will not effect our process in any way. In new SteamCMD update we have to first set our directory where the game server will be installed then we have to login to the Steam Servers in order to update our server. 740 is the AppID for the CSGO Dedicated Server.
force_install_dir /home/csgo
login anonymous
app_update 740 validate
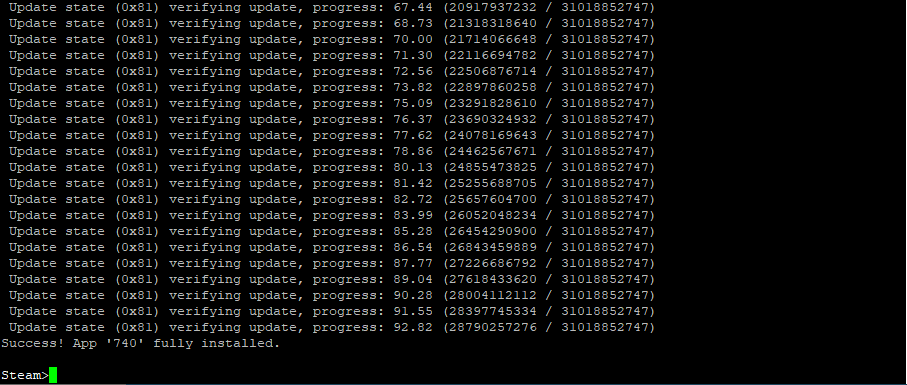
After installing the server, We will see the following command ‘Success! App ‘740’ fully installed.’ This means that our server is fully installed. But before starting the server, We have to do some settings and configuration!
Step 5 : Creating a bash script to run the server
We can start our server manually but the server requires some parameters and GSLT token, Instead we can create a simple bash script which would keep our server running even if we close our SSH connection.
To create the script :
nano server.sh
Paste the following content into the script and save it using CTRL+O
To start the server in Classic Competitive Mode :
!/bin/sh
screen -S “CSGO” ./srcds_run -game csgo -tickrate 128 -usercon +game_type 1+game_mode 0 +map de_dust2 +sv_setsteamaccount (Paste your GSLT Token Here)

To start the server in Classic Casual Mode :
!/bin/sh
screen -S “CSGO” ./srcds_run -game csgo -tickrate 128 -usercon +game_type 0+game_mode 0 +map de_dust2 +sv_setsteamaccount (Paste your GSLT Token Here)
To start the server in Deathmatch Mode :
!/bin/sh
screen -S “CSGO” ./srcds_run -game csgo -tickrate 128 -usercon +game_type 1+game_mode 2 +map de_dust2 +sv_setsteamaccount (Paste your GSLT Token Here)
Step 6 : Configure server.cfg for optimal settings and performance
You can start the server and the server will start with default settings without any name or any rcon password. For doing this you can add the following settings to your server.cfg
nano /yourcsgodir/csgo/cfg/server.cfg
hostname “Your Server Name Here”
rcon_password “Rconpassowrdhere”
sv_password “”
sv_tags “” // Set server tags here like dm,ffa,128tic etc
// Settings for 128 Tick
sv_maxcmdrate 128
sv_mincmdrate 128
sv_minupdaterate 128
sv_maxupdaterate 128
Step 7 : Generating GSLT Token
If you are looking to make your server accessible and reachable from the internet you need to have a GSLT token, Without it your server will be only reachable to LAN only and it would generate a warning as shown in the image below in Step 8.
- Steam Account with CSGO Purchased
- Account must not be limited and has a phone number

Step 8 : Running your server
Add the following generated Token to your startscript.sh. If you have completed all of the steps above, You can now start the server by using the following commands, (Note: if you want your server to be on the internet list you need to generate and add your GSLT Token
cd /home/csgo
./server.sh
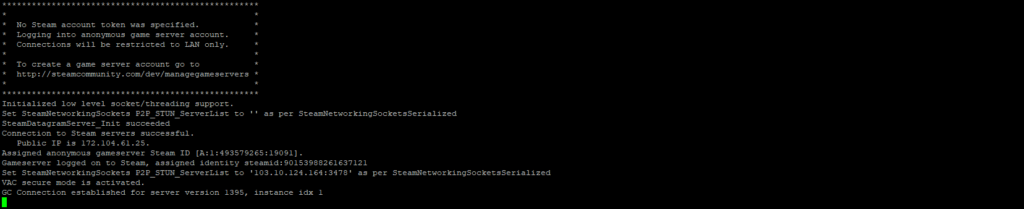
Your server is up and running, Now to remove that “No Steam Account token was specified” You need to generate a GSLT Token as shown in the Step 7.