")
Today, you will learn how to install & configure Magento2 in Linux.
Introduction
Magento is an ecommerce platform built on open source technology which provides online merchants with a flexible shopping cart system, as well as control over the look, content and functionality of their online store. Magento offers powerful marketing, search engine optimization, and catalog-management tools.
Prerequisites
- Linux OS (Windows and macOS installations are not supported)
- Access to a command-line interface (CLI)
- A user with root or sudo privileges.
Magento Open Source Vs. Magento Commerce
Before proceeding with the installation, decide which of the two available Magento platforms meet your store requirements:
- Magento Open Source. Provides a fully functional front-end content management system for free. It is ideal for newly established pure-click companies looking to build online stores from the ground up.
- The Magento Commerce edition is a platform-as-a-service (PaaS) with advanced features, technical and marketing solutions, and trained support staff. The cost of the Magento Commerce platform depends on annual store turnover. The price can range from tens of thousands to millions of dollars.
This tutorial shows you how to install Magento Open Source version 2.
Magento 1 End-of-Life: Official support for Magento 1 ended on the 30th of June 2020. It is possible to install and use Magento 1, but we advise against it. Without the latest security patches and the lack of support, an e-commerce solution is a major liability.
How to Install Magento2 in Linux
Before installing Magento, you need to establish a working environment for the background processes. This includes installing a LAMP stack, PHP Composer, and Elasticsearch to serve as a catalog search solution.
* Avoid using PHP version 7.4.2 with Magento as it has a known messaging issue.
You can use additional solutions to improve Magento’s efficiency. A key-value store like Redis and a messaging server such as RabbitMQ are highly recommended but are not mandatory for Magento.
Step 1: Install PHP Modules
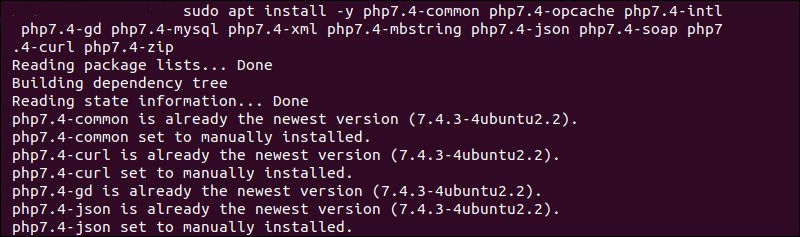
Magento requires a set of PHP extensions for server-side scripting. Enter the following command to install the necessary PHP modules:
sudo apt install -y php7.4-common php7.4-opcache php7.4-gd php7.4-mysql php7.4-intl php7.4-xml php7.4-mbstring php7.4-json php7.4-soap php7.4-curl php7.4-xsl php7.4-zipThe system takes a few moments to complete the installation.
To list existing PHP modules, use the php -m command.
Step 2: Create Apache Virtual Host
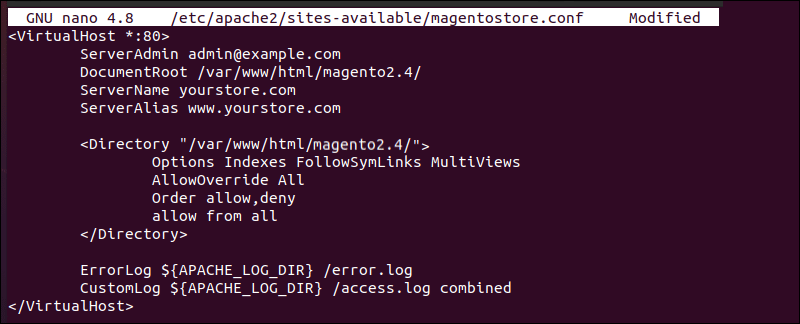
Use a text editor, such as nano, to create an Apache Virtual Host configuration file for your store.
sudo nano /etc/apache2/sites-available/magentostore.confAdd the following content to the file.Change the information to match your system’s data. For example, your store’s IP or domain name.
<VirtualHost *:80>
     ServerAdmin [email protected]
     DocumentRoot /var/www/html/magento2.4/
     ServerName yourstore.com
     ServerAlias www.yourstore.com

     <Directory "/var/www/html/magento2.4/">
        Options Indexes FollowSymLinks MultiViews
        AllowOverride All
        Order allow,deny
        allow from all
     </Directory>

     ErrorLog ${APACHE_LOG_DIR}/error.log
     CustomLog ${APACHE_LOG_DIR}/access.log combined
</VirtualHost>
In this example, the path to the Magento installation directory is /var/www/html/magento2.4/. The path needs to match the location of your installation folder.
Save the changes and exit the file. Then, use the following command to enable the configuration:
sudo a2ensite magentostore.confEnable the Apache rewrite module:
sudo a2enmod rewriteRestart the Apache service to apply the changes:
sudo systemctl restart apache2Step 3: Create MySQL Database and User
Access the MySQL command shell and create a database for your Magento store:
CREATE DATABASE magento;Create a user for the magento database:
CREATE USER 'magento2os'@'localhost' IDENTIFIED BY 'passwd';Give the magento2os user adequate privileges for the magento database:
GRANT ALL PRIVILEGES ON magento.* TO 'magento2os'@'localhost' WITH GRANT OPTION;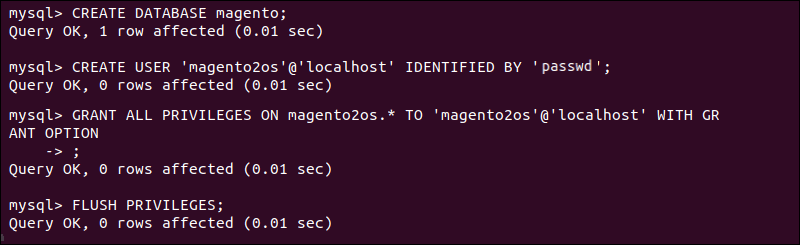
Flush the newly granted privileges:
FLUSH PRIVILEGES;Step 4: Make PHP Composer Globally Available
Use the following command to make Composer globally accessible:
sudo mv composer.phar /usr/bin/local/composerConfirm that Composer is now globally available:
composerAs confirmation, the output displays the installed version.

Step 5: Download and install Magento in Linux Using Composer
There are several ways to download Magento Open Source. You can retrieve and unpack compressed Magento files from the official archives, or a create a Git clone of the Magento repository.
This tutorial shows you how to use PHP Composer to install and manage Magento dependencies. Composer allows you to reuse third-party libraries, reduce PHP compatibility issues, and repackage Magento Open Source with other components.
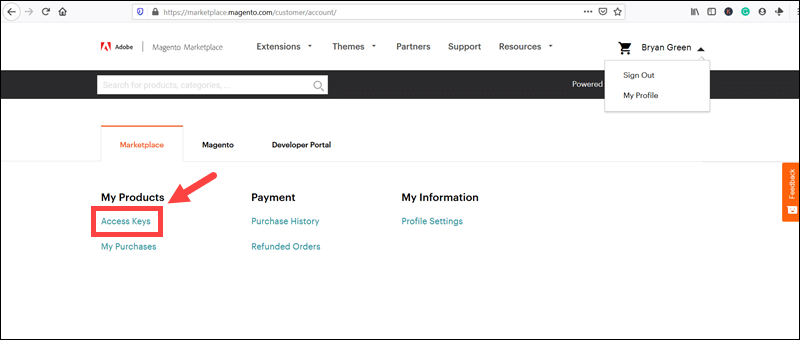
1. Visit the official Magento page and create a free user account.
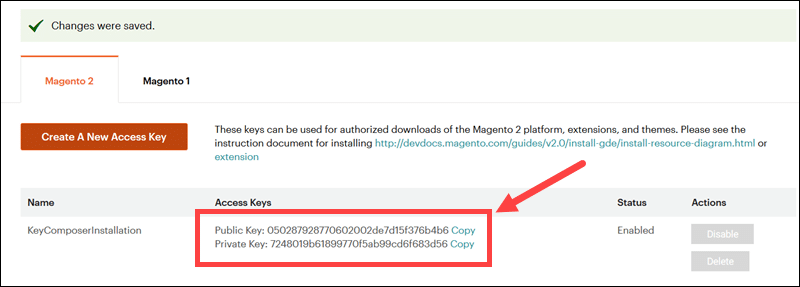
2. Log in to your Magento account and select Access Keys.
3. Click the Create a New Access Key tab. Enter a name and click OK.
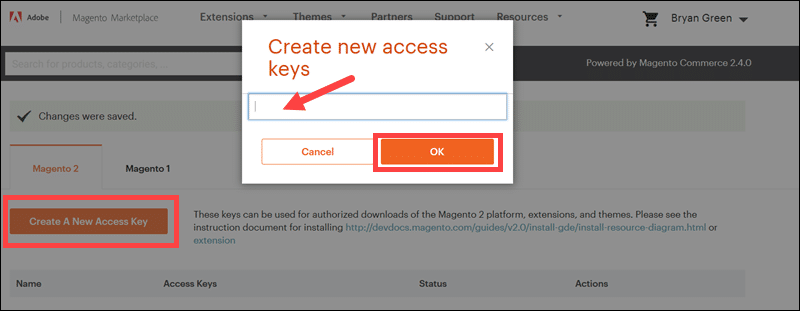
4. Save your Public and Private Keys.
5. Use a CLI to create a directory for the Magento installation. In this example, the magento2.4 sub-directory is created within the Apache web root (/var/www/html/):
mkdir /var/www/html/magento2.46. Access the magento2.4 directory:
cd /var/www/html/magento2.47. Use the following Composer command to download the Magento 2.4 Open Source Edition:
composer create-project --repository-url=https://repo.magento.com/ magento/project-community-edition8. When prompted, enter your Magento authentication keys. The Username and Password are the Public and Private Keys you previously created.
Allow the system to complete the download.
Step 6: Set Ownership and Permissions for the Shared Group
Create a distinct non-root user for the Magento installation. For example, pnap, and set a strong password:
sudo usermod -g www-data pnapAccess the Magento installation directory:
cd /var/www/data/magento2.4Set the read-write permissions for the web server group before installing the Magento software. This way users can write files to the Magento file system. Grant users the following permissions:
sudo find var generated vendor pub/static pub/media app/etc -type f -exec chmod g+w {} \; && find var generated vendor pub/static pub/media app/etc -type d -exec chmod g+ws {} \; && chown -R :www-data . && chmod u+x bin/magentoLet the system finish matching the various files and folders in your installation directory. Then, use the following command to restart the Apache service:
sudo systemctl restart apache2Step 7: Install Magento
Switch to the user you created for the Magento installation:
sudo su pnapAccess your Magento root directory:
cd /var/www/html/magento2.4/Enter the following command to install Magento:
php bin/magento setup:install --base-url="http://localhost/magento2.4/" --db-host="localhost" --db-name="magento" --db-user="magento2os" --db-password="passwd" --admin-firstname="Bruce" --admin-lastname="Banner" --admin-email="[email protected]" --admin-user="Hulk" --admin-password="Hulk123" --language="en_US" --currency="USD" --timezone="America/Chicago" --use-rewrites="1" --search-engine="elasticsearch7" --elasticsearch-host="localhost" --elasticsearch-port="9200"If necessary, edit the information to match your requirements and the configuration of your system:
- base-url – The location (URL) of your store. In this example, the store is installed on the localhost in the magento2.4 sub-directory.
- db-host – If Magento is on the same server as your database, use localhost. If you are using a separate database server, enter the hostname of that server.
- db-name – The name of the MySQL database created earlier.
- db-user – Enter the username of your MySQL user.
- db-password – The password for your MySQL user.
- admin-firstname and admin-lastname – Set the full name for your Magento admin user.
- admin-email – Define a contact email for system notifications and password resets.
- admin-user / admin-password – Create the login credentials for the Magento Admin control panel.
- language – Defines the default language for your store.
- currency – Sets the base currency for your store.
- timezone – Regulates the default time zone for Magento.
- use–rewrites – Enable rewrites by setting the value to 1.
- search-engine – The default search engine value needs to be set to elasticsearch7.
- elasticsearch-host – If Elasticsearch is on the same server as Magento, use localhost. If you are using a separate server, enter the hostname of that server.
- elasticsearch-port – The default Elasticsearch port number is 9200.
The system creates a random Magento Admin URI and displays the value at the end of the installation process. Take note of the value as it allows you to access the Admin panel.
If you need to retrieve the Admin URI at a later point, access the Magento root directory and use the following command:
bin/magento info:adminuriStep 8: Access and Configure Magento
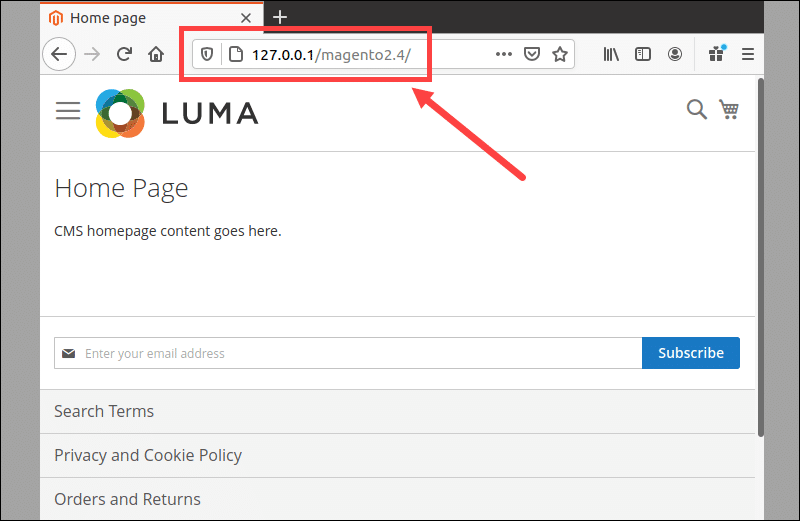
Use a browser to access your Magento storefront. In this example, Magento is installed on the localhost within the magento2.4 sub-directory:
http://127.0.0.1/magento2.4You now have access to the Magento Home Page.
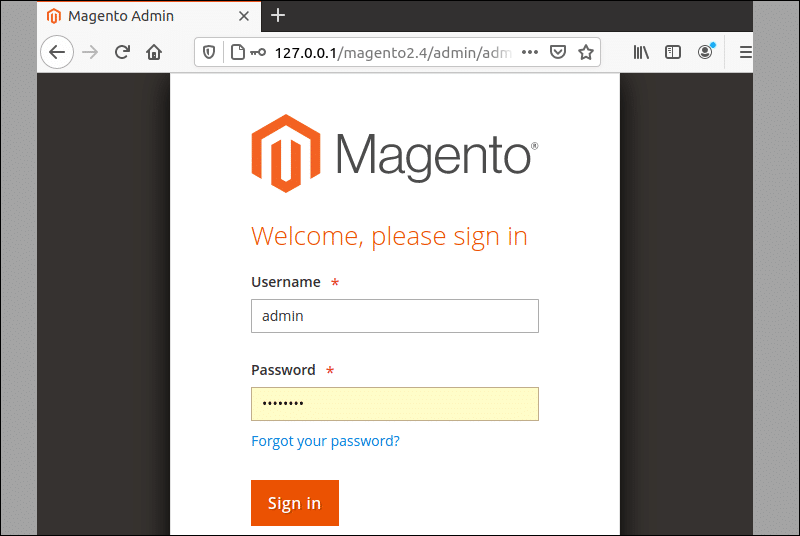
Access the Magento admin panel by adding the admin URI to the store’s frontend URL.
http://127.0.0.1/magento2.4/admin_fasjdnwEnter the Admin username and password you created during the installation process and Sign In.
Magento 2.4 uses two-factor authentication to provide a secure environment for administrators. You cannot log into the Magento admin panel unless you have a Mail Transfer Agent (MTA) or an SMTP server.
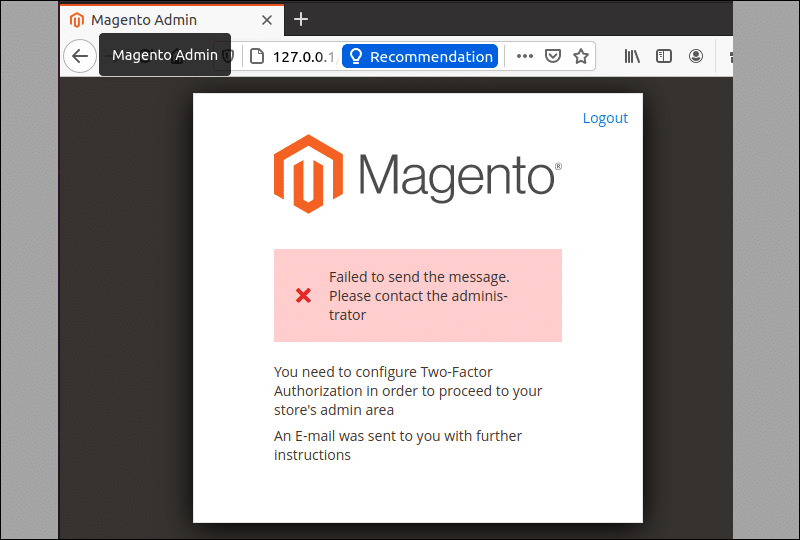
An alternative solution is to disable the two-factor authentication module.
Enter the following command from your Magento root folder:
php bin/magento module:disable Magento_TwoFactorAuthAs the two-factor authentication is no longer required, reload the page to access the Magento admin panel.
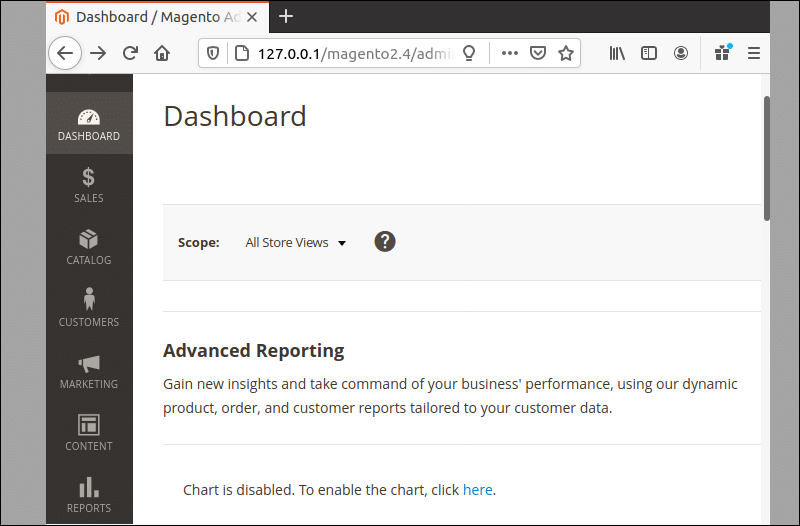
Use the Magento Admin to create and maintain your store, add extensions to improve performance, and design themes that really stand out.
Conclusion
You have successfully installed Magento2 in Linux, a complete e-commerce solution that allows you to create a one-of-a-kind experience for your customers.