In this post, you will learn how to install Asterisk on Ubuntu / Debian
Asterisk in an Open Source Communication toolkit, It powers IP PBX Systems, Conference servers and VoIP Gateways and is used by call centres, enterprise businesses widely. It has many features and allows you to do calls using TCP/IP without any cost. Moreover, it has features like call recordings, Voice Response Menus, Voicemails etc. It can transform an ordinary computer into a IP PBX System. There are more than 1 Million Servers Setup using Asterisk Software.
Requirements :
- Minimum 2GB of RAM (If using for a small home office setup), Or more than that depending upon the size of your office, enterprise etc.
- Fresh Ubuntu 20.04 or 18.04 or Debian9/10 Machine with Root Access
Step 1 : Updating your Server
First step will be updating your VPS for any newer updates or any security update
apt-get update && apt-get upgrade
Step 2 : Installing Prerequisite Packages
apt install build-essential autoconf subversion pkg-config libtool wget git

Step 3 : Installing Asterisk on Ubuntu / Debian
We have to first clone the Asterisk Source Code Repository from the official site
sudo git clone -b 18 https://gerrit.asterisk.org/asterisk asterisk-18
cd asterisk-18
In the next step, We have to run a shell script which would download the required MP3 sources for the required MP3 Module for Asterisk
contrib/scripts/get_mp3_source.sh
This should give a following output:
A addons/mp3
A addons/mp3/MPGLIB_README
A addons/mp3/common.c
A addons/mp3/huffman.h
A addons/mp3/tabinit.c
A addons/mp3/Makefile
A addons/mp3/README
A addons/mp3/decode_i386.c
A addons/mp3/dct64_i386.c
A addons/mp3/MPGLIB_TODO
A addons/mp3/mpg123.h
A addons/mp3/layer3.c
A addons/mp3/mpglib.h
A addons/mp3/decode_ntom.c
A addons/mp3/interface.c
Exported revision 202.
Next, We have to run the install_prereq script to install the required dependencies for Asterisk and other utilities for it, This step will take a bit time.
contrib/scripts/install_prereq installs
After running this script, This will install the required dependencies and in the middle of the process you will be prompted to enter your telephone code number as shown in the following image

After the step, You will see the following prompt:

Step 4 : Building and Installing Asterisk
After installing the required dependencies and prerequisite packages, We can now move on to next step of building the Asterisk PBX from the downloaded files.
To check if all the required dependencies has been installed or not on the server run the following command
./configure
If the above command does not give you a Asterisk Logo at the end of the command run the following command
./configure --with-jansson-bundled
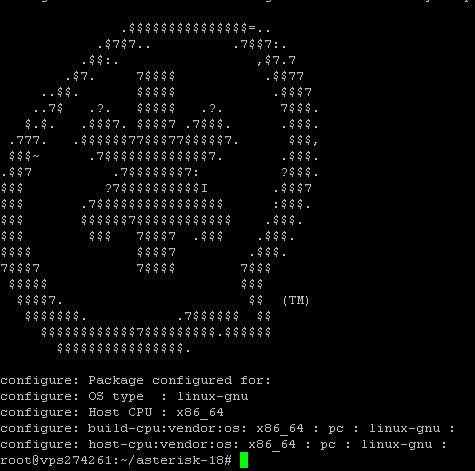
After running the above command, You will see Asterisk Logo on the screen like the ffollowing
Nex step is to select install the required modules and to compile the following as well. To acess the menu run the following command
make menuselect
We can use the arrows keys to navigate and press the enter key to select, First we have to select “format_mp3“
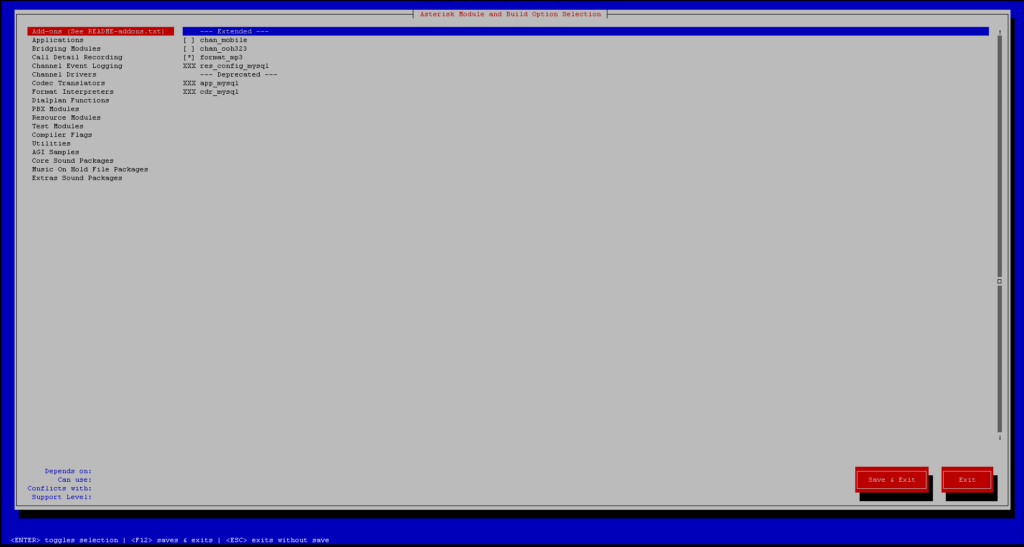
You can also then select other core sound modules if you require them
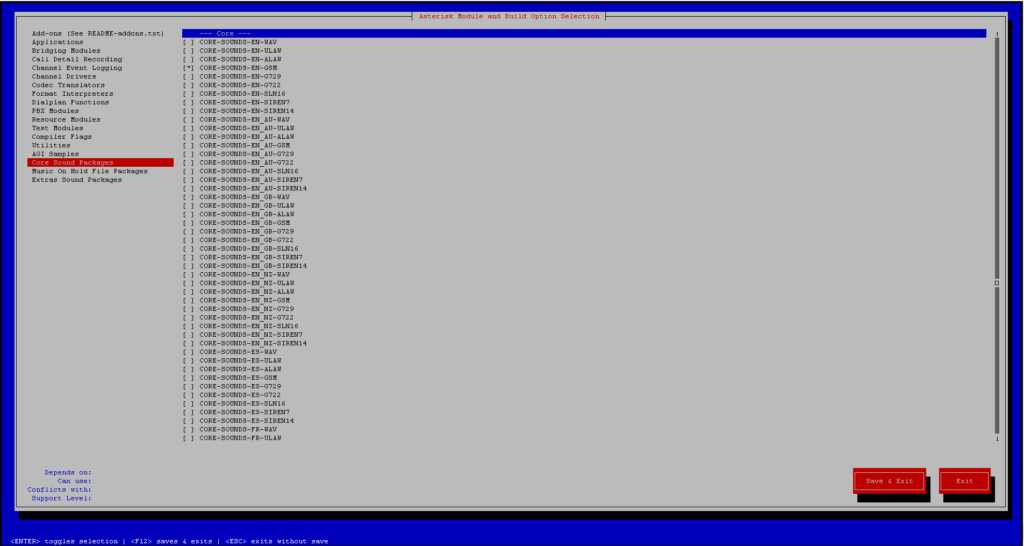
After, Selecting the packages press Tab and Press “Save and Exit“, Now run the following command to build Asterisk, (Note this might take a while)
make
This will give a following output:
[CC] format_mp3.c -> format_mp3.o
[CC] mp3/common.c -> mp3/common.o
[CC] mp3/dct64_i386.c -> mp3/dct64_i386.o
[CC] mp3/decode_ntom.c -> mp3/decode_ntom.o
[CC] mp3/layer3.c -> mp3/layer3.o
[CC] mp3/tabinit.c -> mp3/tabinit.o
[CC] mp3/interface.c -> mp3/interface.o
........
+--------- Asterisk Build Complete ---------  +
+ Asterisk has successfully been built, and +
+ can be installed by running:                   +
+                     make install                    +
+------------------------------------------------  +
Next step is to successfully install Asterisk, This step might also take a bit time depending upon your server network speed, CPU speed etc.
make install
You will see the following output:
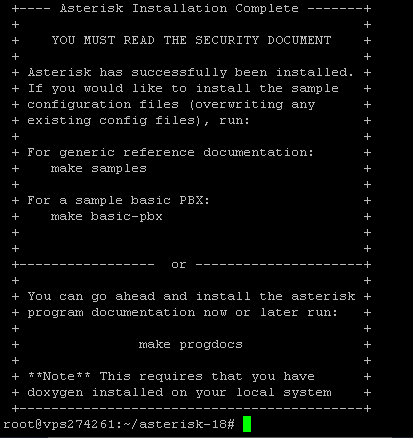
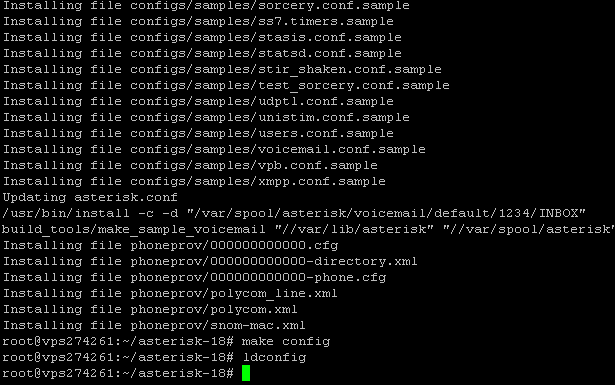
Then, We can move on to installing samples and config files and basic-pbx config files
make samples
make config
make basic-pbx
ldconfig
Step 5 : Creating User and Starting Asterisk
It is always advised to create a non-root user for Asterisk, due to security and other various reasons. In this step, We will create a new user group which will run the Asterisk Services
adduser --system --group --no-create-home --gecos "Asterisk" asterisk
Edit the config file of Asterisk and uncomment the following two lines (Remove the # from behind it) It should look like the folowing
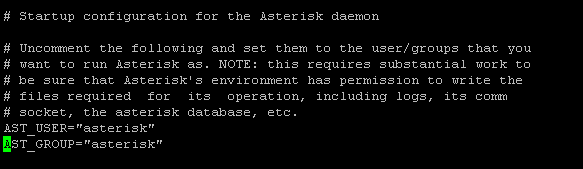
Add the asterisk user to the group:
usermod -a -G dialout,audio asterisk
Now, we have to change the ownership of the Asterisk files to the user:
chown -R asterisk: /var/{lib,log,run,spool}/asterisk /usr/lib/asterisk /etc/asterisk
chmod -R 750 /var/{lib,log,run,spool}/asterisk /usr/lib/asterisk /etc/asterisk
Now, We can finally start Asterisk 18 on our server by running the following command:
systemctl start asterisk
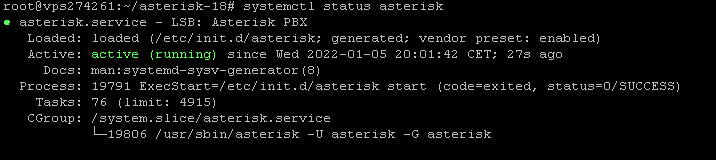
To check if asterisk is running run the following command
systemctl status asterisk
To enable asterisk on boot run the following command
systemctl enable asterisk
Run the following command to verify and to connect to Asterisk CLI
asterisk -rvv

If you see the following output this means that Asterisk 18 has been successfully setup on your VPS/Server. This tutorial was tested on Ubuntu 20.04 and Debian 10 and is expected to work smoothly for Ubuntu 18.04 and Debian 9 too.