
Following the previous article where you’ve installed TeamCity server. In this post, you will learn how to install TeamCity Agent on Linux machine.
TeamCity is a build management and continuous integration tool which supports a variety of version control systems and build runners. It is a commercial tool and licensed under a proprietary license, Freemium software license up to 100 build configurations and 3 free build agents are available.
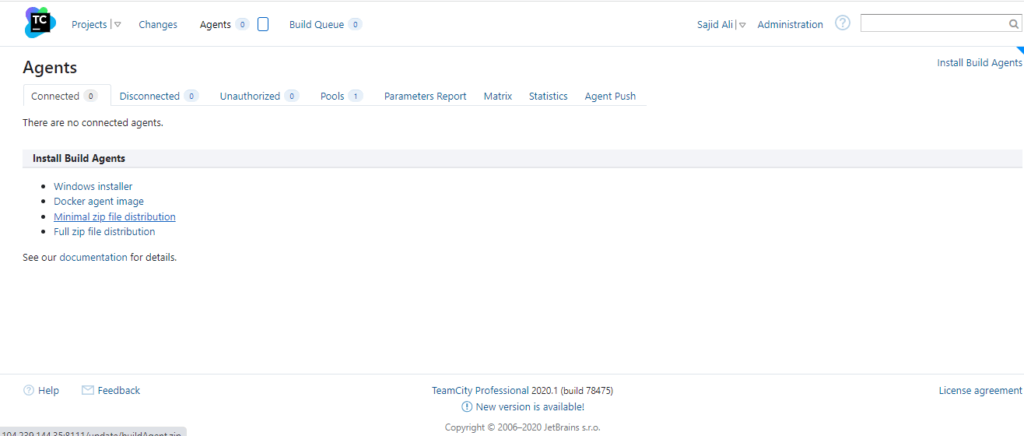
Download TeamCity Agent:
Access the TeamCity server on your web browser, click the Agent tab and copy the link address “Full zip file distribution”
Now, go to the Agent machine and download build agent package using wget command.
# wget https://teamcity-server.com:8111/update/buildAgentFull.zip
Install the unzip package if not installed already.
# yum install unzip
Extract buildAgent package using unzip command.
# unzip buildAgentFull.zip
Installing Java JDK package and setting up environment.
Team City is a Java Based application and therefore needs the JRE & JDK installed with the JAVA_HOME environment variable pointing to the Java installation directory.
To install Java on your machine follow these steps
# yum install java-1.8.0-openjdk
Check your Java Version:
# java -version

Export the JAVA_HOME:
# export JAVA_HOME=/usr/lib/jvm/java-1.8.0-openjdk-1.8.0.252.b09-2.el7_8.x86_64/jre/bin/java
# echo $JAVA_HOME

Install TeamCity Agent:
First, go to the teamcity-agent directory:
# cd teamcity-agent/
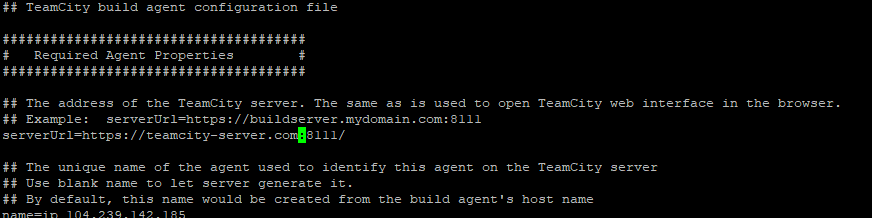
Then, create a new configuration file based on the distributed one:
# cp conf/buildAgent.dist.properties conf/buildAgent.properties
# vi buildAgent.properties
Make the necessary adjustments to your configuration file, changed the default URL (which is http://localhost:8111) to your teamcity server Url like https://teamcity-server.com:8111/
Then, Set execution permissions to the script that starts the Agent:
chmod +x /opt/TeamcityAgent/bin/agent.sh
After that, start the Agent:
sudo TeamcityAgent/bin/agent.sh start

Give it some time so both applications can connect.

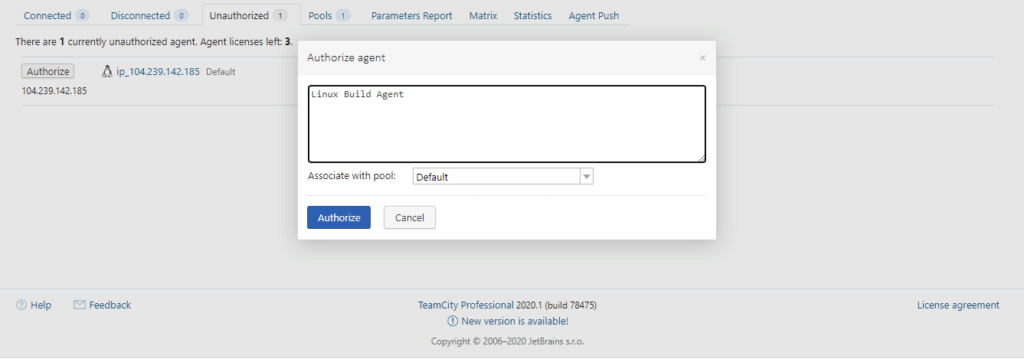
Go back to TeamCity’s page in your browser and you should see you one agent in the unauthorized tab.
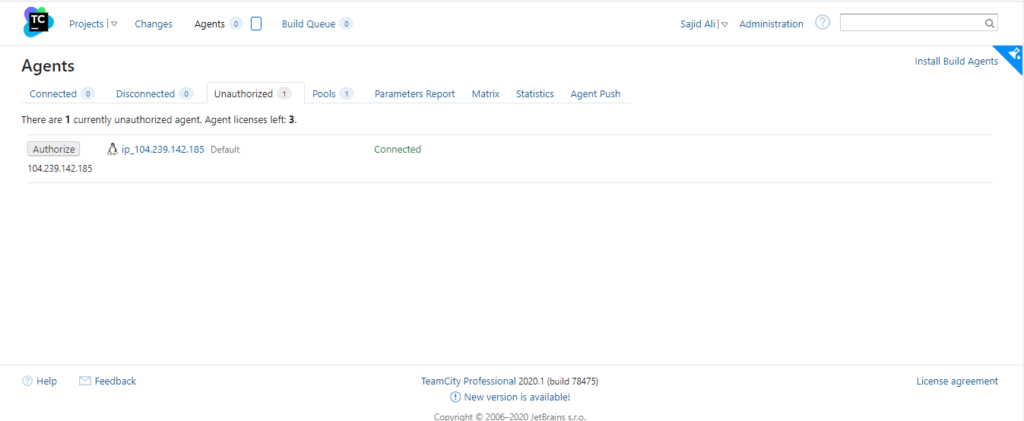
Click on the Authorize button to Authorize the Agent.
Give it some time so both applications can connect and you should see it in the Connected tab

Finally, click on the agent and you’ll see the following information.
Connected since 18 Dec 21 19:08, last communication date 19 Dec 21 19:22Authorized on 18 Dec 21 19:12 by Sajid Ali with comment: Linux Build Agent Unauthorize agentEnabled Disable agent

Final Words:
That’s it. By now you should have a running teamcity agent. In the next article we’ll create project and build configuration.
thanks, it worked like a charm.