
Hello, friends. In this post, you will learn how to install Akaunting on Debian 11. Thanks to it, you will be able to manage your money properly. Let’s go for it.
What is Akaunting?
According to the official website of the application
Akaunting is a free, open-source, and online accounting software for small businesses and freelancers.
In other words, it can help us do our personal accounting. Although it is focused on individual users or small businesses, the truth is that it more than fulfills its function.
From Akaunting you can expect bank account management, taxes, online payments and a powerful reporting system that will help you not to lose anything at all. In addition to this, it supports multiple currencies, discounts and more.
Being a web application and open source, it is possible to install it on any Linux distribution and even on other operating systems.
Let’s go for it, then.
Install necessary packages
Before installing Akaunting, we have to prepare our system with a web environment. So, before we start, let’s achieve this goal.
Open a terminal or connect via SSH to your server and update it.
sudo apt update
sudo apt upgrade
If you do not have sudo access, then run the commands as root.
Next, install both wget and unzip which are necessary to complete the tutorial.
sudo apt install wget unzipInstall a web environment with LAMP on Debian 11
The next step is to install a working web server for Akaunting to run. To complete this, we will choose the LAMP stack, which contains everything and is easy to install.
With a single command, you can install Apache, PHP, and the PHP modules we need.
sudo apt install apache2 php7.4 libapache2-mod-php7.4 php7.4-json php7.4-common php7.4-gmp php7.4-curl php7.4-mysql php7.4-intl php7.4-sqlite3 php7.4-bcmath php7.4-mbstring php7.4-xmlrpc php7.4-gd php7.4-cli php7.4-xml php7.4-zip php7.4-imapThereafter, you should install MariaDB.
sudo apt install mariadb-serverPreparing MariaDB for the installation of Akaunting
When you finish installing MariaDB, you have to set a new password for the root user. You can do this by running.
sudo mysql_secure_installationThere you will have to log in by pressing Enter because there is no root password defined. Then, you can set one and finally secure the installation by answering Y to each of the questions asked.
Next, you have to create a new database for Akaunting as well as a new user to manage it.
Then, access the MariaDB console:
sudo mysql -u root -pFirst create the database with the name you want.
CREATE DATABASE akaunting;Then, create the user who has permissions on it.
GRANT ALL PRIVILEGES ON akaunting.* TO 'user'@'localhost' IDENTIFIED BY 'pss';You must establish a strong password and not the one that I show you as example.
Refresh the permissions and exit the console.
FLUSH PRIVILEGES;
exit;
Download Akaunting on Debian 11
Now it is time to download Akaunting. For this, we will use the wget command.
wget -O akaunting.zip https://akaunting.com/download.php?version=latest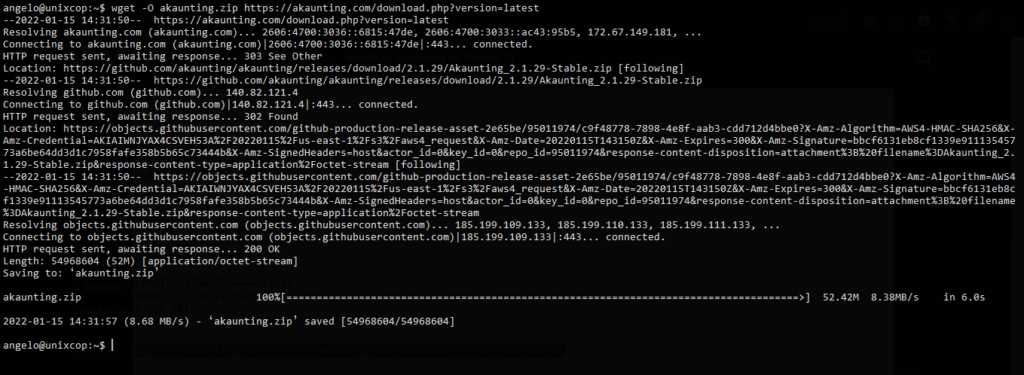
Create a new folder to store the data that will be generated.
sudo mkdir -p /var/www/akaunting/And unzip the file in the folder:
sudo unzip akaunting.zip -d /var/www/akaunting/Then make apache the owner of the folder and make it have appropriate permissions.
sudo chown www-data:www-data -R /var/www/akaunting/ && sudo chown www-data:www-data -R /var/www/akaunting/Then, create a new virtual host for Akaunting
sudo nano /etc/apache2/sites-available/akaunting.confAnd inside that file, add the following
<VirtualHost *:80>

    ServerAdmin localhost
    DocumentRoot /var/www/akaunting/
    ServerName your-domain

    <Directory /var/www/akaunting/>
        DirectoryIndex index.php
        Options +FollowSymlinks
        AllowOverride All
        Require all granted
    </Directory>

    ErrorLog ${APACHE_LOG_DIR}/error.log
    CustomLog ${APACHE_LOG_DIR}/access.log combined

</VirtualHost>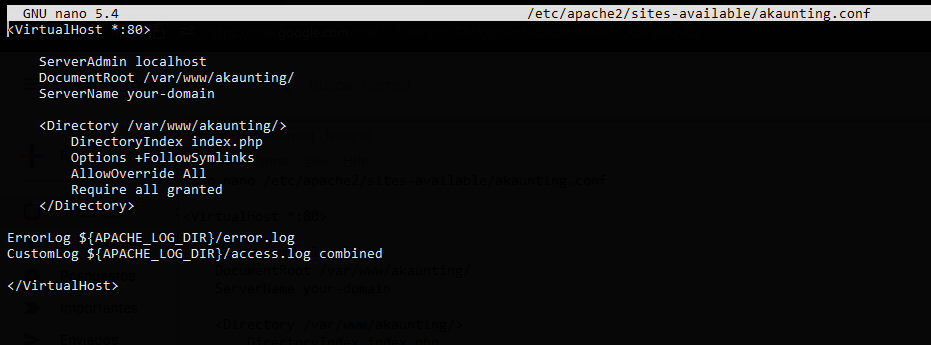
Remember that you have to replace ServerName with your domain.
Save the changes and close the editor.
To apply the changes, run
sudo a2ensite akaunting.confAnd enable the rewrite module.
sudo a2enmod rewriteFinally, restart Apache
sudo systemctl restart apache2Complete Akaunting installation
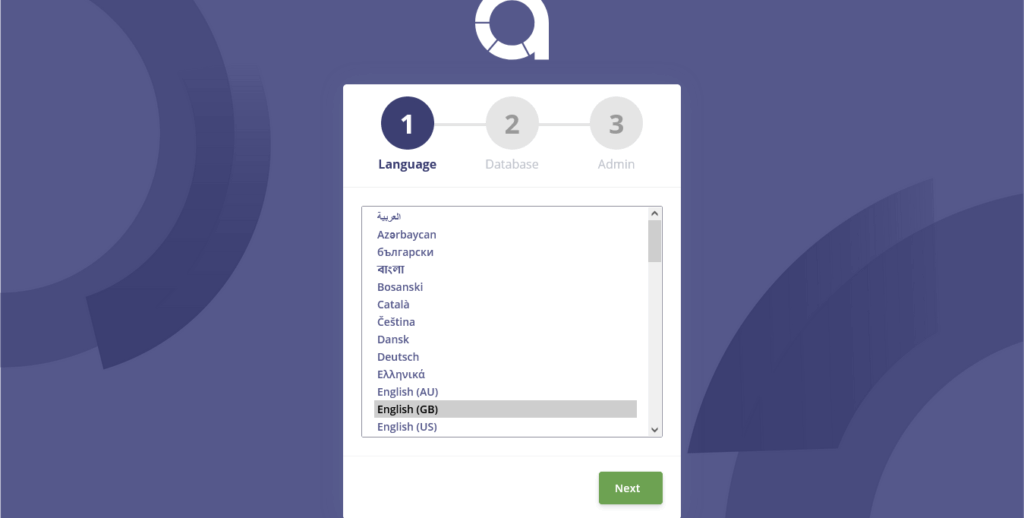
After this, we will have to open a trusted web browser and visit http://your-domain and you will see the installation wizard.
First, choose the installation language.
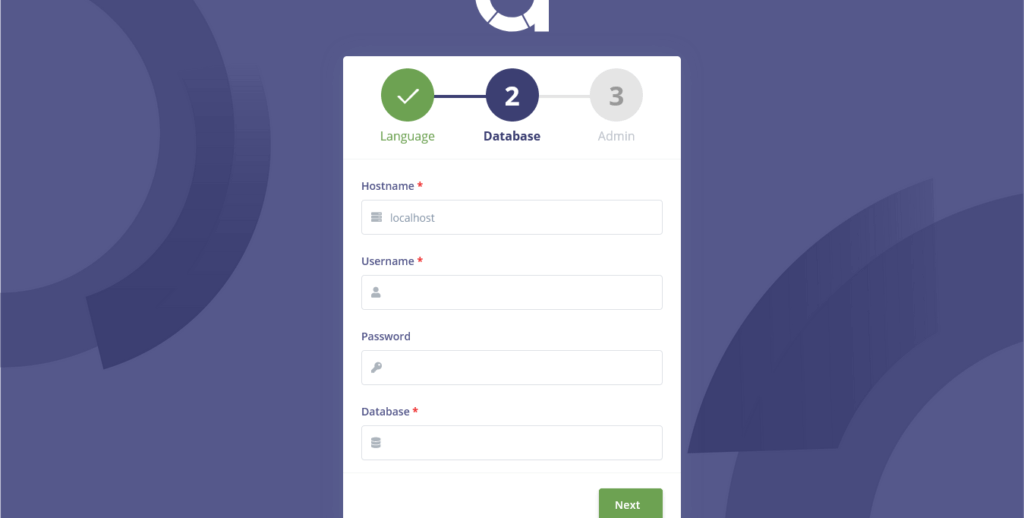
Then set the database connection parameters.
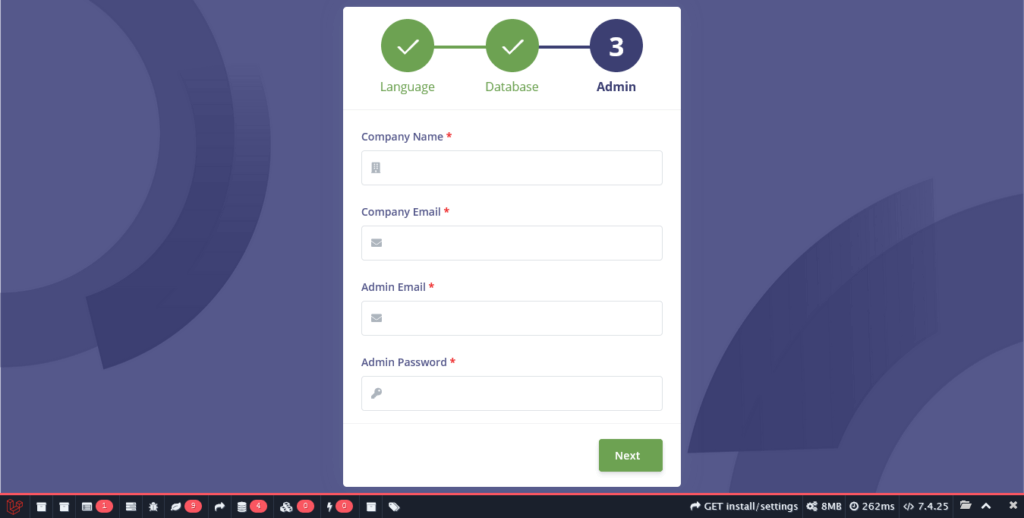
If all goes well, you will then be able to define the administrator user and company information.
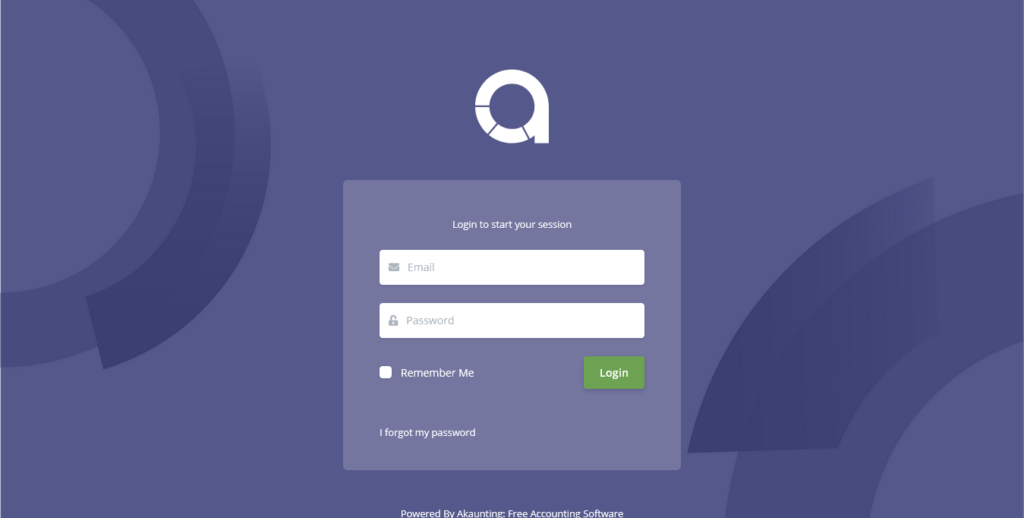
Then you have to log in with your institutional email and password configured before.
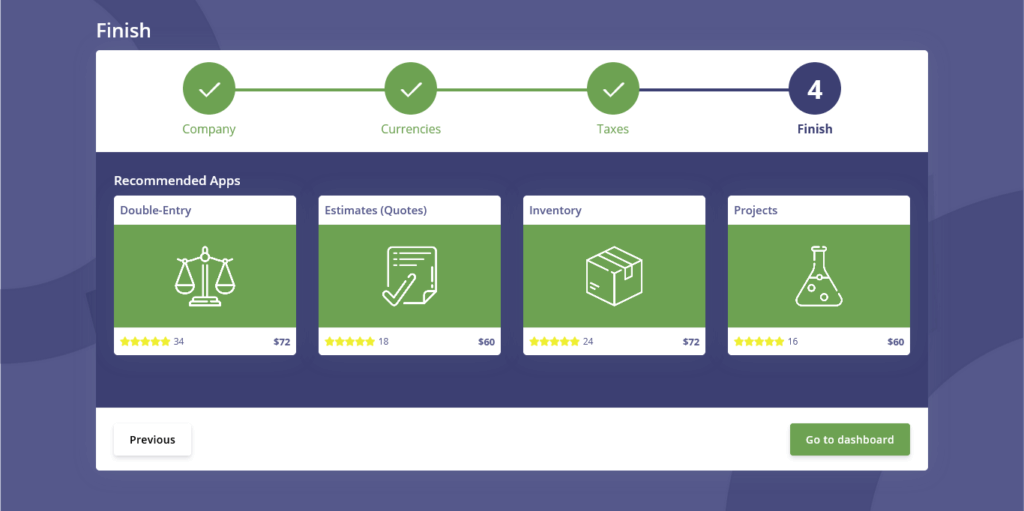
Thereafter, you will have to define the detailed information on your site. You can skip this step. Then configure the currencies and taxes.
Finally, you will have the option to add plugins or apps to Akaunting.
Then, you will be able to see the dashboard.
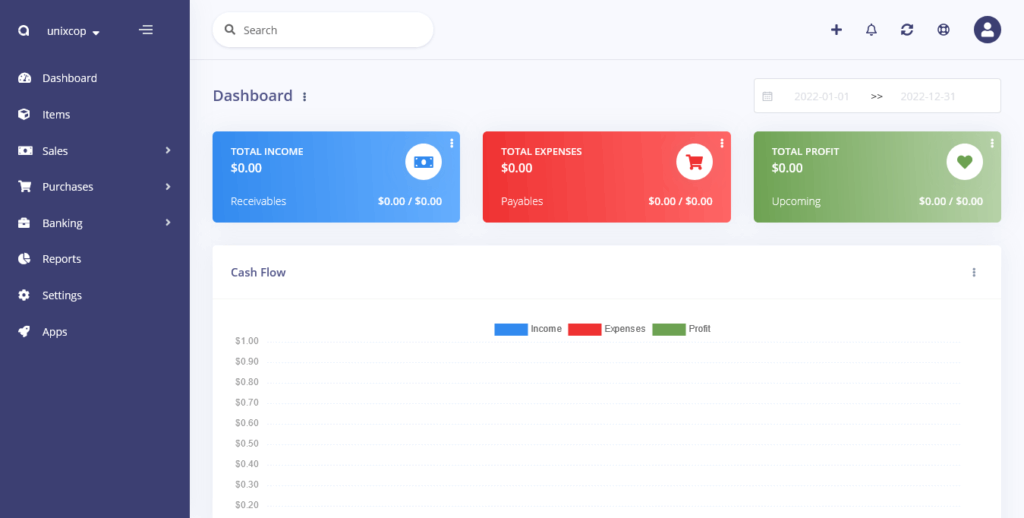
Congratulations, you have successfully installed Akaunting on Debian 11.
Conclusion
In this post, you have learned how to install Akaunting on Debian 11 step by step in an easy and uncomplicated way.