In this article we will learn How to Setup Openshift Origin on CentOS 8.
OpenShift is an open-source PaaS platform that allows you to deploy an application on the cloud. It supports many programming languages including, Python, PHP, Perl, Node.js, Ruby, and Java. You can also add support for other languages. It is specially designed for a high-availability and scalable application platform. Moreover, It provides an easy way to scale your application as per your demand with zero downtime. It provides a powerful web UI that helps you to monitor container resources, container health, and the IP address of nodes.
First, Update your CentOS 8 machine using the following command:
dnf -y updateInstall and Configure Docker:
OpenShift required docker engine on the host machine for running containers. Install Docker using the following commands:
yum install -y yum-utils device-mapper-persistent-data lvm2
yum-config-manager --add-repo https://download.docker.com/linux/centos/docker-ce.repo
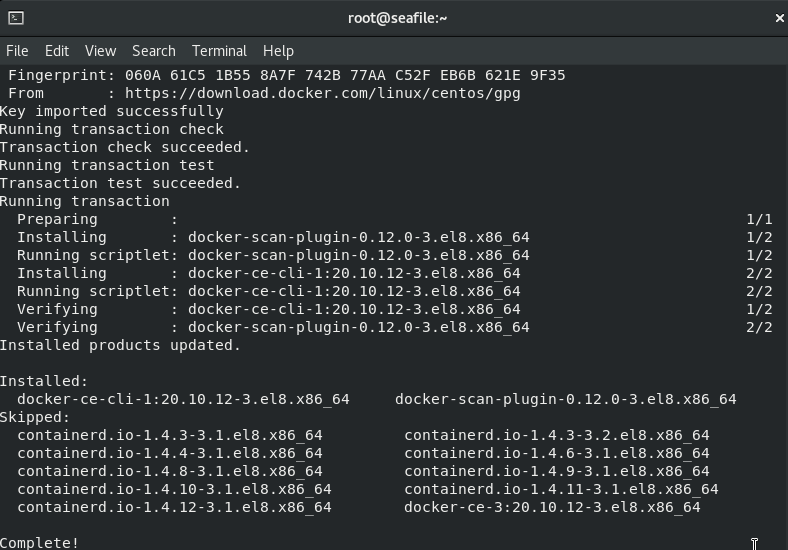
yum install -y docker-ce docker-ce-cli containerd.io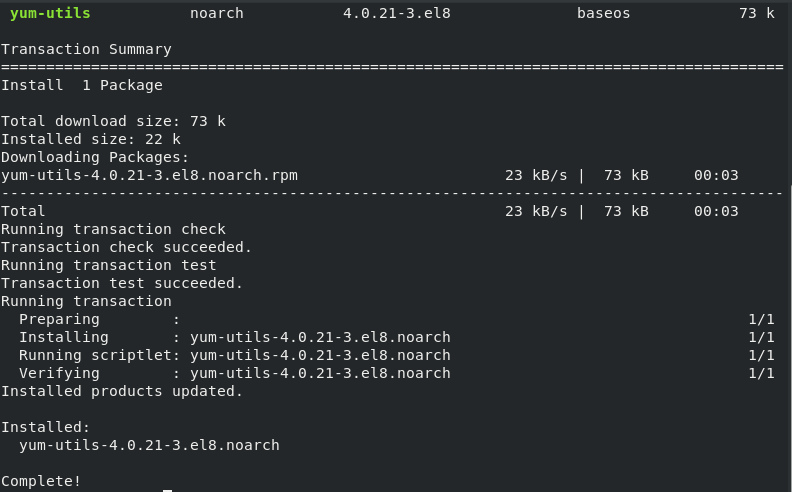

Now we will add user to Docker group.
usermod -aG docker $USER
newgrp docker
After that, we will configure the Docker daemon with an insecure registry parameter of 172.30.0.0/16 using the following commands:
mkdir /etc/docker /etc/containers

sudo tee /etc/containers/registries.conf<<EOF
[registries.insecure]
registries = ['172.30.0.0/16']
EOF

sudo tee /etc/docker/daemon.json<<EOF
{
   "insecure-registries": [
     "172.30.0.0/16"
   ]
}
EOF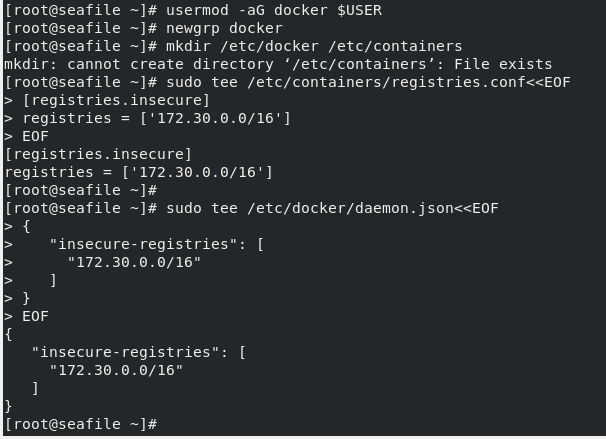
Now we will reload systemd and restart docker to apply above configurations.
systemctl daemon-reload
systemctl restart docker
Enable Docker so that it can automatically start after boot.
systemctl enable docker
Now, enable IP forwarding on your system using the following command:
echo "net.ipv4.ip_forward = 1" | sudo tee -a /etc/sysctl.conf
sysctl -p
Now we will allow containers access to the OpenShift master API (8443/tcp) and DNS (53/udp) endpoints in firewall. Use the following commands to do so.
DOCKER_BRIDGE=`docker network inspect -f "{{range .IPAM.Config }}{{ .Subnet }}{{end}}" bridge`
firewall-cmd --permanent --new-zone dockerc
firewall-cmd --permanent --zone dockerc --add-source $DOCKER_BRIDGE
firewall-cmd --permanent --zone dockerc --add-port={80,443,8443}/tcp
firewall-cmd --permanent --zone dockerc --add-port={53,8053}/udp
sudo firewall-cmd --reload
Download the Linux oc binary:
Download the Linux oc binary using the following command:
wget https://github.com/openshift/origin/releases/download/v3.11.0/openshift-origin-client-tools-v3.11.0-0cbc58b-linux-64bit.tar.gz
tar xvf openshift-origin-client-tools*.tar.gz
cd openshift-origin-client*/
mv  oc kubectl  /usr/local/bin/
Verify installation of OpenShift client using the following command:
oc version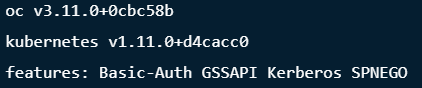
Start OpenShift Origin (OKD) Local Cluster:
Now bootstrap a local single server OpenShift Origin cluster by running the following command:
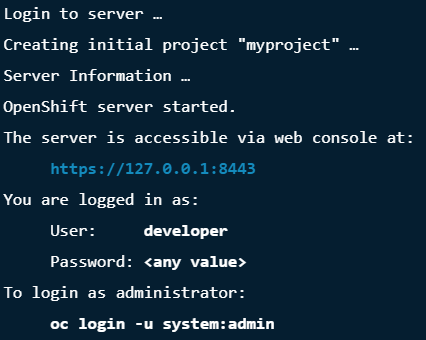
oc cluster upThe command above will:
- Start OKD Cluster listening on the local interface – 127.0.0.1:8443
- Start a web console listening on all interfaces at /console (127.0.0.1:8443).
- Launch Kubernetes system components.
- Provisions registry, router, initial templates, and a default project.
- The OpenShift cluster will run as an all-in-one container on a Docker host.
After successful installation you will see the following message:
Check the cluster status using the following command:
oc cluster status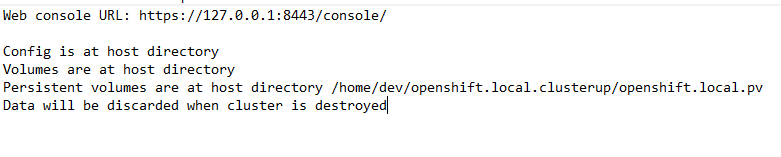
To login as an administrator, use the following command:
oc login -u system:admin
You can check the nodes status using the following command:
oc get nodes
To display the status of your created resources use the following command:
oc status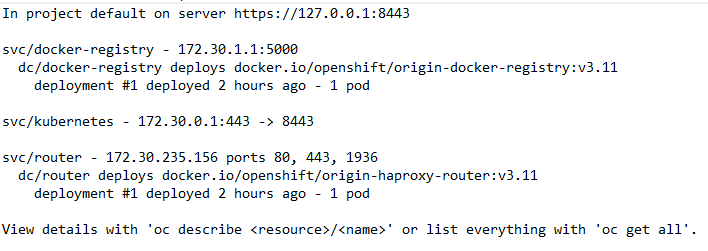
To switch user to developer use the following command:
oc login
You can check whether developer user is logged in using the following command:
oc whoami
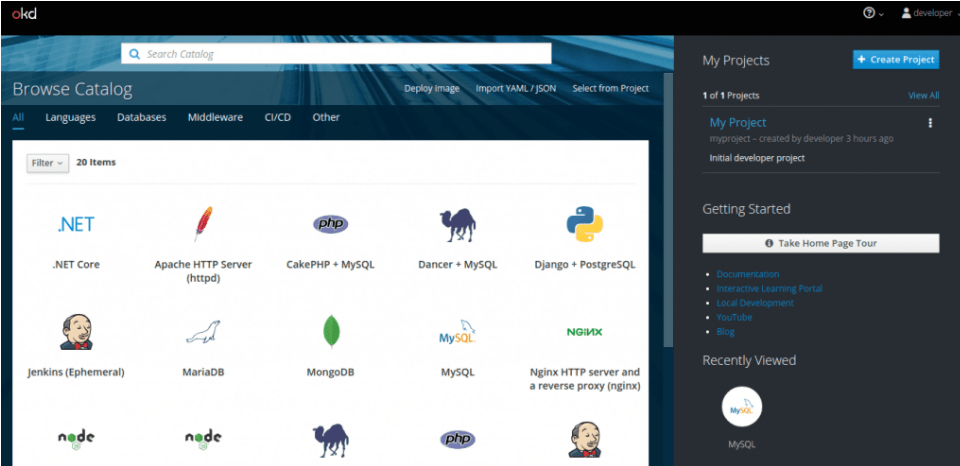
Using OKD Admin Console:
OKD includes a web console which you can use for creation and management actions. This web console is accessible on Server IP/Hostname on the port 8443 via https.
https://YourIPAddress:8443/console
User developer as username and password.
You will see the following page:
If you are redirected to https://127.0.0.1:8443/ when trying to access OpenShift web console, then perform the following steps:
First, stop the cluster:
oc cluster downThen, Edit the configuration file using the following command:
nano ./openshift.local.clusterup/openshift-controller-manager/openshift-master.kubeconfigLocate line “server: https://127.0.0.1:8443“, then replace with “server: https://YourIPAddress:8443”.
Now, Start the cluster using the following command:
oc cluster upWe have successfully Setup Openshift Origin on CentOS 8. You can now use it according to your need.
Hi, i Follow all steps but i have a command not found from oc version