
Zabbix Agent is a program that works on remote client machines, which need to be monitored by the Zabbix server.
The agent gathers the data from the remote client machines and sends it to the Zabbix server. All the remote client machines which are required to be monitored need agent installed on them.
Agent works on two mechanisms:
Active Check : In this mechanism Zabbix agent send the data to server when a request is made.
Passive check : In this mechanism agent send data to server periodically in scheduled time intervals.
In this tutorial I will guide you with all the basic steps of installing the Zabbix Agent on your client side machines. So make sure to go through all the steps. After successful installation of zabbix agent I will also guide you with the steps of adding hosts at the zabbix server end.
STEP (1) First and the most important thing to do is disabling the SELinux so that it allows the zabbix agent to work without any interference.
For doing that enter the below command, open the file and make SELinux Disabled:
$ vim /etc/selinux/config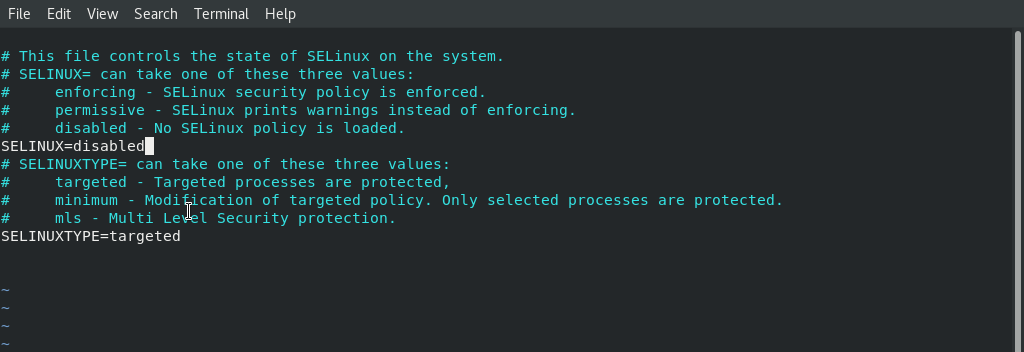
To apply the changes restart the server once.
STEP (2) Installing Zabbix Agent
Zabbix packages are not available in CENTOS 8 by default. So we need to configure zabbix repository in our system. So we will now install the zabbix repository package. I am installing the 5.0 version. You can install the latest on as per your requirements. Enter the foloowing command:
$ dnf install https://repo.zabbix.com/zabbix/5.0/rhel/8/x86_64/zabbix-release-5.0-1.el8.noarch.rpm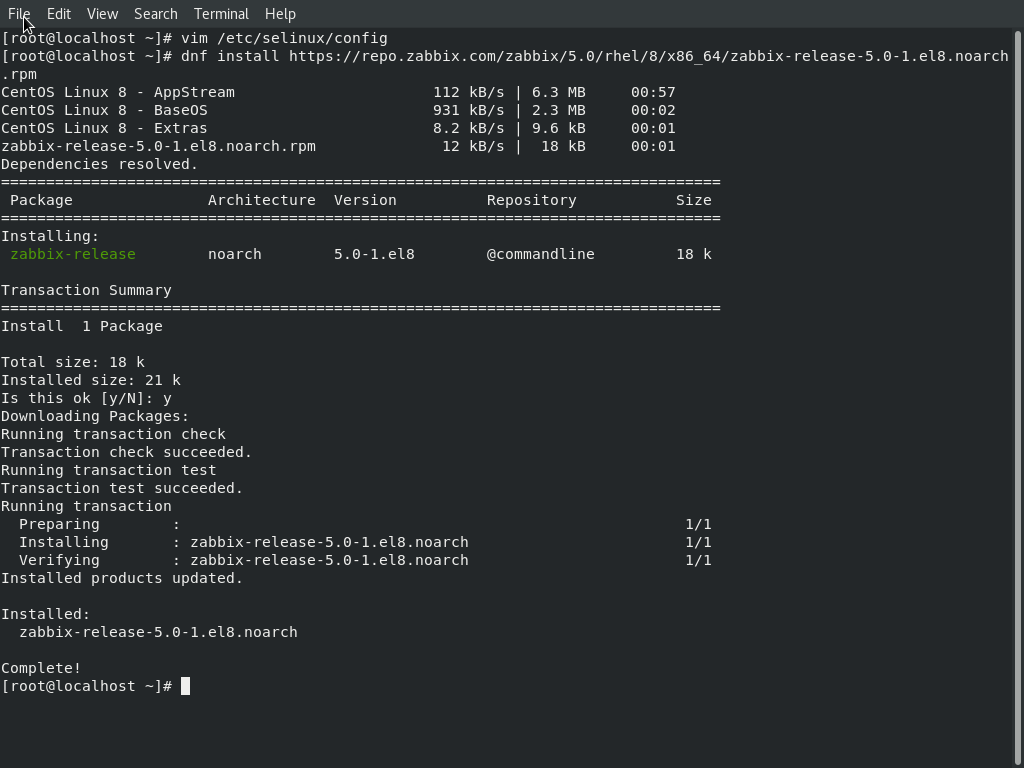
After installing the repository packages we will install Zabbix Agent on our CENTOS 8 with the help of package management tool. To do that enter the following:
$ dnf install zabbix-agent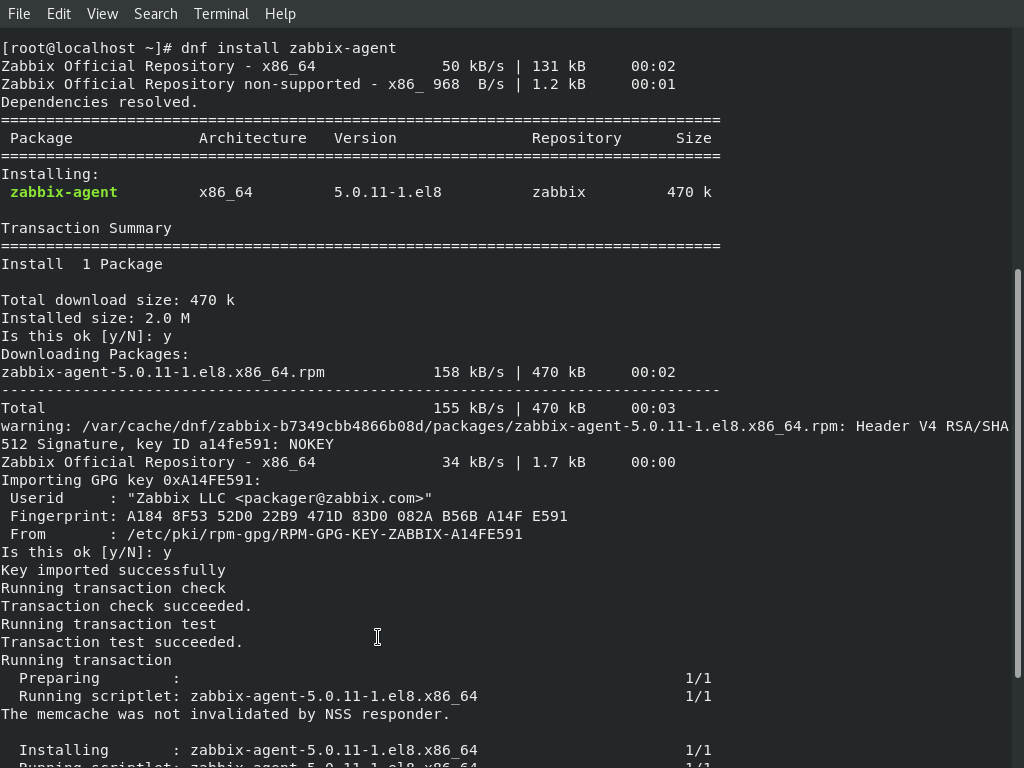
STEP (3) Zabbix Agent configuration
Now configure the Agent to allow the response to the zabbix server requests. In the Agent configuration file add the zabbix 'server IP'. Also edit the 'Hostname' of the client as per your need.
$ Vim /etc/zabbix/zabbix_agentd.confIn my case Hostname is unixcopagent.
STEP (4) Fixing the firewall
We will need to allow the zabbix ports 10050 , 10051 and HTTP service through the firewall.To do that enter
$ firewall-cmd --permanent --add-port=10050/tcpNow Reload the firewall
$ firewall-cmd --reload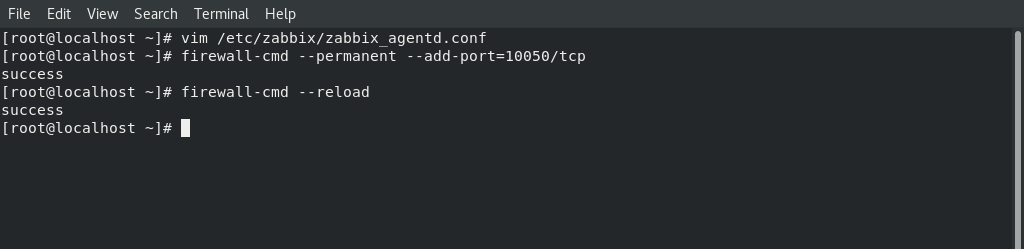
STEP (5) Time to start the Zabbix agent
Now run the following command to start the zabbix agent.
$ systemctl enable zabbix-agentNow to make sure that it gets auto started on every boot ,enter the following
$ systemctl start zabbix-agent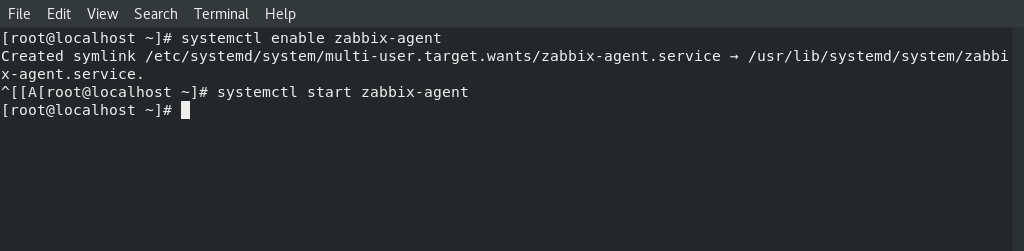
Hurray, We had installed the agent on the client side successfully .Now we will get back to our zabbix server and start adding hosts into it.
Adding Hosts to Zabbix Server
As you are reading this article and I guess you had already configured your Zabbix Server. If not, you can go through my article “How to Download, install and configure Zabbix 5.0 on Centos 8/RHEL 8“ to get help regarding Zabbix server installation.
There are many approaches to add remote client server machines. First approach is to make zabbix server automatically scan the network and add all those client server machines on which Agent services is running. Another approach is add remote hosts manually to the zabbix server.
We will pick the second approach. Now I will guide you all the steps in detail to add the remote hosts server machines to your Zabbix server.
How to add New Hosts in Zabbix Server
Click on the ‘configuration Menu’ of you Zabbix Dashboard
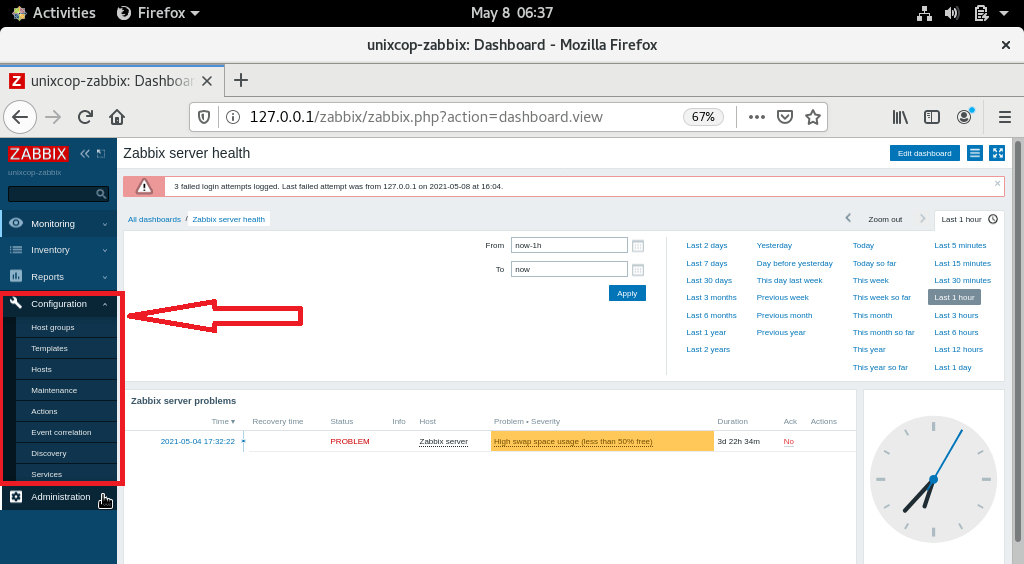
Click on ‘Hosts’ option and then ‘Create Host’

Now add all the details of the Remote Host shown below and click on ‘Add’
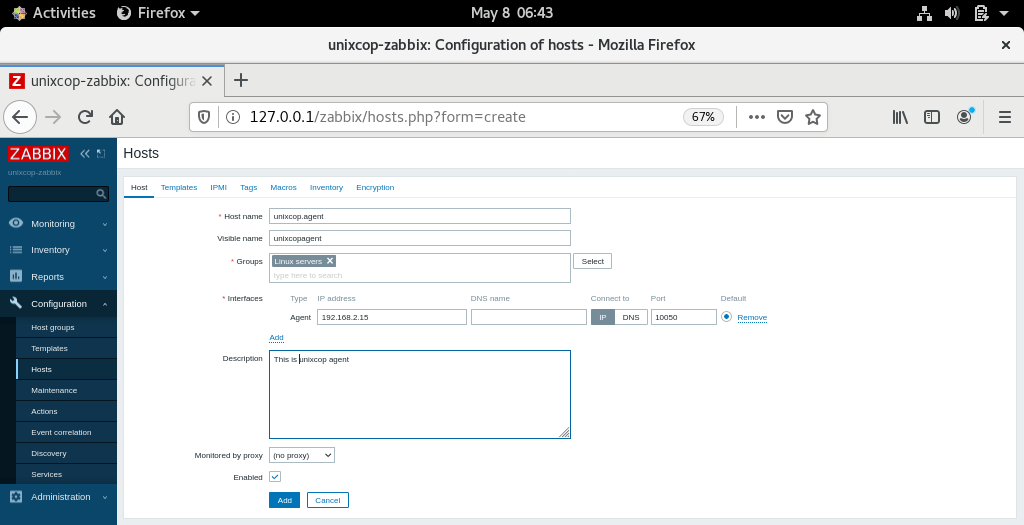
- ‘HOSTNAME’ is the name of the Host.
- ‘VISIBLE NAME’ is the name of your Remote Host that would be displayed on your Zabbix server.
- ‘GROUPS’ is the name of the group of the severs to which you want to assign this remote host.
- ‘INTERFACES’ is the IP address of the interface through which this Remote Host is connected to Zabbix server.
- ‘DESCRIPTION’ is a set of summary about this Remote Host which you want to add.
- You can also enter the PROXY information, if you want and keep it ‘ENABLED’ as default.
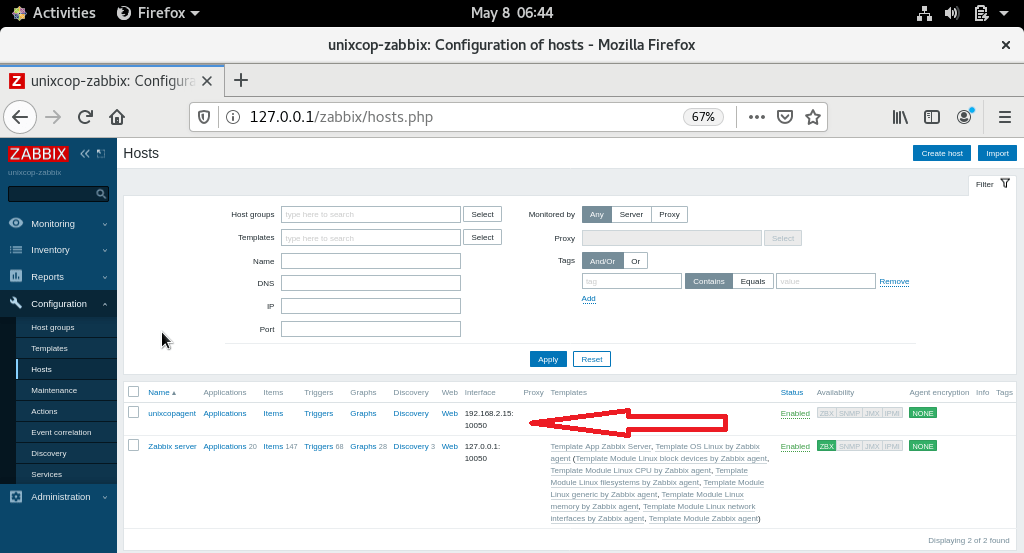
Your Remote Host is successfully added to the list as shown below
CONCLUSION
Finally you got to know that How Remote Hosts can be added to Zabbix server. It’s not a tough task to perform as some of you guys were thinking. I hope this tutorial would be helpful to you.