
Hello, friends. In this post, you will learn how to install YClas on Debian 11.
YClas is a web application created with PHP and open source that allows us to quickly deploy a classifieds website. It is free, but we can also purchase a license to get more and better benefits.
Let’s install it on a Debian 11 server.
Installing LAMP on Debian 11
As it is built on PHP along with web technology, then we need a working web server to deploy it. So to install LAMP on Debian 11 along with the PHP dependencies required by the application run.
sudo apt update
sudo apt install apache2 php libapache2-mod-php php-gd php-gd php-cli php-mysql php-imagick php-zip php-soap php-curl php-mbstring php-common php-json php-opcache php-xml mariadb-server wget unzip
After the whole process is finished, you have to open ports 80 and 443 in your firewall.
After this, we have to configure certain things in PHP. In particular, we have to enable the short_open_tag directive, which is a requirement of YClas.
Open the file
sudo nano /etc/php/7.4/apache2/php.iniAnd change the value of short_open_tag.
short_open_tag = OnSave the changes and restart Apache.
sudo systemctl restart apache2After this, we need to assign a password to the MariaDB root user. To achieve this, run.
sudo mysql_secure_installationYou will be prompted for the root password
Enter current password for root (enter for none):But as there is none defined, just press enter. Then you can change it.
Change the root password? [Y/n]
New password:
Re-enter new password:
Password updated successfully!
Reloading privilege tables...
... Success!
Now secure the installation by answering Y to all questions.
Remove anonymous users? [Y/n]
Disallow root login remotely? [Y/n] Remove test database and access to it?
Remove test database and access to it? [Y/n]
Reload privilege tables now? [Y/n]
After this, access, the MariaDB console to create the new database
sudo mysql -u root -pThen, create the database, the user with his password and refresh all permissions.
CREATE DATABASE yclas;
GRANT ALL PRIVILEGES ON yclas.* TO 'user'@'localhost' IDENTIFIED BY 'pss';
FLUSH PRIVILEGES;
EXIT;
You can change the values to your own.
Download YClas in Debian 11
Now, we can download YClas to the system. This is possible from the /tmp folder.
cd /tmp
wget https://github.com/yclas/yclas/archive/master.zip
Then, unzip the archive into the Apache directory.
sudo unzip master.zip -d /var/www/htmlAlthough it is not mandatory, it is advisable to rename the folder to a simpler name.
cd /var/www/html && sudo mv yclas-master yclasNow make Apache the owner of the folder and assign the correct permissions.
sudo chown -R www-data:www-data yclas
sudo chmod -R 775 yclas
Now create a new Apache Virtual Host for YClas.
sudo nano /etc/apache2/sites-available/yclas.confAdd the following configuration:
<VirtualHost *:80>
     ServerAdmin admin@your_domain.com
     DocumentRoot /var/www/html/yclas
     ServerName yclas.unixcop.com

     <Directory /var/www/html/yclas/>
          Options FollowSymlinks
          AllowOverride All
          Require all granted
     </Directory>

     ErrorLog ${APACHE_LOG_DIR}/yclas_error.log
     CustomLog ${APACHE_LOG_DIR}/yclas_access.log combined
</VirtualHost>
Replace ServerName with the domain name.
Save the changes and close the editor.
Enable the new configuration, the rewrite module and restart Apache.
sudo ln -s /etc/apache2/sites-available/yclas.conf /etc/apache2/sites-enabled/yclas.conf
sudo a2enmod rewrite
sudo systemctl restart apache2
Now we can complete the installation from the web interface.
Install YClas on Debian 11
Now open a web browser and go to your domain to start the installation.
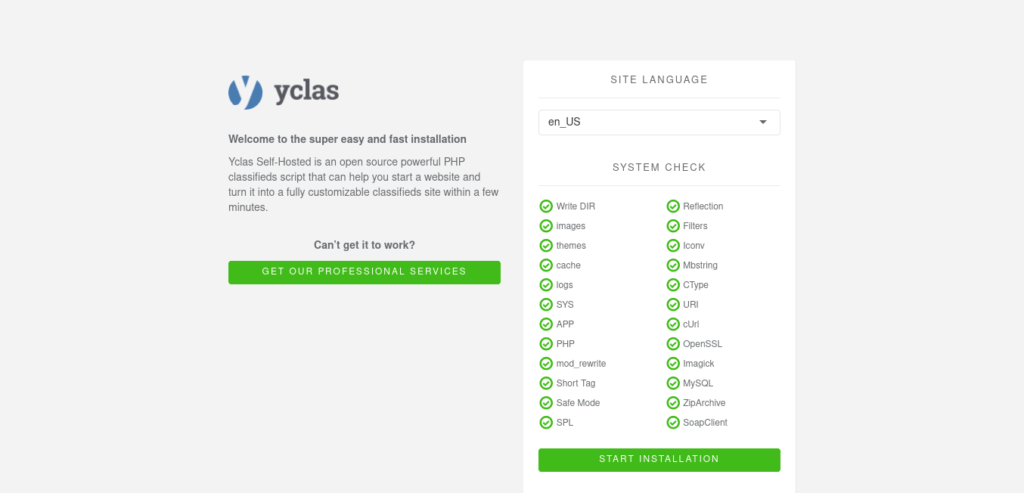
First you will be asked for the language, and it will check if the system meets all the requirements.
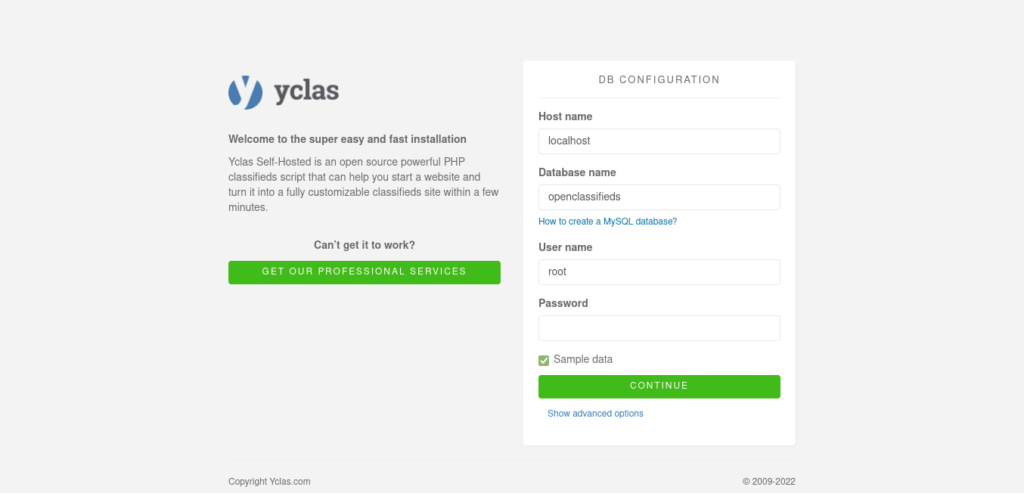
Then configure the database and its connection with the parameters we have defined.
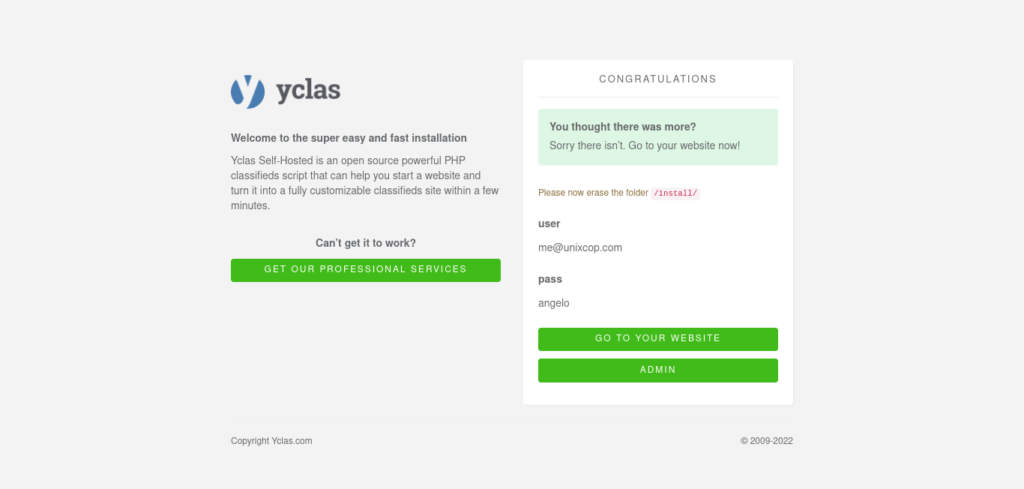
Thereafter, configure the new site by giving it a name and timezone. Also create the admin user.

You will see a screen like this indicating that everything went well.
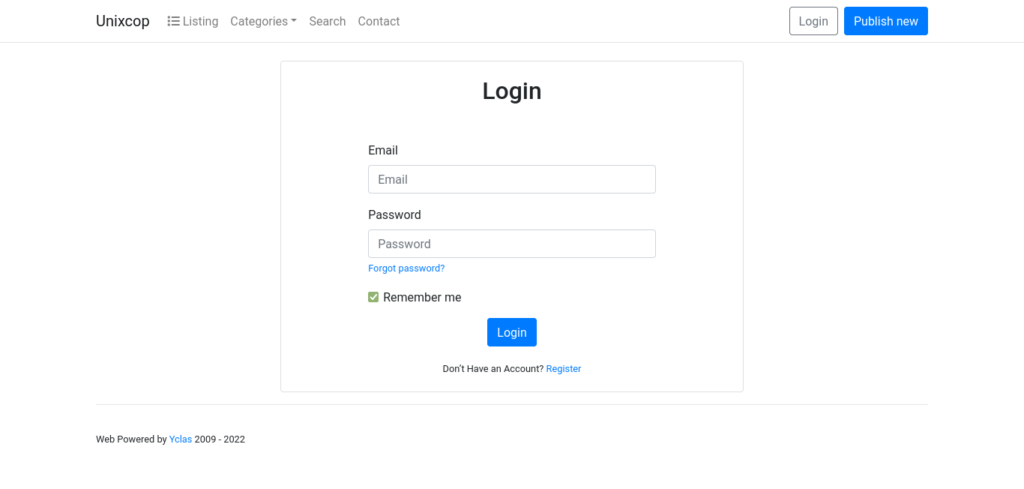
Go to the login page.
And when you log in, you will see the dashboard.

Then everything is fine.
Conclusion
Thanks to this post, you learned how to install YClas on Debian 11.