")
Webmin is an open-source web control panel that allows you to administrate your Linux system through a web browser. With a few clicks, you can manage your users, configure the DNS, or tweak your web server. For those who are not big fans of the command line, this tool will make your server administration smooth and easily manageable.
In this article you’ll install and configure Webmin on your server and secure access to the interface with a valid certificate from Let’s Encrypt. You’ll then use Webmin to add new user accounts, and update all packages on your server from the dashboard.
First, update your server’s package index if you’ve not done so recently:
apt install software-properties-common apt-transport-https wget
apt update
apt upgrade
Secondly, We will add Webmin repository in Ubuntu. Purpose of addition is that we can Install and update using this repository / package manager.
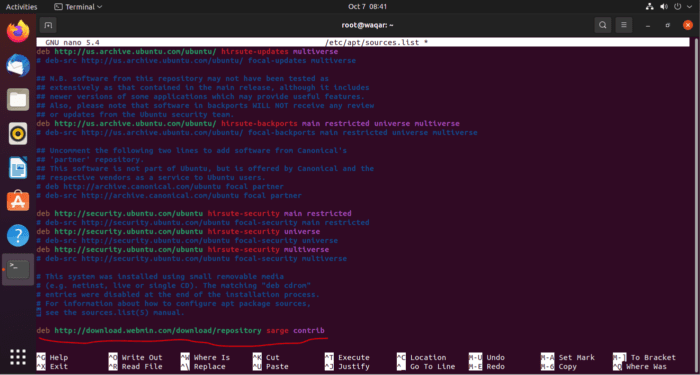
Open the following file using nano / vim editor, whichever you prefer.
nano /etc/apt/sources.listAdd the following line in the file:
deb http://download.webmin.com/download/repository sarge contribsave and quit the file.
Download the Webmin PGP key with wget and add it to your system’s list of keys using the following command:
wget -q -O- http://www.webmin.com/jcameron-key.asc | sudo apt-key add

apt-get update

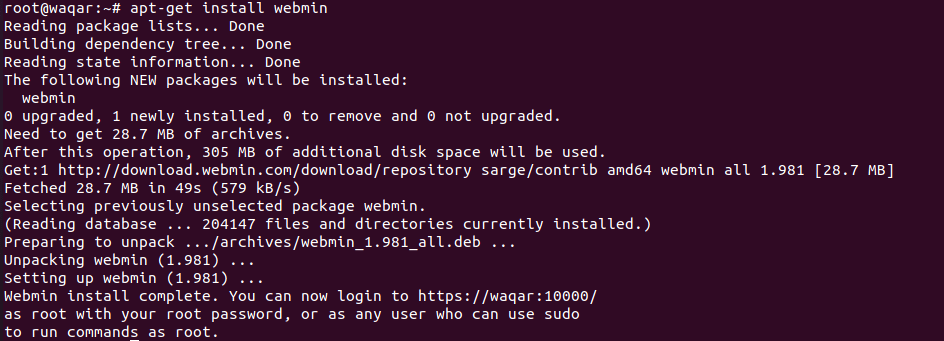
Install Webmin:
Now Install Webmin using following command:
apt-get install webmin
Allow port 10000 through Firewall using the following command:
ufw allow 10000
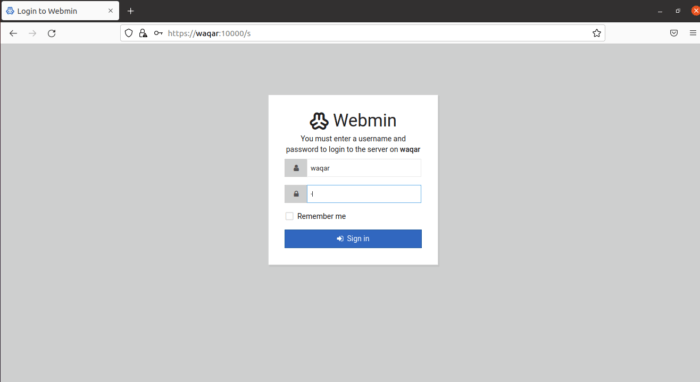
ufw reloadOpen https://your_IP:10000 into your Web Browser then Click on “Advanced” and then click on “I Accept the Risk and Continue”. Provide root account username and password to enter.

Adding a Valid Certificate with Let’s Encrypt:
You must Install Apache2 to use lets Encrypt. You can Install and configure Apache2 from our article https://unixcop.com/how-to-install-mantis-bt-on-ubuntu-21/
Goto Section “Install Apache2 HTTP Server on Ubuntu” and “Configure Apache2”.
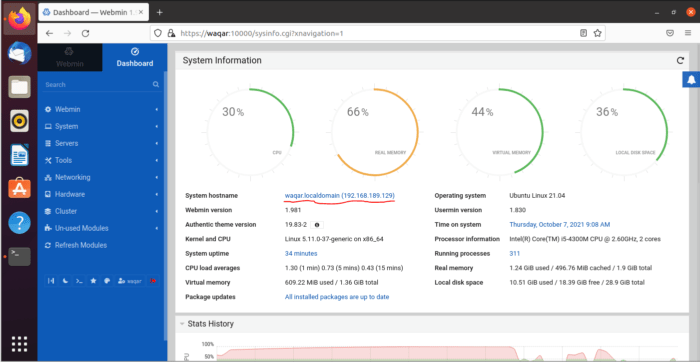
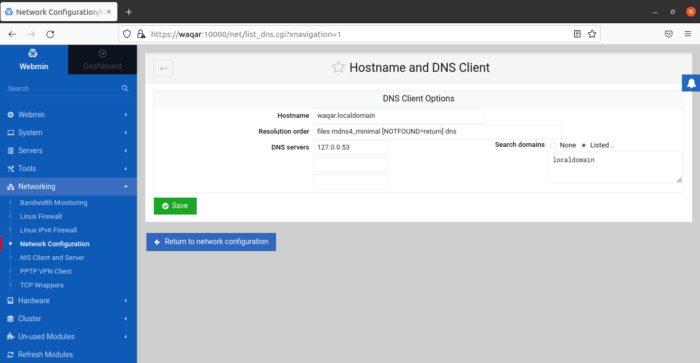
After you login the first screen you will see is Webmin Dashboard. Before you can apply a valid certificate, you have to set the server’s hostname. Look for the System hostname field and click on the link to the right, as shown in the following figure:
This will take you to the Hostname and DNS Client page. Locate the Hostname field, and enter your Fully-Qualified Domain Name into the field. Then click the Save button at the bottom of the page to apply the setting.
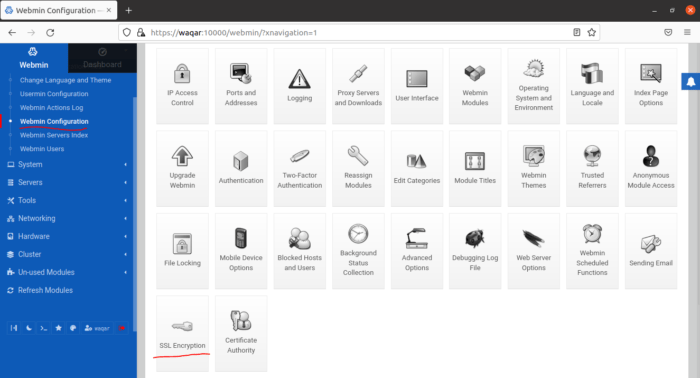
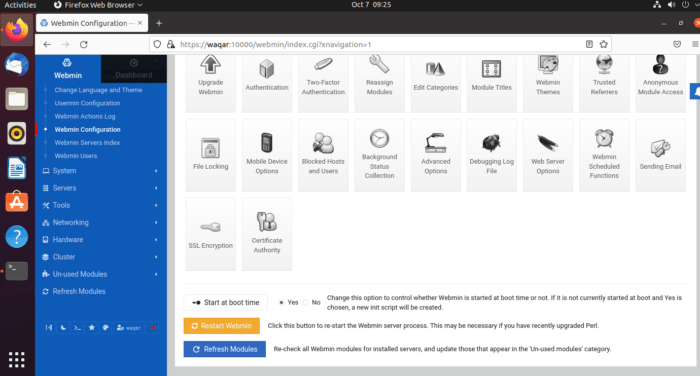
After you’ve set your hostname, click on the Webmin dropdown menu in the left-hand navigation bar, and then click on Webmin Configuration.
From the Webmin Configuration page, select SSL Encryption from the list of icons.
Click on the Let’s Encrypt tab as shown in the following figure:
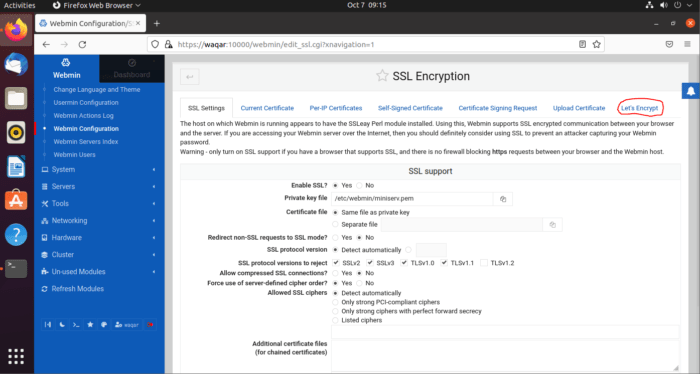
After clicking on Let’s Encrypt you will see the following screen.
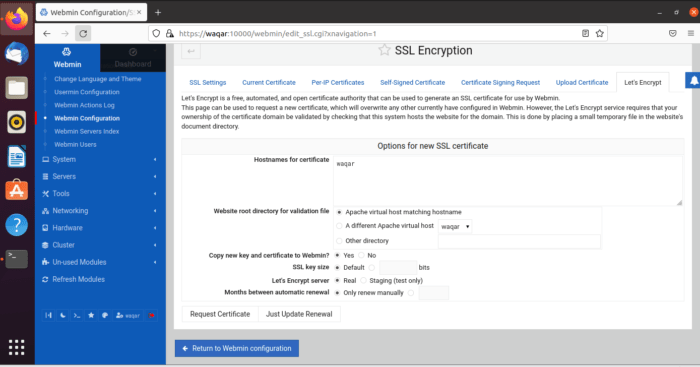
Setting Let’s Encrypt:
You’ll tell Webmin how to obtain and renew your certificate. Let’s Encrypt certificates expire after 3 months, but you can instruct Webmin to automatically attempt to renew the Let’s Encrypt certificate every month. Let’s Encrypt looks for a verification file on the server, so we’ll configure Webmin to place the verification file inside the folder /var/www/your domain in my case it will be /var/www/waqar which is the folder that the Apache web server you configured in the prerequisites uses. Follow these steps to set up your certificate:
- Fill in Hostnames for certificate with your FQDN.
- For Website root directory for validation file, select the Other Directory button and enter your website’s document root this will be /var/www/your domain.
- For Months between automatic renewal section, deselect the Only renew manually option by typing 1 into the input box, and select the radio button to the left of the input box.
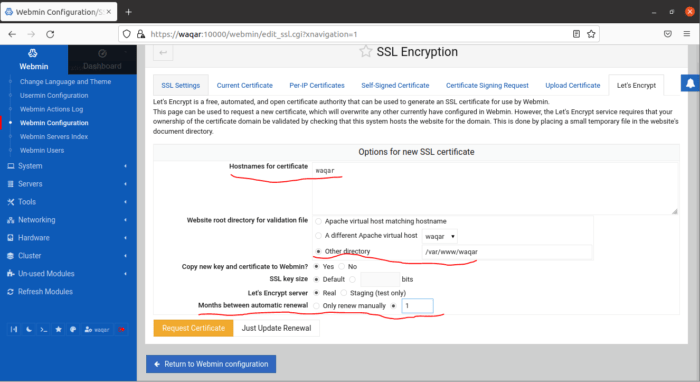

To use the new certificate, click the Return to Webmin configuration button on the confirmation screen. From that page, scroll down and click the Restart Webmin button. Wait around 30 seconds, and then reload the page and log in again. Your browser should now indicate that the certificate is valid.
Now you can use Webmin to do your System Admin tasks easily an effectively.