
RabbitMQ is the most popular open source message broker. and it’s a lightweight application available for most of the popular operating systems. supports multiple messaging protocols. RabbitMQ can be easily deployed in a distributed and federated configurations to meet high-scale, high-availability requirements. This tutorial will help you to install RabbitMQ on CentOS 8.
- Install prerequisites needed to download signing keys and packages over HTTPS
- Add a source list file for the repository
- Update package metadata
- Install Erlang packages required by RabbitMQ
How does it work?
RabbitMQ works by offering an interface, connecting message senders (Publishers) with receivers (Consumers) through an exchange (Broker) which distributes the data to relevant lists (Message Queues).

RabbitMQ Example
They can be used to reduce loads and delivery times of web application servers by delegating tasks that would normally take up a lot of time or resources to a third party that has no other job.
In this guide, we follow a scenario where a web application allows users to upload information to a website. The site will handle this information, generate a PDF, and email it back to the user. Handling the information, generating the PDF, and sending the email will, in this example case, take several seconds.

When and why should you use RabbitMQ?
Message queueing allows web servers to respond to requests quickly instead of being forced to perform resource-heavy procedures on the spot that may delay response time. Message queueing is also good when you want to distribute a message to multiple consumers or to balance loads between workers.
The consumer takes a message off the queue and starts processing the PDF. At the same time, the producer is queueing up new messages. The consumer can be on a totally different server than the producer or they can be located on the same server. The request can be created in one programming language and handled in another programming language. The point is, the two applications will only communicate through the messages they are sending to each other, which means the sender and receiver have low coupling.

- The user sends a PDF creation request to the web application.
- An exchange accepts the messages from the producer and routes them to correct message queues for PDF creation.
- The PDF processing worker (the consumer) receives the task message and starts processing the PDF.
AMQP Advanced message queuing protocol:
AMQP is a widely accepted open-source standard for distributing and transferring messages from a source to a destination. As a protocol and standard, it sets a common ground for various applications and message broker middlewares to interoperate without encountering issues caused by individually set design decisions.
Environmental specifications:
- CPU :4C
- Memory: 8GB
- Storage space: 50 GB
- Operating system: CentOS 8.2
- Host name: rabbitmq.lianglab.cn
- IP address: 192.168.6.176/24
Step 1: update your Linux server
Using SSH client to connect with rabbitmq.lianglab.cn The server is the root user of Linux.
Use the dnf command to update the software package in the Linux server to the latest stable version
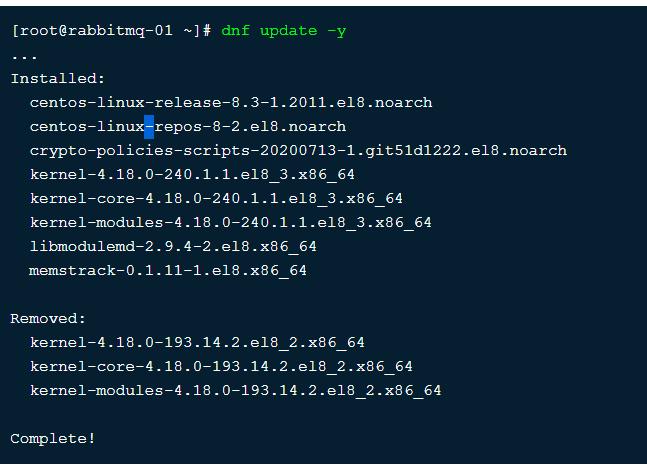
.
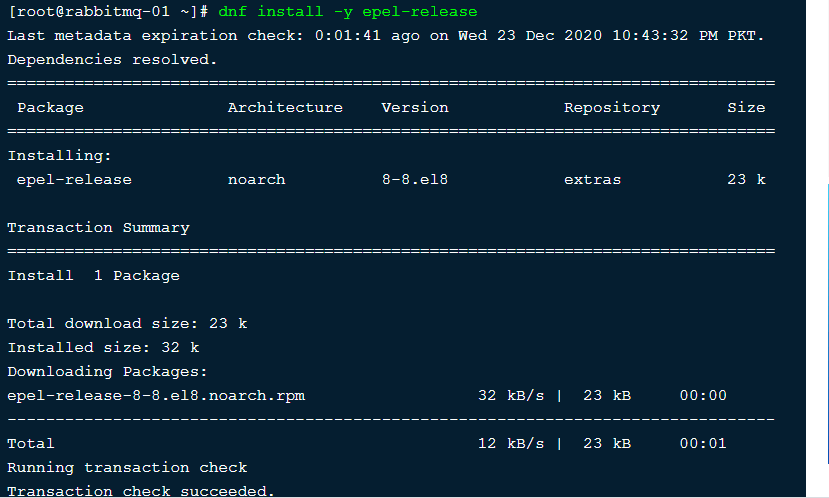
Step 2 – Install Erlang
Some of the required software packages by RabbitMQ server are available in EPEL (Extra Packages for Enterprise Linux) yum repository.
load Erlang repository package from its official website and install on your system.
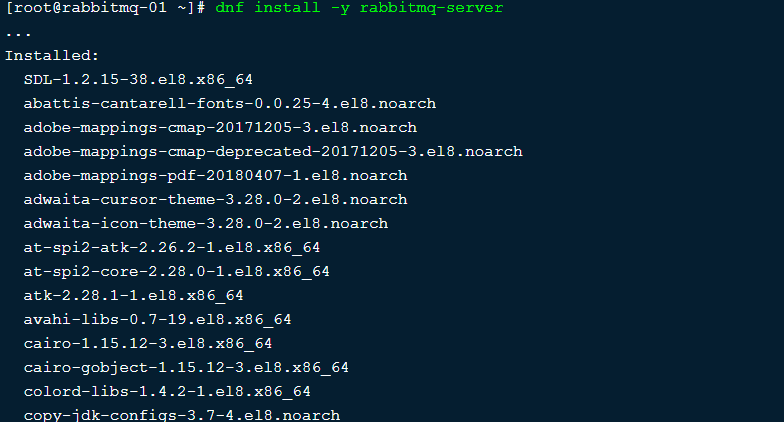
Step 3 – Install RabbitMQ Server
Now, you can easily install RabbitMQ server by using a dnf command.
Step 3 – Manage RabbitMQ Service
After completing above installations, enable the RabbitMQ service on your system. Use one the below methods sysvinit for older systems or systemctl for the latest operating system.
Enable and start RabbitMQ service as follows


Using systemctl – CentOS/RHEL 8
$ sudo systemctl enable rabbitmq-server
$ sudo systemctl start rabbitmq-server
$ sudo systemctl stop rabbitmq-server
Step 4 – Create Admin User in RabbitMQ
By default RabbitMQ creates a user named “guest” with password “guest”. You can create your own administrator account on server . Change password with your own password.
$ sudo rabbitmqctl add_user admin password
$ sudo rabbitmqctl set_user_tags admin administrator
$ sudo rabbitmqctl set_permissions -p / admin ".*" ".*" ".*"
Step 5 – Setup RabbitMQ Web Management Console
it’s provides and web management console for managing the entire MQ service. To enable web management console run below command on your system. The web management console helps you for managing RabbitMQ server.
$ sudo rabbitmq-plugins enable rabbitmq_management
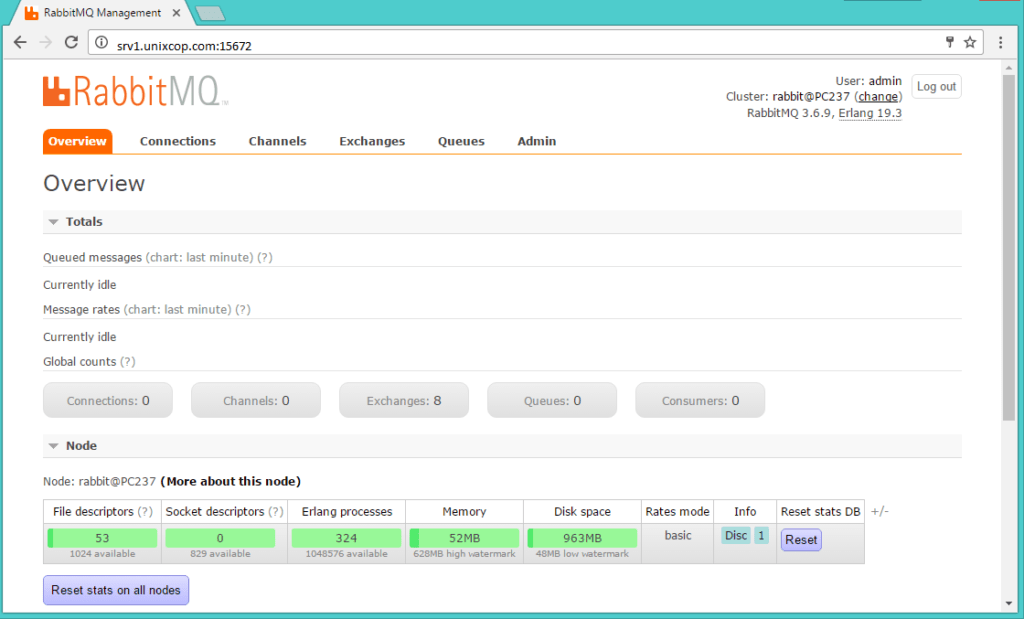
RabbitMQ dashboard starts on port 15672. Access your server on the port to get dashboard. Use the username and password created in step 4
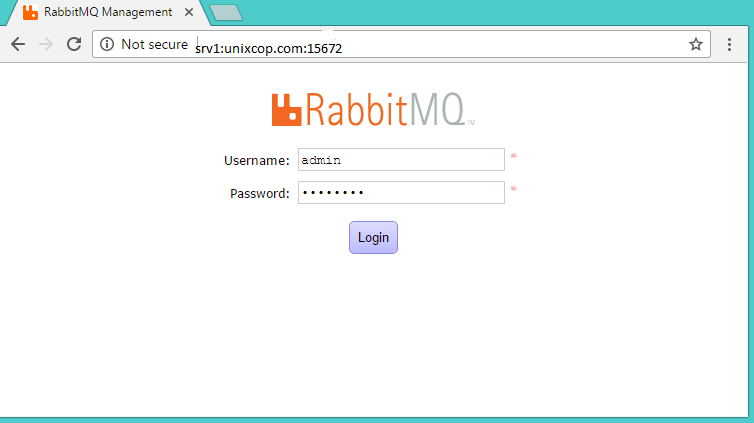
After login, you will get the RabbitMQ management web interface dashboard.
Basic tests with library
The required library librabbitmq-c is now installed and we continue with basic operations with amqp_* tools, located in the examples/ folder of the build directory, testing client server interaction.
Please note, those example applications may not be included in the RPM library packages.
Test 1 – create the exchange
[root@maxscale-02 examples]# ./amqp_exchange_declare
Usage: amqp_exchange_declare host port exchange exchangetype
Declare the exchange:
[root@maxscale-02 examples]# ./amqp_exchange_declare 127.0.0.1 5672 foo direct
Test 2 – Listen to exchange with selected binding key
[root@maxscale-02 examples]# ./amqp_listen
Usage: amqp_listen host port exchange bindingkey
Start the listener:
[root@maxscale-02 examples]# ./amqp_listen 127.0.0.1 5672 foo k1 &
Test 3 – Send a message …
[root@host-02 examples]# ./amqp_sendstring
Usage: amqp_sendstring host port exchange routingkey messagebody

[root@host-02 examples]# ./amqp_sendstring 127.0.0.1 5672 foo k1 “This is a new message”
… and watch the listener output
Delivery 1, exchange foo routingkey k1
Content-type: text/plain
Step 4 – Configure new applications
The new filter needs to be configured in maxscale.cnf.
[Test Service]
type=service
router=readconnroute
router_options=slave
servers=server1,server2,server3,server5,server4
user=massi
passwd=massi
filters=MQ

[MQ]
type=filter
module=mqfilter
exchange=x1
key=k1
queue=q1
hostname=127.0.0.1
port=5672
logging_trigger=all
Logging triggers define whether to log all or a subset of the incoming queries using these options:
# log only some elements or all
logging_trigger=[all,source,schema,object]

# Whether to log only SELECT, UPDATE, INSERT and DELETE queries or all possible queries
logging_log_all=true|false

# Log only when any of the trigger parameters match or only if all parameters match
logging_strict=true|false

# specify objects
logging_object=mytable,another_table

# specify logged users
logging_source_user=testuser,testuser

# specify source addresses
logging_source_host=127.0.0.1,192.168.10.14

# specify schemas
logging_schema=employees,orders,catalog
Example:
logging_trigger=object,schema,source
logging_strict=false
logging_log_all=false
logging_object=my1
logging_schema=test
logging_source_user=maxtest
The logging result of the example is:
if user maxtest does something, it's logged
and all queries in test schema are logged
anything targeting my1 table is logged
SELECT NOW(), SELECT MD5(“xyz)” are not logged
Please note that if we want to log only the user ‘maxtest’ accessing the schema ‘test’ with target ‘my1’ the option logging_strict must be set to TRUE and if we want to include those selects without schema name the option logging_log_all must be set to TRUE.
The mqfilter logs into the MaxScale TRACE log information about the matched logging triggers and the message delivering:
2021 29/03 06:22:04   Trigger is TRG_SOURCE: user: testuser = testuser
2021 29/03 06:22:04   Trigger is TRG_SCHEMA: test = test
2021 29/03 06:22:04   Trigger is TRG_OBJECT: test.t1 = t1
2021 29/03 06:22:04   Routing message to: 127.0.0.1:5672 / as guest/guest, exchange: x1<direct> key:k1 queue:q1
The consumer application needs to be configured as well:
#The options for the consumer are:
#hostname    RabbitMQ hostname
#port        RabbitMQ port
#vhost        RabbitMQ virtual host
#user        RabbitMQ username
#passwd    RabbitMQ password


#queue        Name of the queue to use
#dbserver    SQL server name
#dbport    SQL server port
#dbname    Name of the database to use
#dbuser    SQL server username
#dbpasswd    SQL server password
#logfile    Message log filename
[consumer]
hostname=127.0.0.1
port=5672
vhost=/
user=guest
passwd=guest
queue=q1
dbserver=127.0.0.1
dbport=3308
dbname=mqpairs
dbuser=xxx
dbpasswd=yyy
We may probably need to modify LD_LIBRARY_PATH before launching ‘consumer’:
# export LD_LIBRARY_PATH=/packages/rabbitmq-c/rabbitmq-c/librabbitmq:/packages/mariadb_client-2.0.0-Linux/lib/mariadb:/usr/lib64
and finally we can launch it:
# ./consumer
If the consumer.cnf file is not in the same directory as the binary file is, you can provide the location of the folder that it is in by passing it the -c flag followed by the path:
# ./consumer -c path/to/file
and start MaxScale as well
Step 5 – Test the filter and check collected data
Assuming that MaxScale and the message consumer are successfully running let’s connect to the service with an active mqfilter:
[root@maxscale-02 MaxScale]#  mysql -h 127.0.0.1 -P 4506 -uxxx -pyyy
...
MariaDB [(none)]> select RAND(3), RAND(5);
+--------------------+---------------------+
| RAND(3)            | RAND(5)             |
+--------------------+---------------------+
| 0.9057697559760601 | 0.40613597483014313 |
+--------------------+---------------------+
1 row in set (0.01 sec)
…
MariaDB [(none)]> select RAND(3544), RAND(11);
we can check the consumer output in the terminal where it was started:
--------------------------------------------------------------
Received: 1409671452|select @@version_comment limit ?
Received: 1409671452|Columns: 1
...
Received: 1409671477|select RAND(?), RAND(?)
Received: 1409671477|Columns: 2

We query now the database for the content collected so far:

MariaDB [(none)]> use mqpairs;
Database changed


MariaDB [mqpairs]> select * from pairs;

+-------------------------------------+----------------------------------+------------+---------------------+---------------------+---------+
| tag                                 | query                            | reply      | date_in             | date_out            | counter |
+-------------------------------------+----------------------------------+------------+---------------------+---------------------+---------+
| 006c006d006e006f007000710072007374  | select @@version_comment limit ? | Columns:  |       3 |
| 00750076007700780079007a007b007c7d  | SELECT DATABASE()                | Columns: 1 |  |       3 |
| 007e007f00800081008200830084008586  | show databases                   | Columns: 1 |  |       3 |
| 008700880089008a008b008c008d008e8f  | show tables                      | Columns: 1 |  |       3 |
| 0090009100920093009400950096009798  | select * from mqpairs.pairs      | Columns: 6 |  |      12 |
| 00fc00fd00fe00ff0100010101020103104 | select NOW()                     | Columns: 1 |  |       1 |
| 01050106010701080109010a010b010c10d | select RAND(?), RAND(?)          | Columns: 2 |  |       1 |
+-------------------------------------+----------------------------------+------------+---------------------+---------------------+---------+
7 rows in set (0.01 sec)
The filter send queries to the RabbitMQ server in the canonical format, i.e select RAND(?), RAND(?). The queries Message Queue Consumer application gets from the server are stored with a counter that quickly shows how many times that normalized query was received:
| 01050106010701080109010a010b010c10d | select RAND(?), RAND(?) | Columns: 2 | | 3 |