
In this tutorial I will show you how to setup a basic router and firewall with pfSense. With some practice and reading you could turn later on an advanced router with the firewall capabilities you could need on your network.
pfSense is an special distribution of FreeBSD intented for network routing and firewall and is rapidly becoming the world’s most trusted open source network security solution…. at least they said so, speaking only for me: I trust in this solution.
Network scenario
I made up a network for this article, consisting in:
- A mini LAN with a pc and a WebServer that we’ll enable access only to the http service from the outside world
- Another computer where we will install pfSense for routing data packages between that LAN and the internet. This computer will have two network cards.
- My own PC will live on the internet
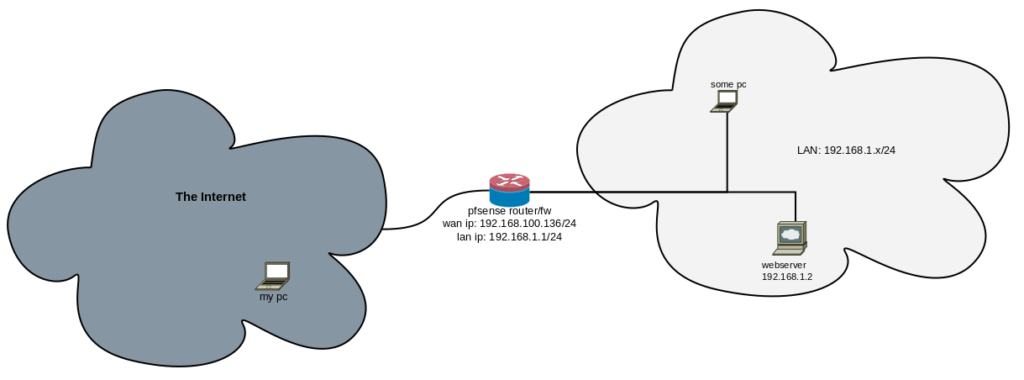
But… there is a but: I’m working at home today and I don’t have 4 computers. I have VirtualBox, so I’m setting up everything on my PC and the other pc, the router and the webserver are actually virtual machines.
Installing
You can download the community edition from here: https://www.pfsense.org/download/ you can choose for a CD image to burn on a physical disk or an USB image depending or what you have.
On the main site you can also pay for commercial support or appliances, get access to the documentation, etc.
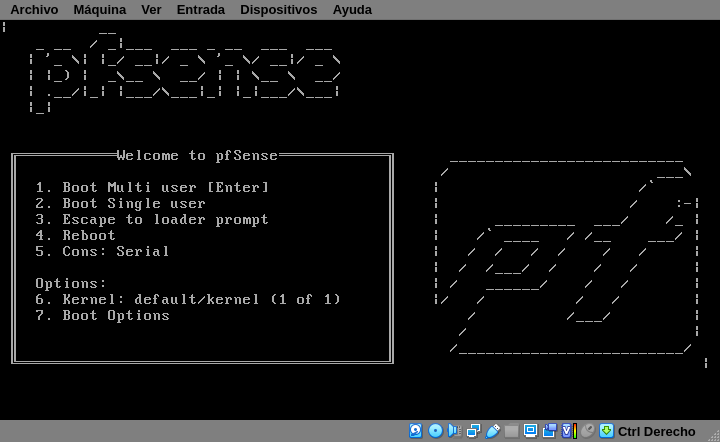
In that bootloader screen, just hit the Enter key, let pfSense boot and wait until you see the following Copyright notice
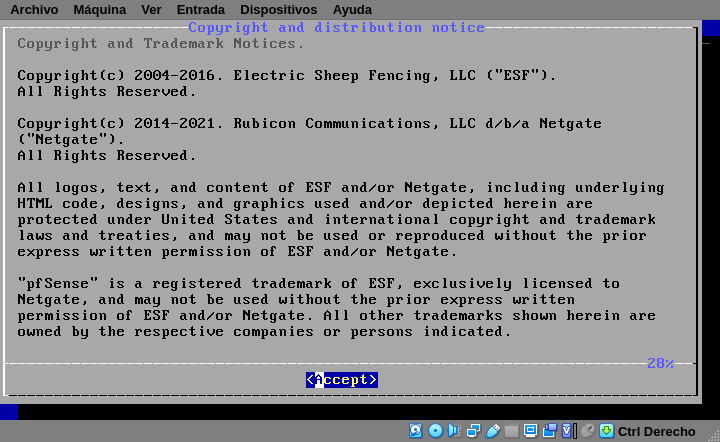
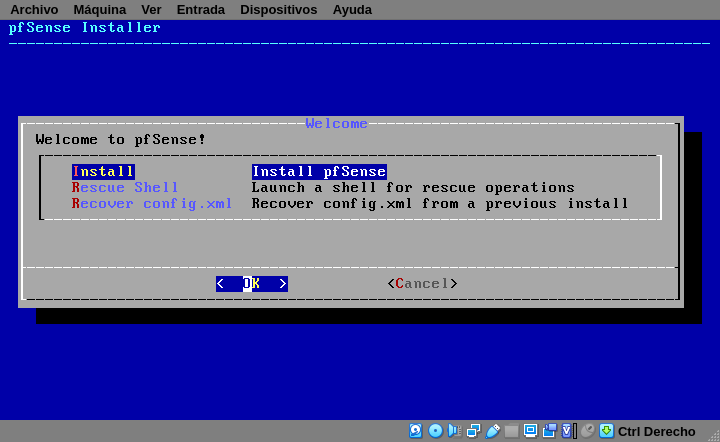
After reading and accept that notice, choose Install on the next screen. The other two options are useful if you had a pfsense already running that you need to recover because something is messed up.
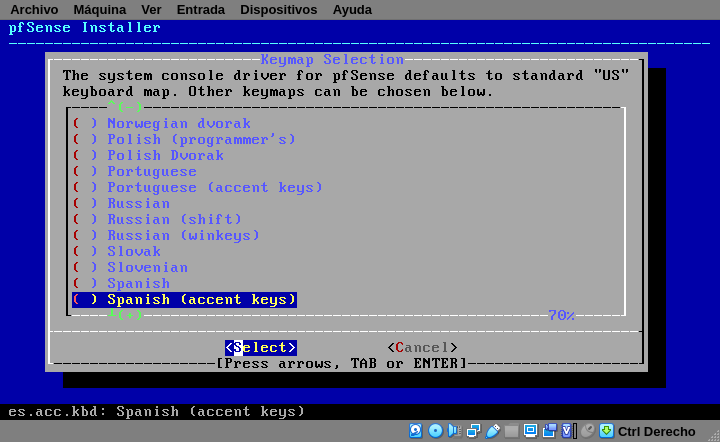
The next screen is for keyboard distribution. Mine is spanish.
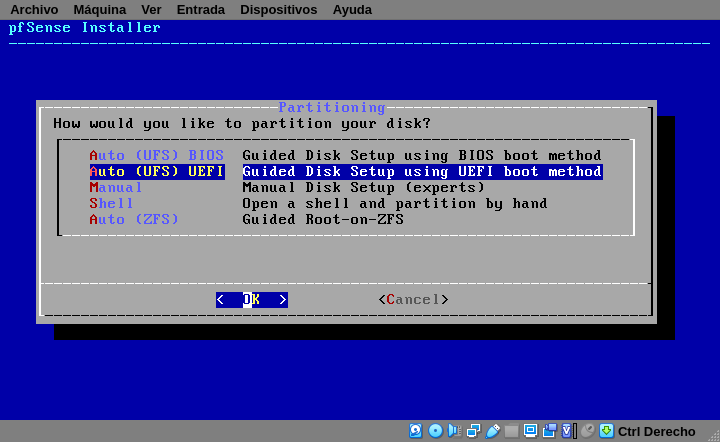
Having choosen your keyboard, the next screen will ask you on how to partition your disk.
It’s not supposed to do some dual boot on routers, in fact you shouldn’t reboot or shutdown your router because your network depends on them. That’s why I always choose one of the automatic options. BIOS is intended for older computers, and turning into a firewall it’s a good way to give your old computer another opportunity. UEFI is for not that newer computers.
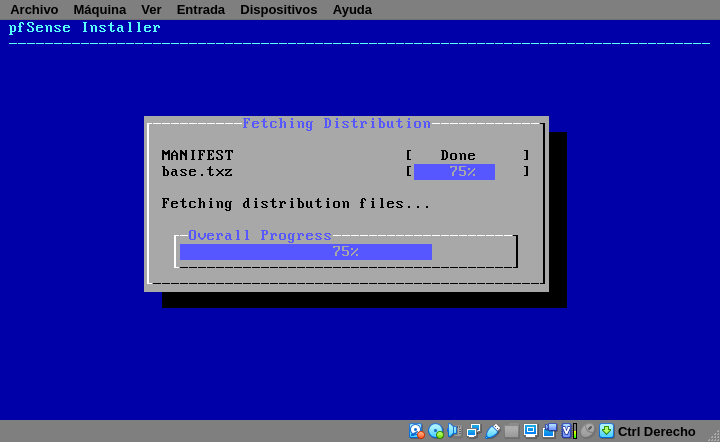
After partition your disk, the installation begin to copying files:
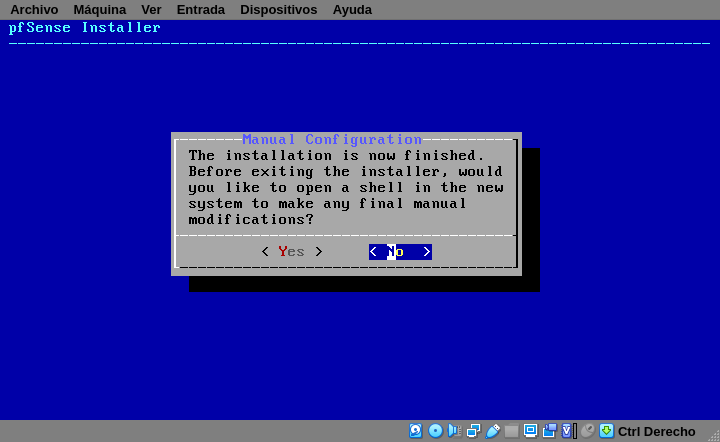
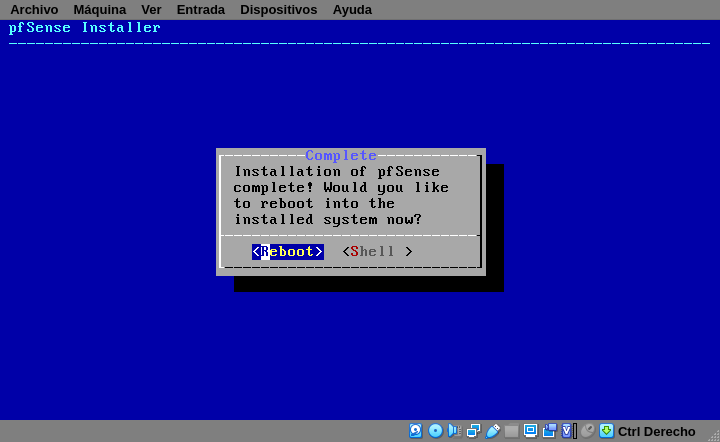
At last, the installer will give you two opportunities to do some manual modifications if you need. Then remove your install media and reboot.
Configuring your router
Console options
Reboot and this is the main screen you’ll see:
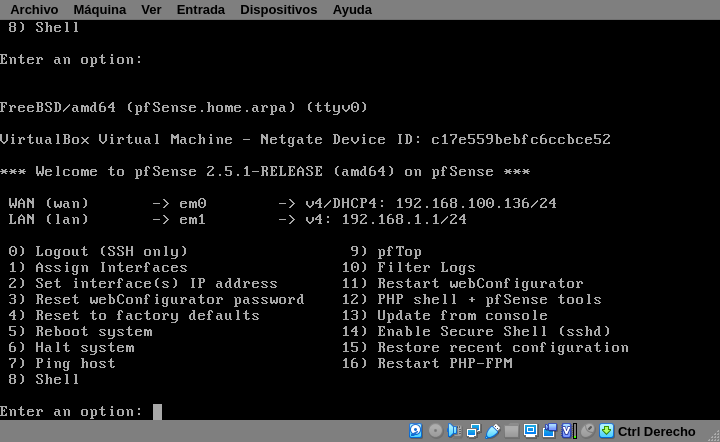
But before going to your browser and start configuring, let’s take a look at some of the options showed:
- Assign interfaces: ideally you’ll have a network card per network, in this option you say which card is for the LAN, which one for the WAN/Internet, which one for the DMZ if you have one or which one for any other kind of lan you could have. Also you can setup VLANs here if you need it.
- Set interface(s) IP address: here you setup the LAN address. Actually you can also set an IP for every network card, but you can do it later in the webConfigurator after setting up the LAN.
- Reset webConfigurator password: if you forgot the admin password this is the place you can go. It’s very important to have a good physical security (if they can hack your system but have physical access they still can hack your system… with an axe or something)
- Reset to factory default: use this option to start over as in a fresh install
- Enable Secure Shell(sshd): use this to enable remote shell access
- Restore recent configuration: If for some reason you reinstall your pfsense, here you can load your backups
- Restart PHP-FPM: on my first pfSense installation several years ago, I only had a very old and tiny PC, one they I left the traffic graph screen opened and went home; the next day I’ve lost access to pfsense via web because php-fpm has hanged. I was about to reboot the whole slow-to-boot system but I saw this option before.
webConfigurator
After setting your LAN IP address (in my case 192.168.1.1) go to https://IP with your browser and the following warning will popup:
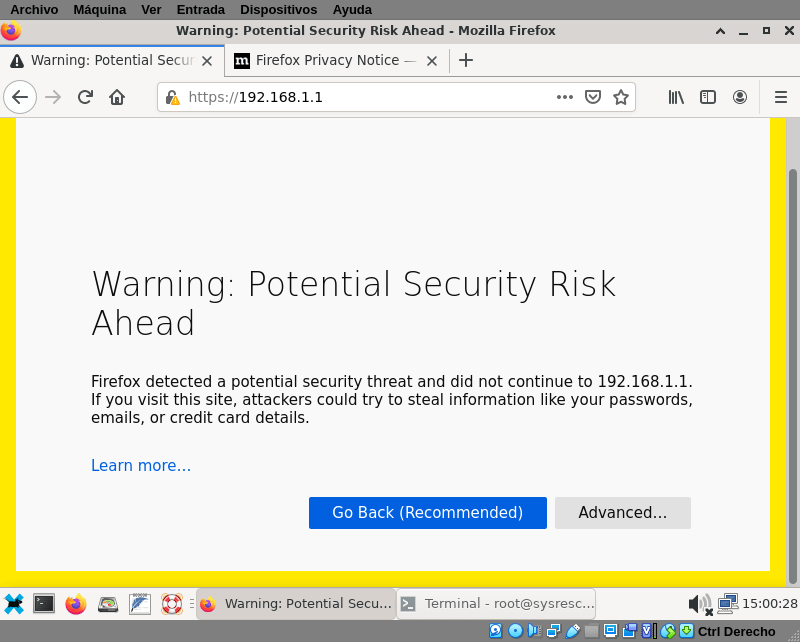
That warning it’s because secure http (https) is enabled, but pfsense it’s using self-signed SSL certificates. It’s ok because is a new installation you can trust. Later you can buy your own certificate and install on your pfSense. Click on Advanced and tell to firefox that you want to load that site anyway.
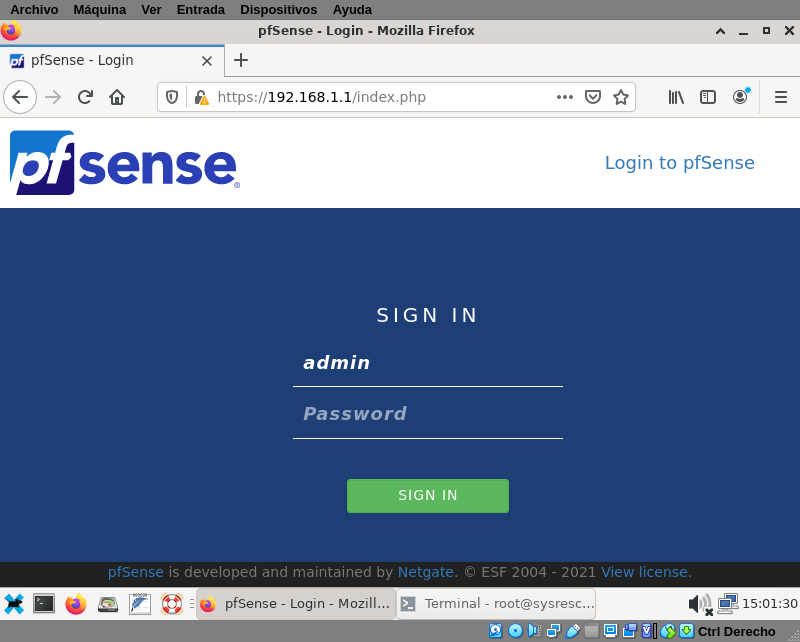
Login with the user admin and default password pfsense, later the system will show you a warning to change that password. When you log in for the first time, the system will launch a wizard to help you in the initial configuration
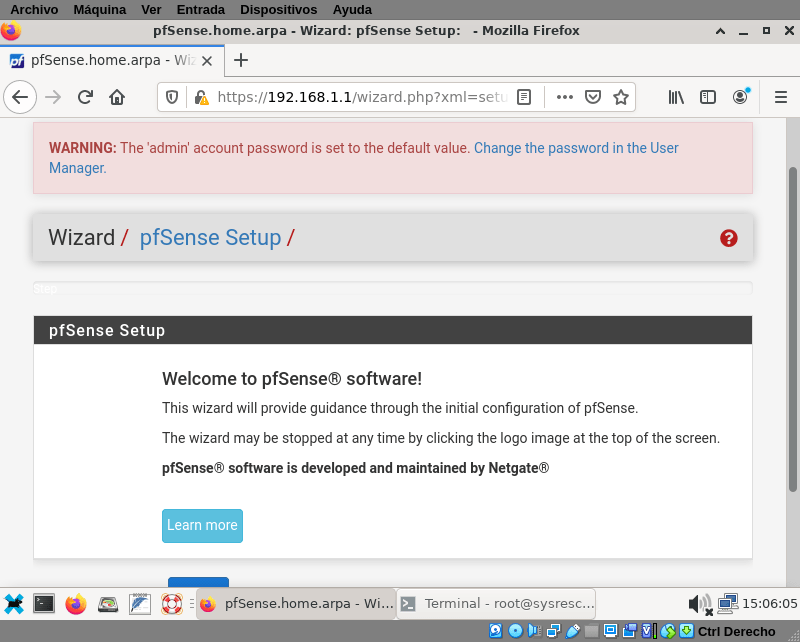
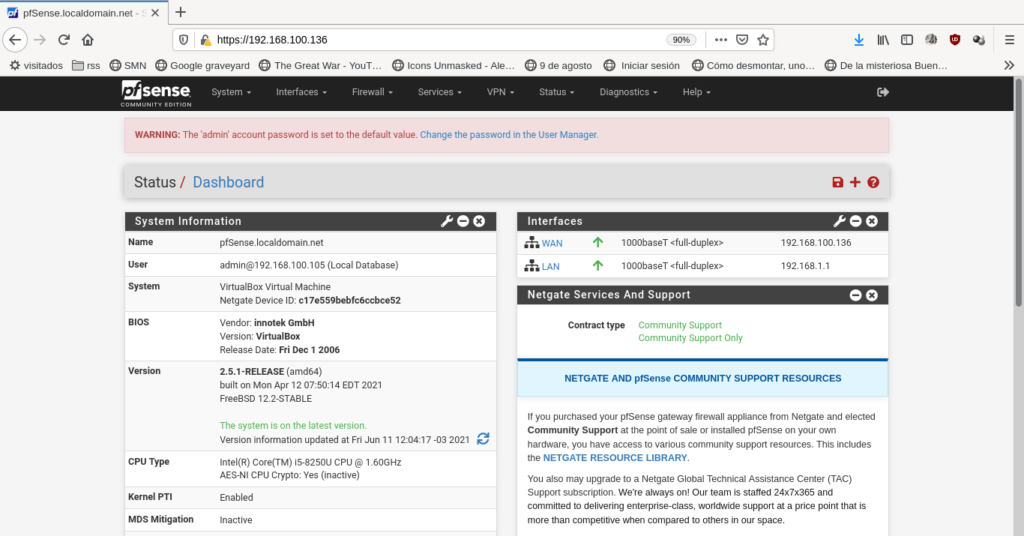
We know what we are doing, so I clicked on the pfSense logo top of the screen and cancel the wizard. The main screen with a Status dashboard is showed. If your screen is large enough it will look like this:
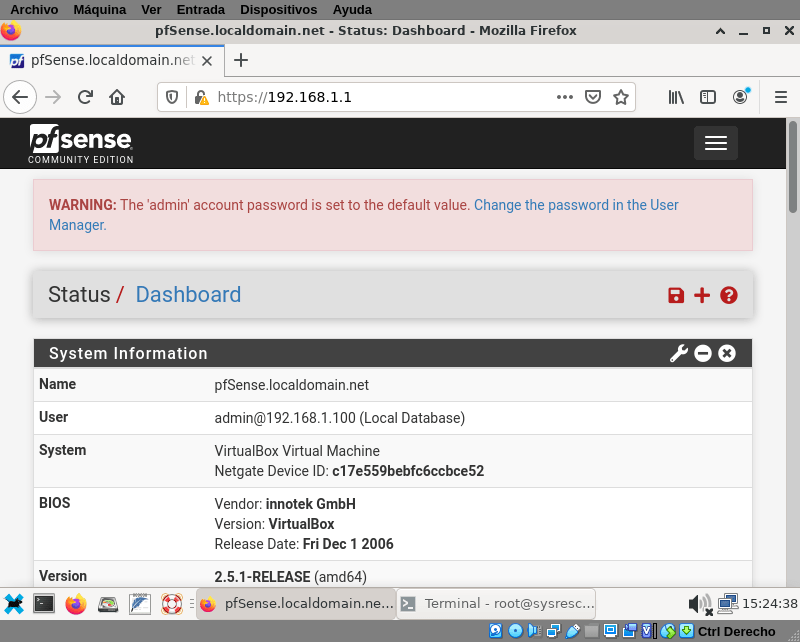
PfSense will display a single column layout if your screen it’s smaller:
Remember to change your admin password in the user manager (click the link on the warning).
Network cards configuration:
We skipped the wizard, and on the first console screen we only choose to configure the LAN IP address. We should configure the WAN now and any other card we have installed. Go to Interfaces → WAN to do it.
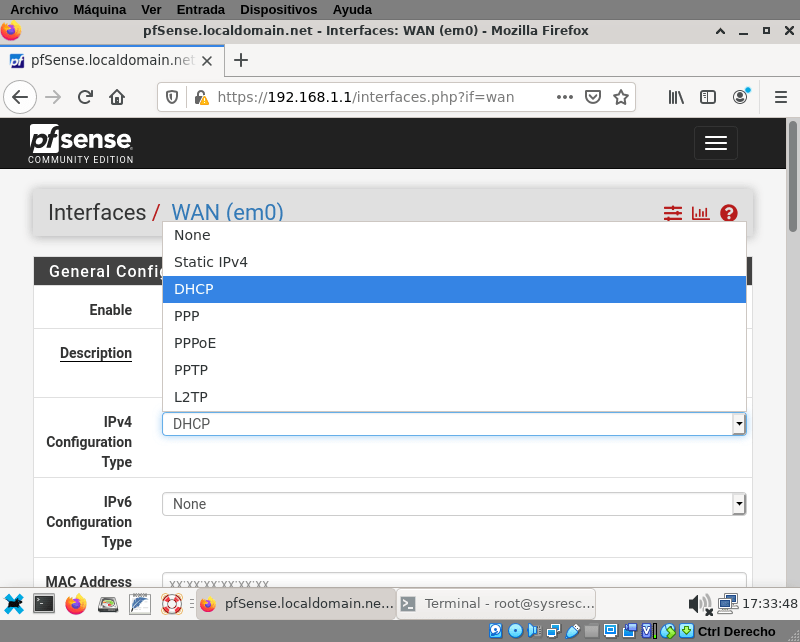
Fortunately to get a dynamic IP from a DHCP server it’s the default option in pfsense and also the default option from internet providers (at least in my town), the other options are:
- Static IP. This should be provided by your ISP or your Network Administrator
- DHCP. As I said before, the default and most common option now.
- PPP. Point-to-Point Protocol, was used on the older days of the internet when you needed a modem and a telephone line.
- PPPoE. PPP over Ethernet. Used in ADSL connections. You also needed a modem and a telephone line, but you get better bandwidth and you can still use the phone. At least in my city they didn’t sell it anymore, but the ones that exist still work
- PPTP: an obsolete VPN protocol
- L2TP: another tunneling protocol for support vpns
Scroll down to the bottom and click save to configure your interface. If you have another kind of connection method, scroll down (not to the bottom) and fill out the information required. In example, if you chose static ip you will need your IP address, the netmask, and though isn’t mandatory you can add your gateway now. Fill the required information and click save.
Note: the last two options are for blocking private networks, loopback address and bogon networks. It’s a good idea to keep those blocked.
Proceed with the other network cards if need it, they have the same options.
DHCP Server
In a small network (say, with less than 10 hosts) it’s easy to configure every one of them manually with an static IP; but when the network grows, sooner than later it will become a mess. You wouldn’t know what IP addresses are free to add a new host, if you have to renumber your network you need to go re-configuring manually machine by machine.
It’s easier to set up a DHCP server and when you plug a host in the network, that host will ask for network parameters and the dhcp will answer with an available ip, the netmask, dns information, default gw. You can also leave some address fixed to certain hosts so they always get the same ip address.
I know I only have two hosts on my made-up network, but setting a dhcp service isn’t difficult at all, so go to Services → DHCP Server and enable on your LAN interface:
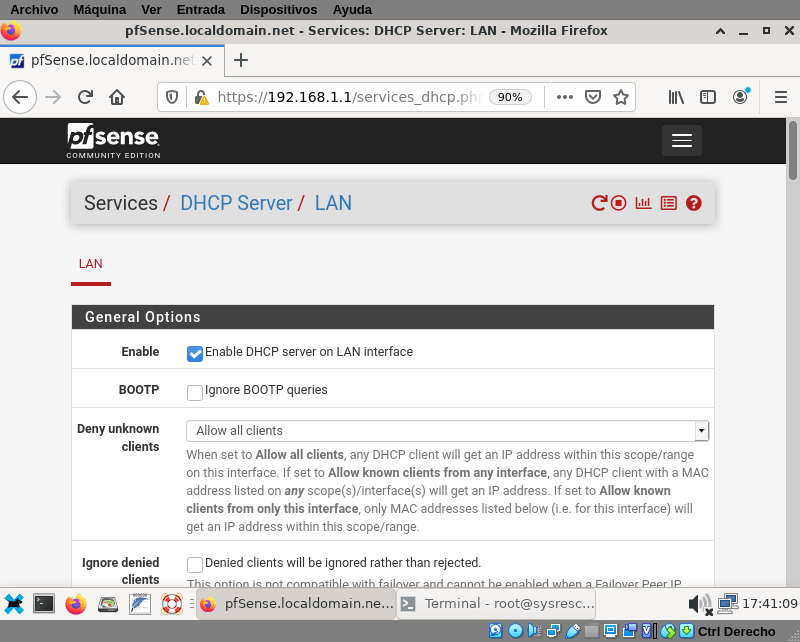
It’s actually three mouse clicks later (and one scroll): I forgot to tell that you need to scroll to the bottom of that page and click on Save.
The fine print
But you should do some fine tunning before.
As is it now, anybody who connect a device to your network will get the parameters to connect, this is fine if you have a lot of guests but is not if you only want authorized devices. So, in the Deny unknown clients you should choose Allow know clients from only this interface.
Even if you permit unknown clients, if you are going to let some ip addresses fixed, you need to reduce the range of the available leases so you can assign ip from outside that range to fixed hosts. Scroll down to Range and put from and to ip as small as you want. I will go from 192.168.1.128 to 192.168.1.245
Static IP
Some times you want a host get always the same IP. Sometimes you need that. The way to do it is to associate the hardware address (MAC) of the network card to an IP. In this example I’m need my server to get always the same IP, because it’s a server it should always be reachable in the same address. The server is the same I’ve used in the moodle tutorial, and I need to get the mac with the ifconfig command:
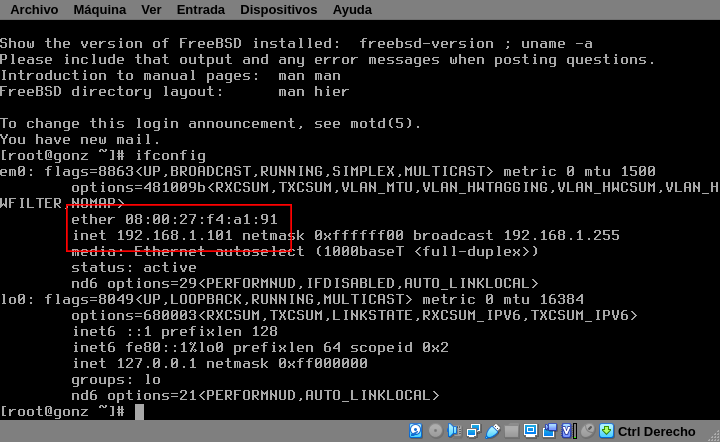
With the mac-address 08:00:27:f4:a1:91 I can add an static mapping in pfSense. Scroll down to DHCP Static Mappings for this Interface and click + Add
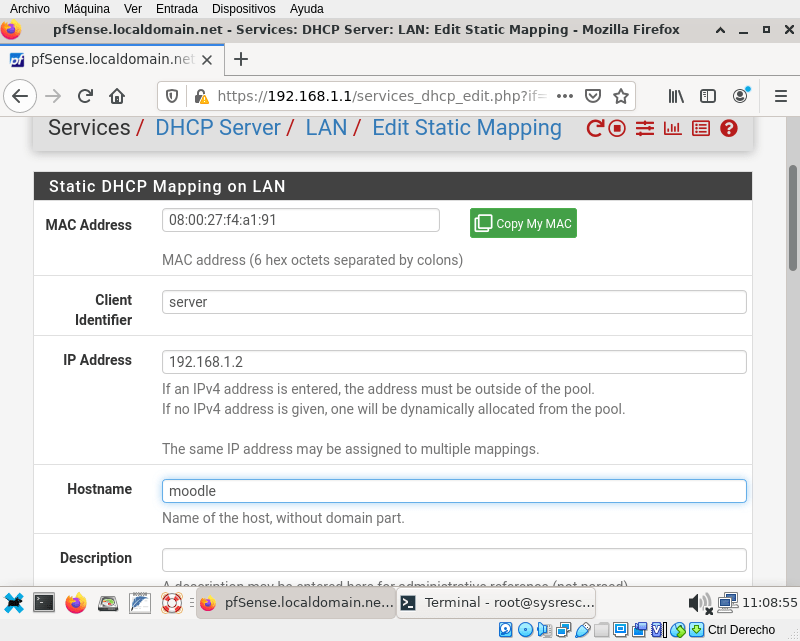
You will see a lot of parameters you can configure, but the most important are: MAC Address, Client identifier and IP address. The only mandatory is a valid MAC Address. Let get back to the server and restart the network with /etc/rc.d/netif restart:
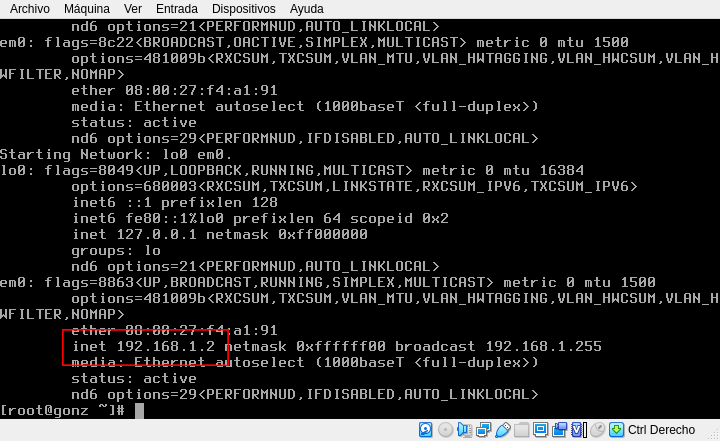
Now the address for our server is 192.168.1.2.
There are a lot more things you can set on a dhcp server, but for now is enough.
Basic firewall rules
By now, we have a router that connects to the internet and provides correct network parameters to the hosts on your network so they can connect to the internet also. On the next section I will explain why the hosts can connect (or if they can’t how to do it). And on the last section I will explain how the internet can connect to some hosts (i.e. the webserver)
Outbound traffic
NAT stands for Network Address Translation. You probably saw in the press that the IP addresses are practically exhausted. One solution was to assign some IP ranges for private networks. We are using one of them 192.168.1.x/24 in our LAN network, maybe in your work or your house you have the same network segment because any body can use it. But to browse the internet the data packages must travel both ways: inside and outside your network.
Let’s say you want to visit wikipedia from your PC with IP 192.168.1.148, how wikipedia knows to what 192.168.1.148 send the page you requested if anybody can use this address? the answer is that wikipedia doesn’t know and didn’t care… because the request came from the public ip (public ip are unique) of your router, so wikipedia send the page to your router and your router is responsible to know that that request was made from your computer. This process is called NAT: when you make a request to the internet, your router will replace the From: field in the package with his own public ip address and send it; when the answer comes it replace the To: field in the package with your private ip address.
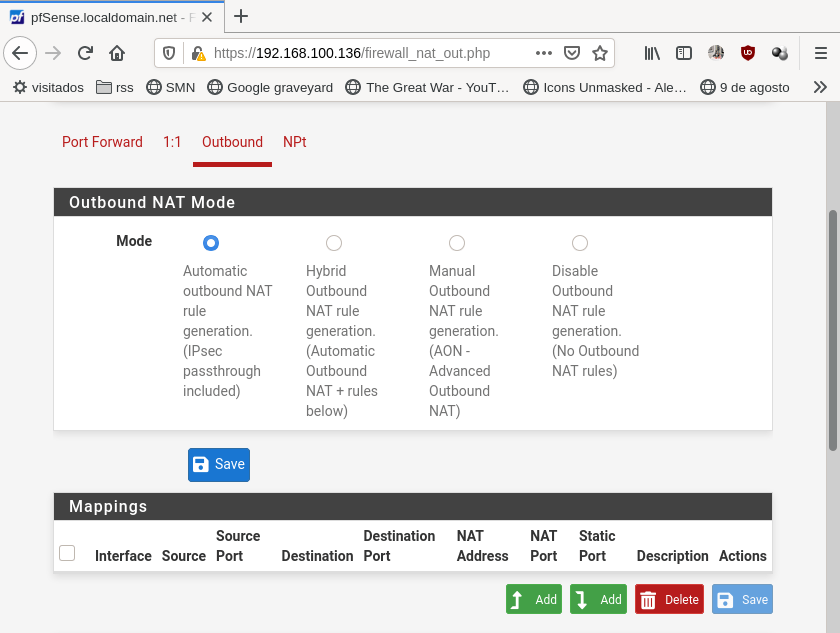
By default pfSense include that NAT rule for your LAN interface, but if you have more interfaces you need to add and outbound rule, you can find this rules or add new ones on Firewall → NAT → outbound:
Inbound traffic
What about inbound rules? you want your webserver available and reachable from the internet, you have also one connection to internet with one IP available that this pfSense is already using. Also, you don’t want to expose all your server, only the http service. What you need is some port forwarding. Go to Firewall → NAT → Port forwarding and add the following rule:
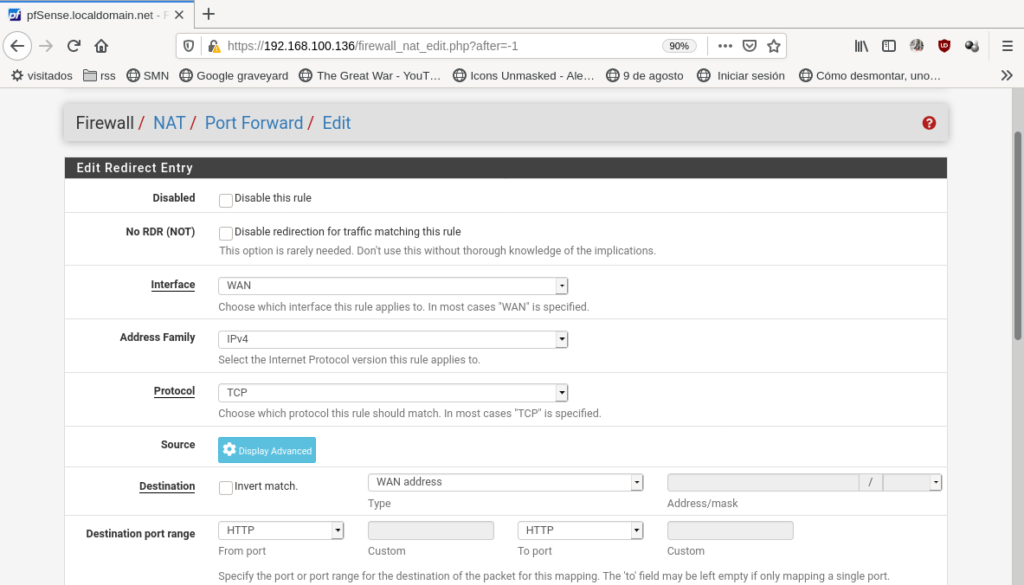
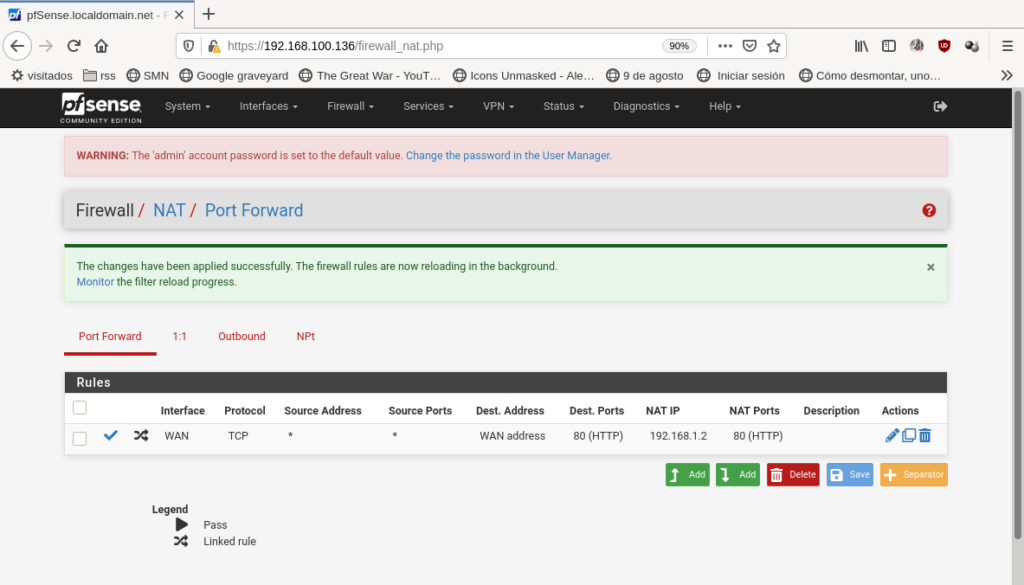
In interface choose WAN because the requests will came through this interface. Protocol is TCP, but some services are UDP and some others needs both. Destination: WAN address because the requests will be sent to the public IP address of your router. Destination port range: HTTP or 80 (80 is http port), but it can be any port just you shouldn’t use the well-known ports (you can, but don’t). Redirect target IP: 192.168.1.2 this is the IP we’ve fixed to our server. Redirect target port: HTTP. And, if isn’t, choose in Filter association rule: Add associated filter rule. because pfSense filters all the incoming traffic by default. Click save and apply and your rules lists will look like this:
Now we can test it. Go in your browser to http://wan.ip/ and your webserver will respond:
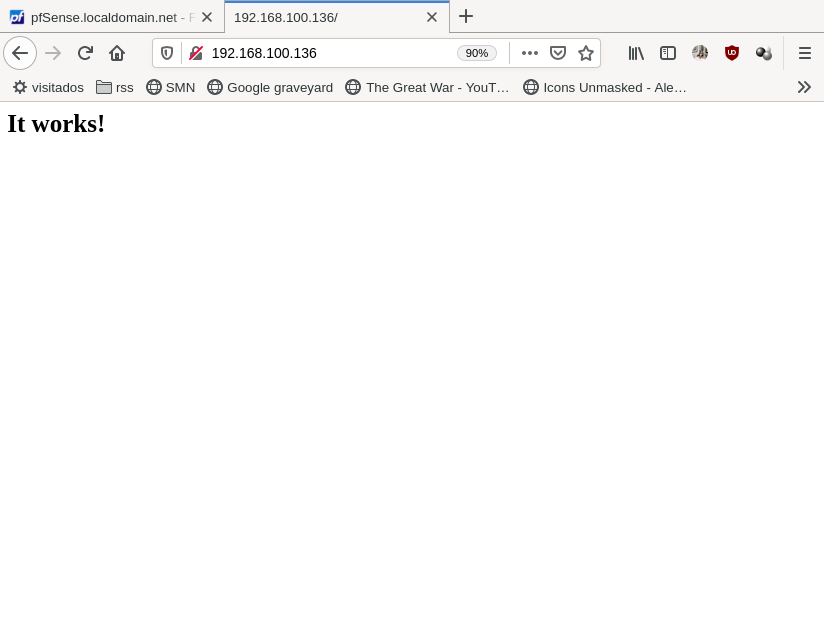
A couple of things to notice:
- The inbound NAT was made only to the http(80) port, and pfSense is running in https(port 443). If you have a real website, you’ll probably want to run in secure https. You should move pfSense to another port, to enter pfsense on your new port the url will look something like https://ip.addr:new-port/
- You noticed the “public” ip I’m using, 192.168.100.136, isn’t public at all. In fact, as my two networks are physically (I mean, virtually) connected I’ve should solved it with static routes and avoid NAT. But I did it this way to introduce those concepts.
Last words
This is like the 0.few% of things you can do with pfSense. You can setup things like proxy cache, VPN (with ipsec, OpenVPN, …), Captive Portals, Vlan, balance multiple WAN connections, IPv6 and the list goes and goes. You can even pay for official commercial support and someone will help you or do it for you.
I always finish my articles with a link to the documentation, so here it is: https://docs.netgate.com/pfsense/en/latest/ . If you are new to the computer networks world, I recommend you to start reading Networking concepts.