
We have heard of many linux distributions in recent times used for different purposes. We choose a linux distribution such as debian , manjaro or ubuntu as per our requirements. So we care about the brand recognition of these distros sometimes. now forget about the brand value and go towards the simplicity. Here we will find a distribution that fulfills all our needs, and that is ‘MX linux’. Here I will go through all steps to install MX Linux in detail.
We found MX linux as middle weight linux operating system based on Debian stable and using core antiX components. Additionally ,we also get complementary softwares created and packaged by the MX community. Now, MX linux is an operating system that is designed to combine elegant and efficient desktop system with high stability. Also MX linux is the most downloadable Linux Distribution at Distrowatch. This is because it gives simplicity and less dreary feel to the novice linux users. Basically, MX Linux consists of a core pulled from AntiX system and other stuff from MEPI’s.
MX Linux Desktop environment
We get a bunch of Desktop environments such as Xfce , Kde and Flux bundled with MX linux. now let us have a look at these Desktop environments.
- Xfce : That’s a middleweight desktop environment that is fast and low resource, while still being attractive and user friendly. It comes with full functionality expected from a modern Desktop environment. It comes with a collection of fast and handy MX Tools which consists of options such as Boot manager , Repository manager.
- Kde : It comes with its advance desktop plasma. It consists of excellent tools such as Dolphin file manager, Kde connect, extra themes and package manager
- Fluxbox : It is also a fast ,low resource and elegant toolset from MX linux. This basically supports low capacity older machines. This is because it has very low graphical requirements.It also comes with full feature rich app finder and MX snapshot.
SYSTEM REQUIREMENTS
MX linux do not crave for huge system hardware. so we can also run it on our old PC as well.
MINIMUM
- AMD or intel 1486 at least or better
- Minimum 512 MB of RAM
- 5GB of hard disk or more space for installation.
- CD/DVD Drive support. (If we want to install MX linux with the help of a CD/DVD)
- USB boot support in BIOS. (If we want to install MX linux with a USB drive)
RECOMMENDED
- i686 Intel or AMD processor
- 2 GB of RAM memory or more
- At least 20 GB free hard drive
- 3D-capable video card for 3D desktop support
- HDA-compatible sound card
In this tutorial I will guide you through all the detailed steps to install the MX linux on virtual Box.
STEP(1) Download MX linux
so now the first step is to Download the MX linux image ISO. So you can Download from here the latest MX linux ISO according to your system requirements and the as per the GUI environment of your choice. MX linux is available in both 32 bits and 64 bits format.
STEP(2) Creating a virtualbox VM for MX linux
Once you have downloaded the MX linux ISO ,the next step is to create a virtual machine in virtualBox. now better for better performance of MX linux host OS , you must create a virtual hard disk of size 20 Gb. Also select the memory size of 2 Gb for a brisk performance. After that link the downloaded MX linux ISO to the VM.
STEP(3) Start the Virtual machine
So now after doing all the configuration in virtualbox , Start the virtual machine. Then screen as shown below would appear
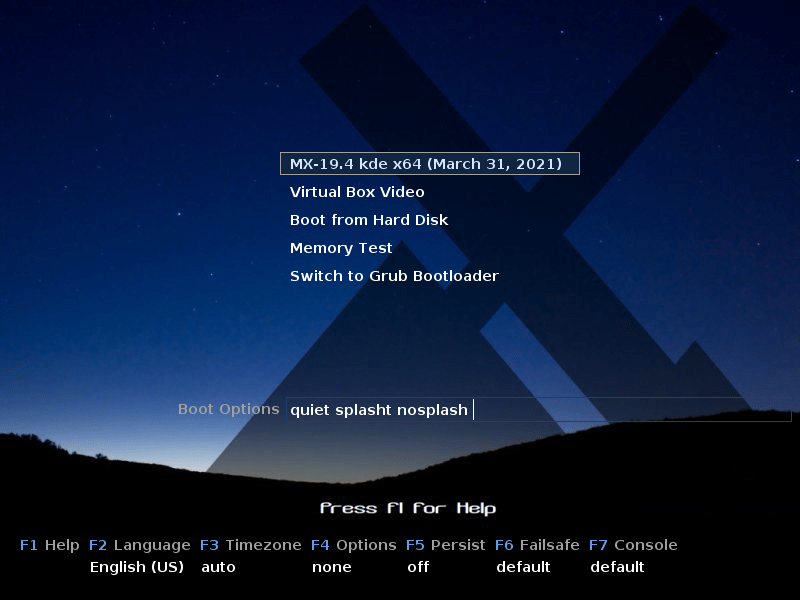
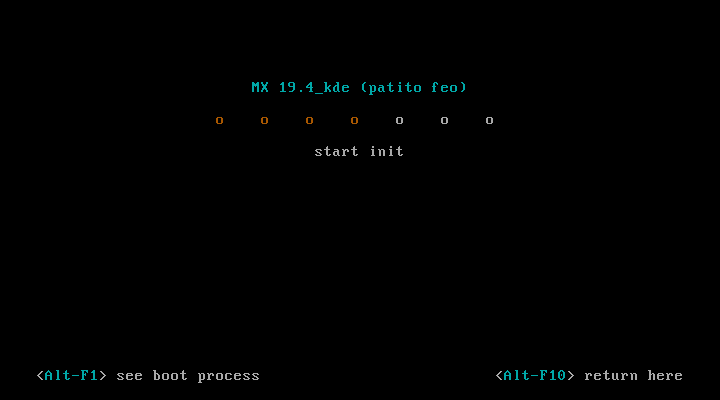
now from here you can select the first option. But if you want to get the screen resolution adjusted automatically according to the virtualbox the go for the second option ‘virtualBox video’. after clicking on that option a screen as shown below would appear. It shows that the installation had been started now.
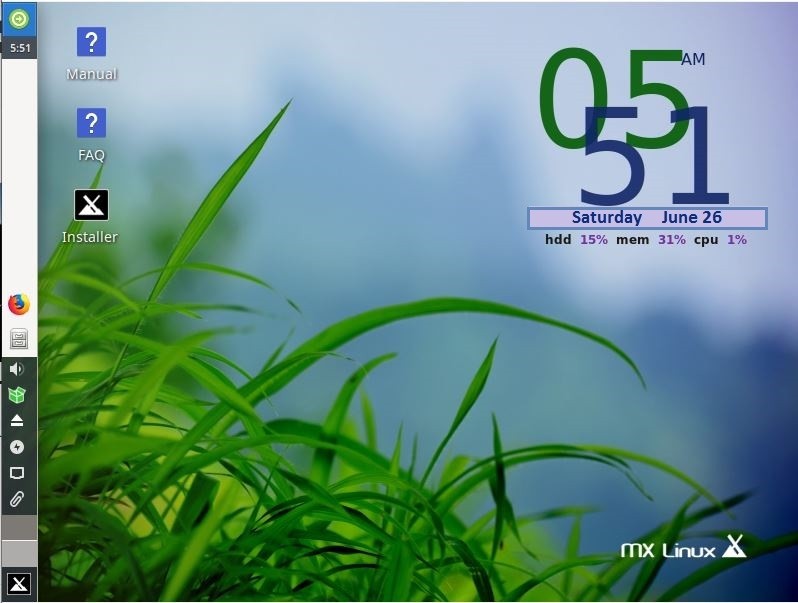
STEP(4) Install from LIVE installer
now after that you get the LIVE screen of the MX linux. next step is to click on the installer icon dislayed on the Desktop as shown below.
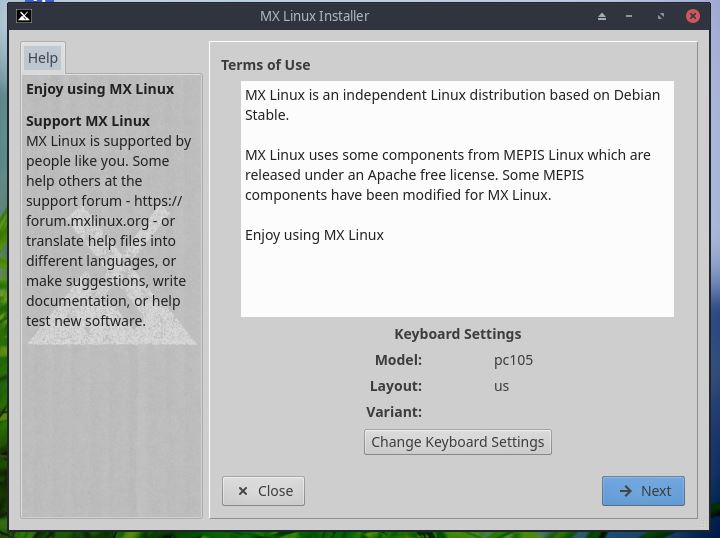
After that a similar screen as shown below would appear. so then click on the ‘next’ button and the keyboard layout will be set automatically.
STEP(5) Partitioning
Now here comes the partitioning options. Then click on the ‘next’ button and the system will automatically handle the partitioning tasks. as we are on a virtual machine there is no need to do the worry about the disk partitioning.
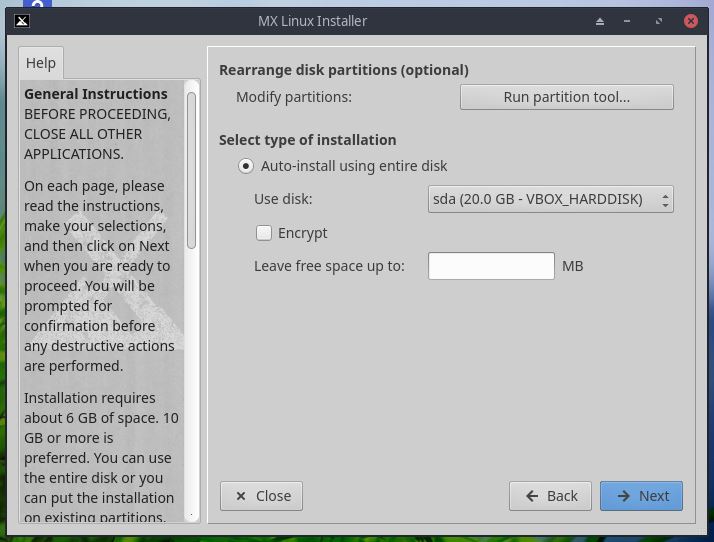
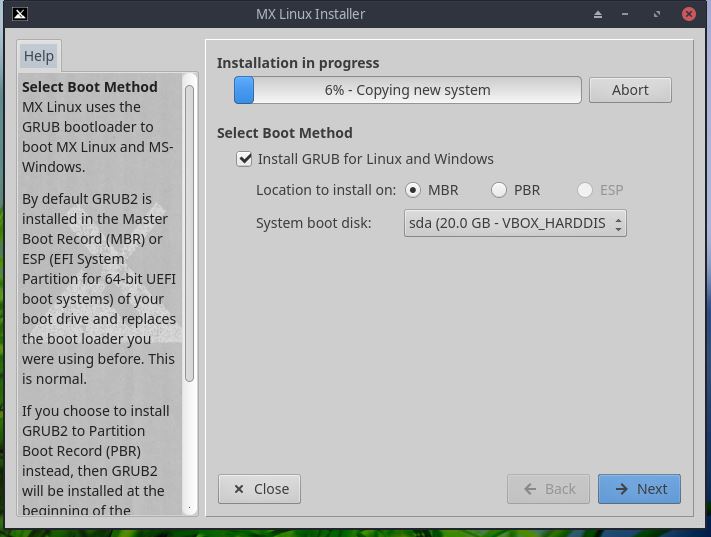
so after clicking on the ‘next’ button the installation would get started as shown below . While the installation is in progress, we have to click on the ‘next’ button to set up further things.
STEP(6) Basic setting configuration
now here we have to mention the computer name and domain name to identify it on the internet easily.
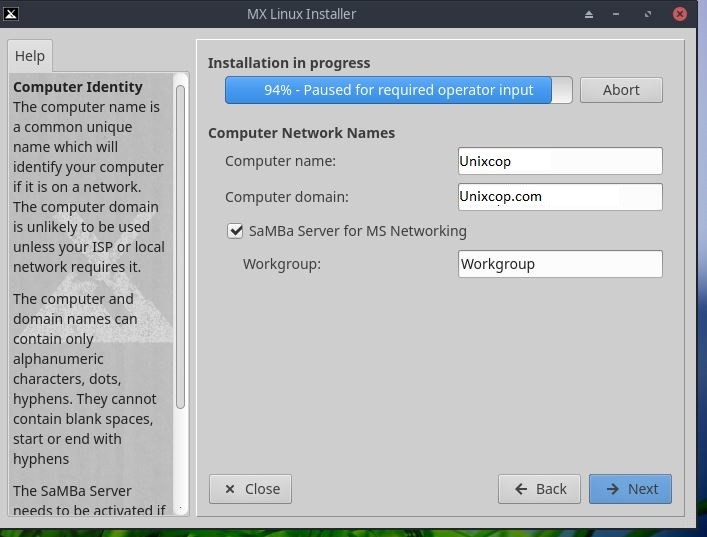
Then set the time zone as per your requirements.

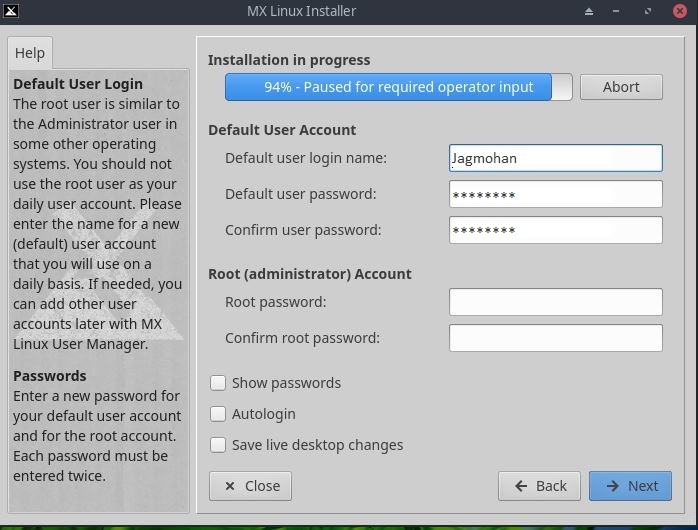
so now after clicking next you will get the screen to enter the user login id and password for both default and the root user. Enter your credentials and click on ‘next’ as shown below.
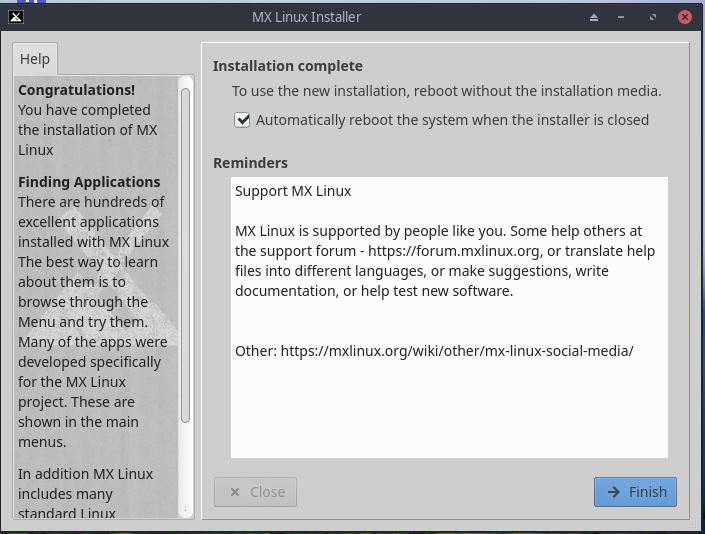
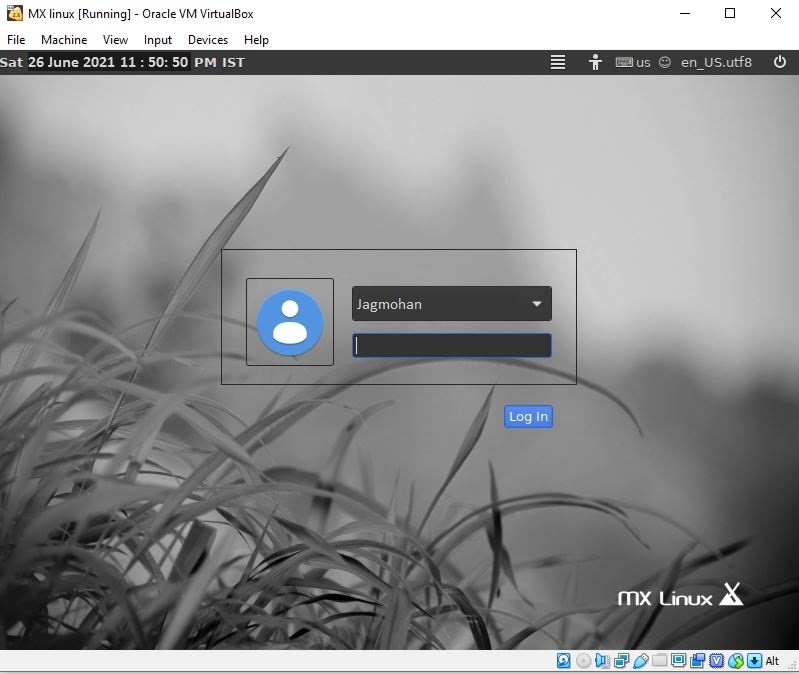
STEP(7) Login to your MX linux desktop
Now after the successful completion of the installation, you would get the screen as shown below. Click on ‘finish’ button and it will reboot the system.
so after rebooting you will get a similar screen as shown below. now just enter your credentials and start exploring MX linux.
Conclusion
In this tutorial , I have guided you through all the detailed steps to install MX linux on virtualbox. I hope this would help you to get a better hands on practice of MX linux using virtualbox.