
Hello, friends. In this post, you will learn how to install KubeSphere on Alma Linux 9. Let’s go for it.
According to the tool’s website:
KubeSphere is a distributed operating system managing cloud-native applications with Kubernetes as its kernel. It provides a plug-and-play architecture for the seamless integration of third-party applications to boost its ecosystem.
KubeSphere is 100% open source, built and improved by the community. For this reason, although it is used in very complex environments, it is a community-inclusive creation at all times.
In addition to this, you can extend the functionality of it with modules and plugins. You will be able to choose between several, and it all depends on the needs of the moment.
Let’s install it.
Before we start…
Although the installation is not complex, it is always recommended that it is done from a fresh Alma Linux 9 installation to avoid conflicts with other packages.
As you might guess, we require root permissions, so it might be a limitation for some cases.
And of course, always update your system before you start.
sudo dnf updateInstall KubeSphere on Alma Linux 9
After updating your system, you will have to install some packages needed to complete the tutorial.
To do so, run
sudo dnf install curl socat conntrack ebtables ipset tarAs you can imagine, KubeSphere is not present in the official Alma Linux 9 repositories, but this does not prevent you from installing it. To do so, first download KubeKey.
curl -sfL https://get-kk.kubesphere.io | VERSION=v3.0.7 sh -
You can replace 3.0.7 by the version number you want, and you can check it here.
Now assign it permission to run
chmod +x kkThen we have KubeSpehre and you can use it to create a Kubernetes cluster.
sudo ./kk create cluster --with-kubernetes v1.24.2 --with-kubesphere v3.3.1 --container-manager containerdIt is important that in the previous command you set the versions of both Kubernetes and KubeSphere. In this case, I have opted for the former.
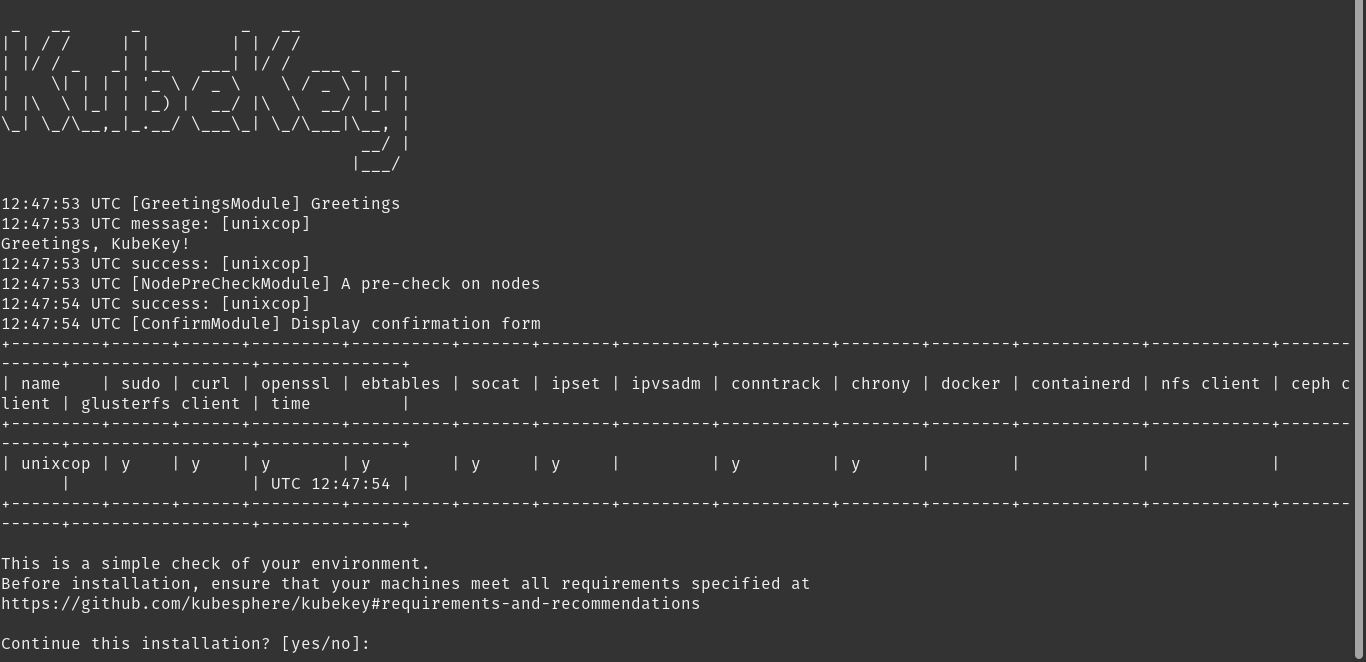
There will start the whole installation process that, in the first case, you will have to confirm.
Then, the entire process of downloading and configuring the tool will start. When it finishes, you will see a screen like this.
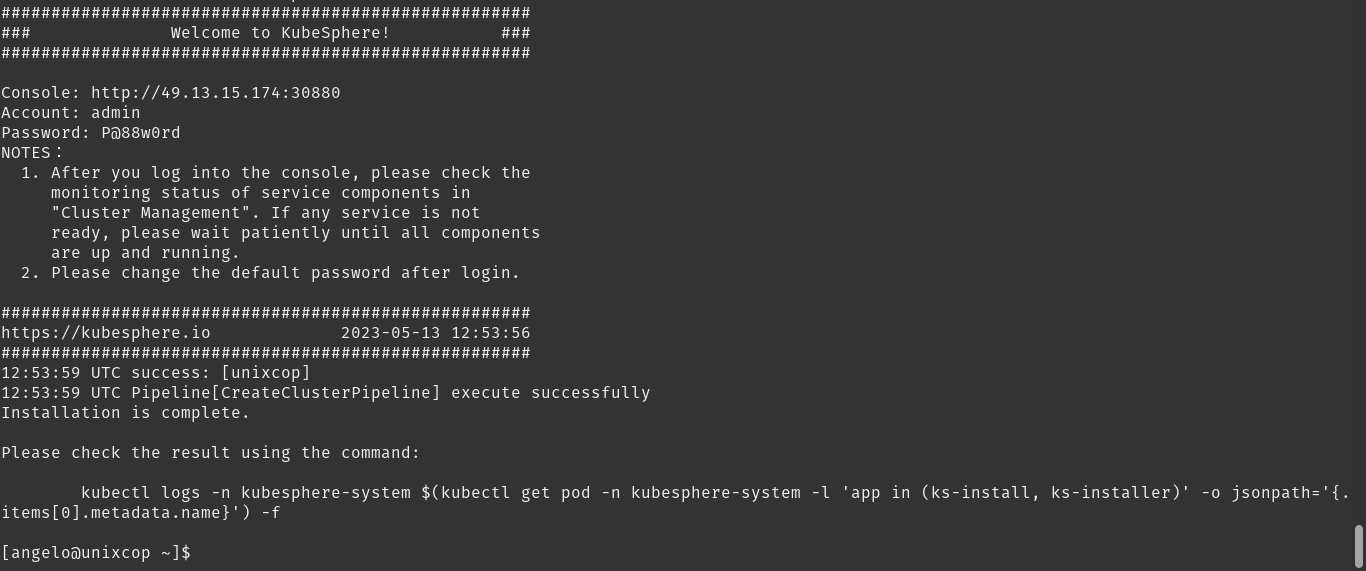
You will notice the login information and some recommendations.
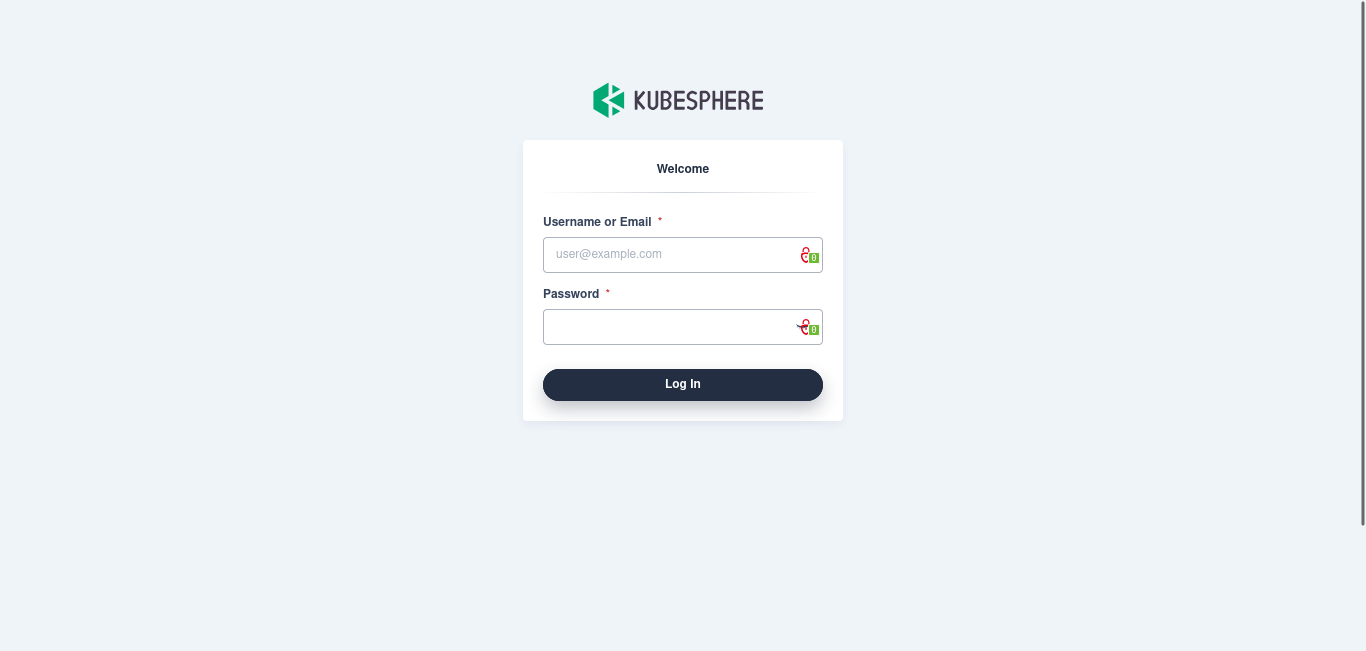
All that remains is to open a web browser, go to the IP address of your server, and log in with the specified credentials.
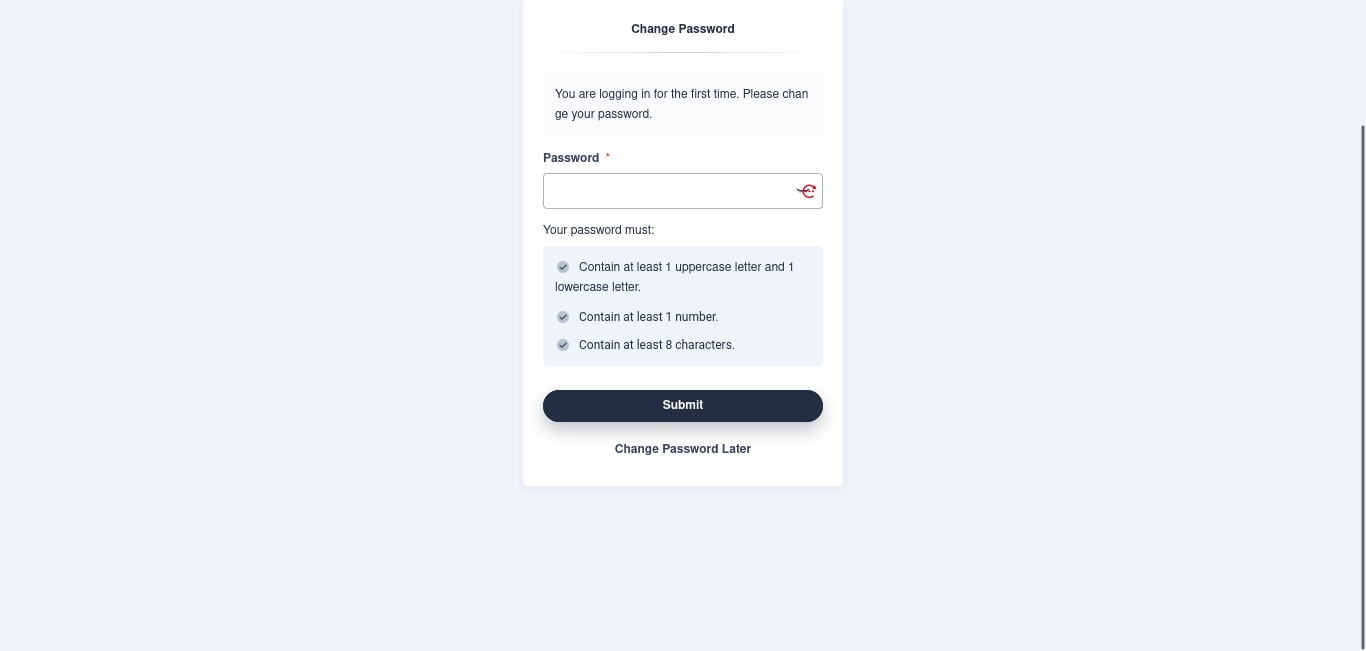
When you log in with the temporary password, you can then change it to your personal password.
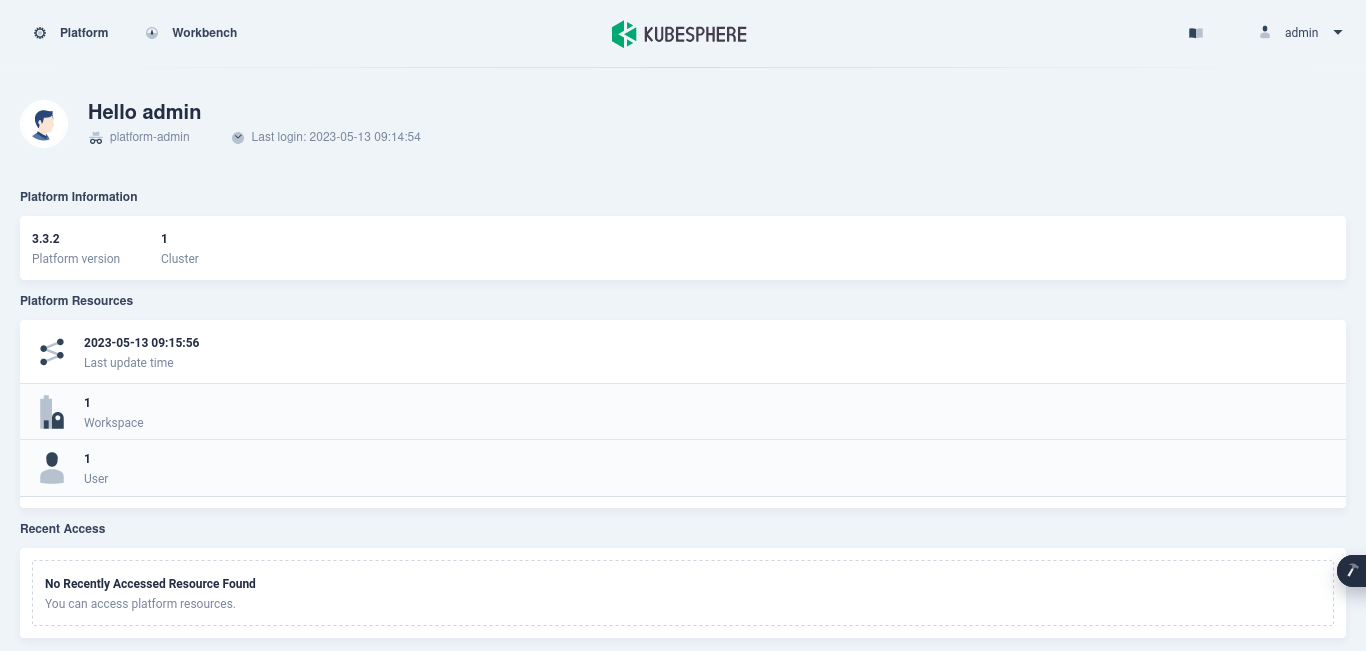
You will then be able to access the KubeSphere main panel.
Conclusion
KubeSphere is an important utility for today’s infrastructures, so it is always good to know how to install it for any issue.