
Introduction
JIRA is a project management tool developed by Atlassian. It is also used for issue tracking and bug tracking related to your software development and other Projects. This guide will walk you through the installation Jira on CentOS 8 / RHEL 8 Linux.
Install Java
Jira requires Java installed in your CentOS 8 / RHEL 8 machine for it to run. so run this command to install java-openjdk.
[root@unixcop ~]# yum install java-11-openjdk.x86_64Confirm installation with Java version:
[root@unixcop ~]# java -version
openjdk version "11.0.12" 2021-07-20 LTS
OpenJDK Runtime Environment 18.9 (build 11.0.12+7-LTS)
OpenJDK 64-Bit Server VM 18.9 (build 11.0.12+7-LTS, mixed mode, sharing)
[root@unixcop ~]#
Jira doesn’t work with MySQL 8 database server, so install MySQL 5.7 .
Once the database server is installed, start it and login as root user and create database and user for Jira:
[root@unixcop ~]# mysql -u root -p
Enter password:
Welcome to the MySQL monitor.  Commands end with ; or \g.
Your MySQL connection id is 8
Server version: 8.0.21 Source distribution

Copyright (c) 2000, 2020, Oracle and/or its affiliates. All rights reserved.

Oracle is a registered trademark of Oracle Corporation and/or its
affiliates. Other names may be trademarks of their respective
owners.

Type 'help;' or '\h' for help. Type '\c' to clear the current input statement.

mysql>
mysql> CREATE DATABASE jira CHARACTER SET utf8mb4 COLLATE utf8mb4_bin;
Query OK, 1 row affected (0.01 sec)

mysql> CREATE USER 'jira'@'localhost' IDENTIFIED BY 'strong@UnIxcop(PasswoRD@';
Query OK, 0 rows affected (0.00 sec)

mysql> GRANT ALL ON jira.* TO 'jira'@'localhost';
Query OK, 0 rows affected (0.01 sec)

mysql> FLUSH PRIVILEGES;
Query OK, 0 rows affected (0.00 sec)

mysql> \q
Bye
[root@unixcop ~]#
Download and Install JIRA
We have install Java and a database server, the next action is to download JIRA’s binary file. Check the latest version on the Jira Downloads page.
The latest jira version right now is 8.18x. but jira-8.13 is a long term support so we will download and install it.
[root@unixcop ~]# wget https://product-downloads.atlassian.com/software/jira/downloads/atlassian-jira-software-8.8.1-x64.bin -O atlassian-jira-software.bin

--2021-08-23 11:00:13--  https://product-downloads.atlassian.com/software/jira/downloads/atlassian-jira-software-8.8.1-x64.bin
Resolving product-downloads.atlassian.com (product-downloads.atlassian.com)... 52.222.144.160, 2600:9000:20fe:a600:1f:ab86:b4a:17e1, 2600:9000:20fe:4200:1f:ab86:b4a:17e1, ...
Connecting to product-downloads.atlassian.com (product-downloads.atlassian.com)|52.222.144.160|:443... connected.
HTTP request sent, awaiting response... 200 OK
Length: 402401644 (384M) [application/octet-stream]
Saving to: 'atlassian-jira-software.bin'

atlassian-jira-software.bin           100%[=======================================================================>] 383.76M   943KB/s    in 12m 54s

2021-08-23 11:13:07 (263 KB/s) - 'atlassian-jira-software.bin' saved [402401644/402401644]

[root@unixcop ~]#
Give the file execution permission
chmod +x atlassian-jira-software.binThen start the installer:
To start Jira setup press ENTER:
Then Press [1] to use express installation settings:
Type i key or Enter to start installation.
Finally Accept to start Jira services.
[root@unixcop ~]# ./atlassian-jira-software.bin
Unpacking JRE ...
Starting Installer ...

This will install Jira Software 8.8.1 on your computer.
OK [o, Enter], Cancel [c]

Click Next to continue, or Cancel to exit Setup.

Choose the appropriate installation or upgrade option.
Please choose one of the following:
Express Install (use default settings) [1], Custom Install (recommended for advanced users) [2, Enter], Upgrade an existing Jira installation [3]
1

Select the folder where you would like Jira Software to be installed.
Where should Jira Software be installed?
[/opt/atlassian/jira]


Default location for Jira Software data
[/var/atlassian/application-data/jira]


Configure which ports Jira Software will use.
Jira requires two TCP ports that are not being used by any other
applications on this machine. The HTTP port is where you will access Jira
through your browser. The Control port is used to startup and shutdown Jira.
Use default ports (HTTP: 8080, Control: 8005) - Recommended [1, Enter], Set custom value for HTTP and Control ports [2]


Jira can be run in the background.
You may choose to run Jira as a service, which means it will start
automatically whenever the computer restarts.
Install Jira as Service?
Yes [y, Enter], No [n]


Details on where Jira Software will be installed and the settings that will be used.
Installation Directory: /opt/atlassian/jira
Home Directory: /var/atlassian/application-data/jira
HTTP Port: 8080
RMI Port: 8005
Install as service: Yes
Install [i, Enter], Exit [e]
i

Extracting files ...


Please wait a few moments while Jira Software is configured.

Installation of Jira Software 8.8.1 is complete
Start Jira Software 8.8.1 now?
Yes [y, Enter], No [n]


Please wait a few moments while Jira Software starts up.
Launching Jira Software ...


Installation of Jira Software 8.8.1 is complete
Your installation of Jira Software 8.8.1 is now ready and can be accessed
via your browser.
Jira Software 8.8.1 can be accessed at http://localhost:8080
Finishing installation ...
[root@unixcop ~]#
Install Java MySQL connector
[root@unixcop ~]# wget https://dev.mysql.com/get/Downloads/Connector-J/mysql-connector-java-8.0.18.zip
--2021-08-23 11:32:23--  https://dev.mysql.com/get/Downloads/Connector-J/mysql-connector-java-8.0.18.zip
Resolving dev.mysql.com (dev.mysql.com)... 137.254.60.11
Connecting to dev.mysql.com (dev.mysql.com)|137.254.60.11|:443... connected.
HTTP request sent, awaiting response... 302 Found
Location: https://cdn.mysql.com//archives/mysql-connector-java-8.0/mysql-connector-java-8.0.18.zip [following]
--2021-08-23 11:32:24--  https://cdn.mysql.com//archives/mysql-connector-java-8.0/mysql-connector-java-8.0.18.zip
Resolving cdn.mysql.com (cdn.mysql.com)... 2.18.1.85
Connecting to cdn.mysql.com (cdn.mysql.com)|2.18.1.85|:443... connected.
HTTP request sent, awaiting response... 200 OK
Length: 4573467 (4.4M) [application/zip]
Saving to: 'mysql-connector-java-8.0.18.zip'

mysql-connector-java-8.0.18.zip       100%[=======================================================================>]   4.36M   333KB/s    in 13s

2021-08-23 11:32:37 (357 KB/s) - 'mysql-connector-java-8.0.18.zip' saved [4573467/4573467]

[root@unixcop ~]#
Then restart Jira with the following commands:
Stop it.
# /etc/init.d/jira stopThen start it with:
[root@unixcop ~]# /etc/init.d/jira start

To run Jira in the foreground, start the server with start-jira.sh -fg
executing using dedicated user: jira

                  `sMMMMMMMMMMMMMM+
                     MMMMMMMMMMMMMM
                     :sdMMMMMMMMMMM
                             MMMMMM
          `sMMMMMMMMMMMMMM+  MMMMMM
             MMMMMMMMMMMMMM  +MMMMM
              :sMMMMMMMMMMM   MMMMM
                     MMMMMM    `UOJ
   `sMMMMMMMMMMMMM+  MMMMMM
     MMMMMMMMMMMMMM  +MMMMM
      :sdMMMMMMMMMM   MMMMM
             MMMMMM    `UOJ
             MMMMMM
             +MMMMM
              MMMMM
               `UOJ

      Atlassian Jira
      Version : 8.8.1


If you encounter issues starting or stopping Jira, please see the Troubleshooting guide at https://docs.atlassian.com/jira/jadm-docs-088/Troubleshooting+installation


Server startup logs are located in /opt/atlassian/jira/logs/catalina.out
Using CATALINA_BASE:   /opt/atlassian/jira
Using CATALINA_HOME:   /opt/atlassian/jira
Using CATALINA_TMPDIR: /opt/atlassian/jira/temp
Using JRE_HOME:        /opt/atlassian/jira/jre/
Using CLASSPATH:       /opt/atlassian/jira/bin/bootstrap.jar:/opt/atlassian/jira/bin/tomcat-juli.jar
Using CATALINA_PID:    /opt/atlassian/jira/work/catalina.pid
Tomcat started.
[root@unixcop ~]#
Configuration of Nginx Proxy for JIRA
Install Nginx and enable the service.
# yum -y install nginx
# systemctl enable --now nginx
Configure Nginx
Create a new Nginx configuration file for Jira.
# vim /etc/nginx/conf.d/jira.confAdd the following :
server {
    listen 80;
    server_name jira.unixcop.com;
    location / {
        proxy_set_header X-Forwarded-Host $host;
        proxy_set_header X-Forwarded-Server $host;
        proxy_set_header X-Forwarded-For $proxy_add_x_forwarded_for;
        proxy_pass http://localhost:8080;
        client_max_body_size 10M;
    }
}
Disable Nginx and restart it in addition to Jira
# setenforce 0
# systemctl restart jira
# systemctl restart nginx
Also Allow http port in the firewall:
[root@unixcop ~]# firewall-cmd --add-service=http --permanent
success
[root@unixcop ~]# firewall-cmd --reload
success
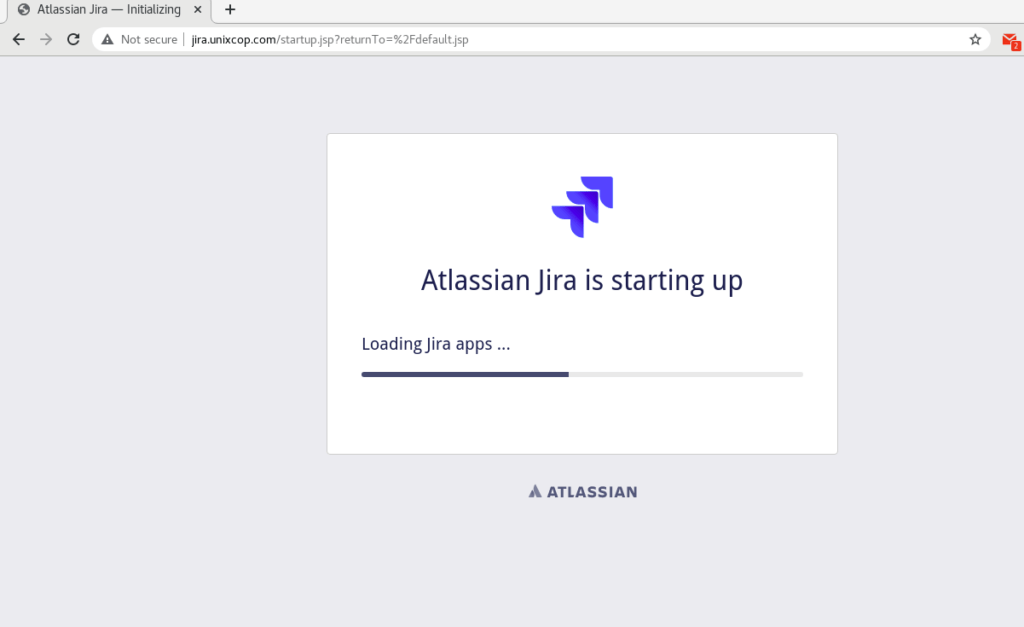
[root@unixcop ~]#Once installation is complete go to jira.unixcop.com in your browser to begin the setup process.
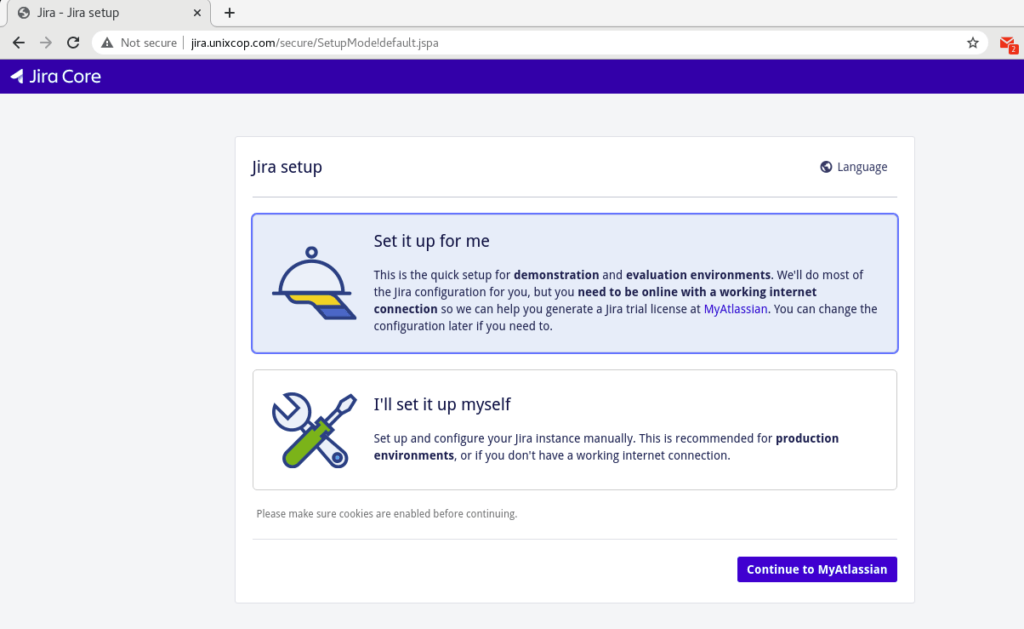
MyAltassian Installation Method “Set it up for me”:
The default selection is “Set it up for me” .
As shown below MyAtlassian will make a quick setup for you.

Then click to continue to MyAtlassian.
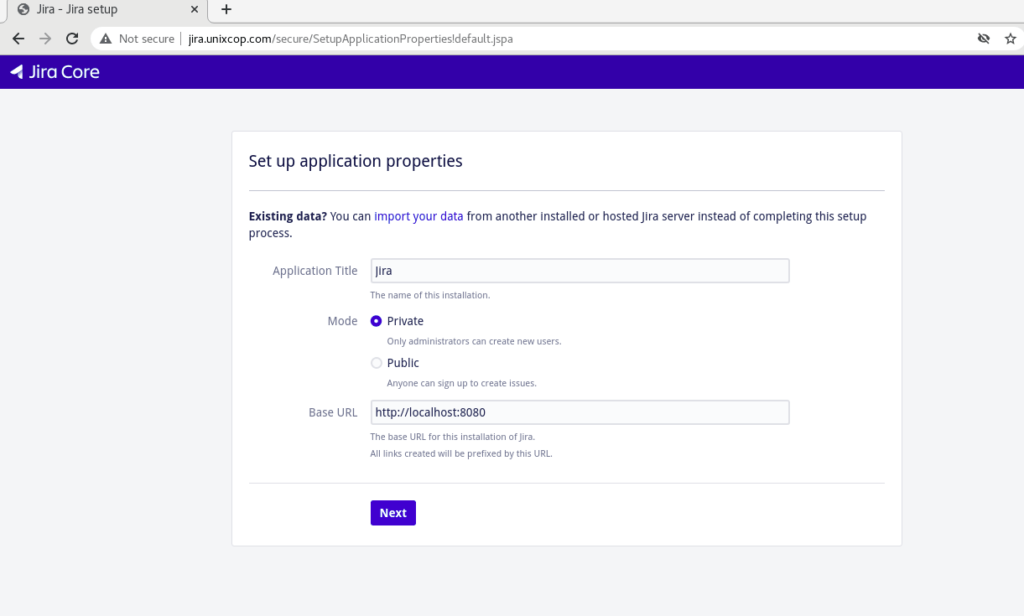
Click Next to setup application properties.
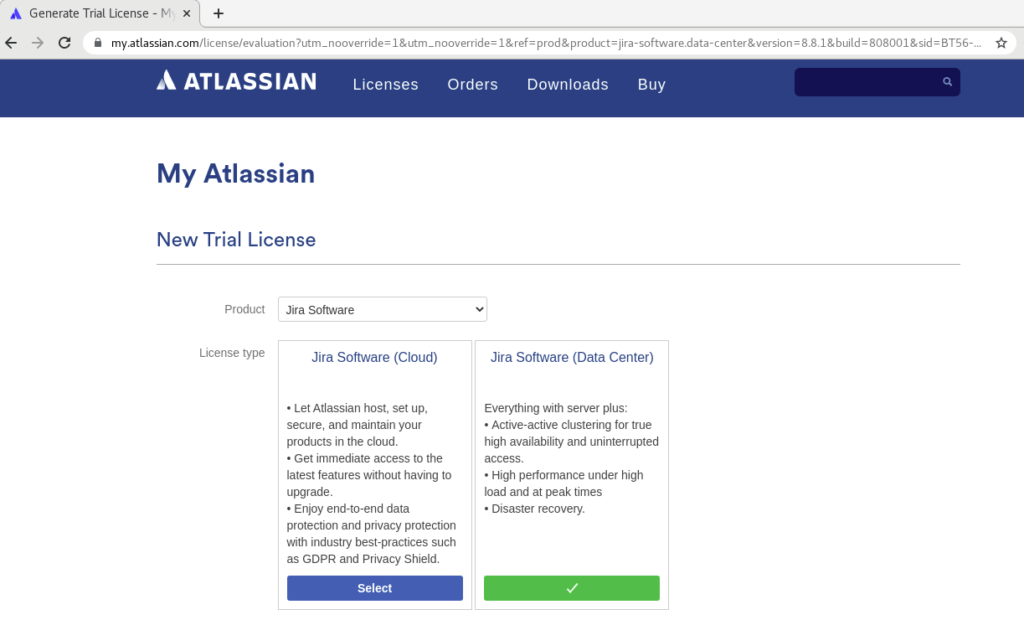
You will be redirect to the official website ATLASSIAN to get a new trial licence as shown above.
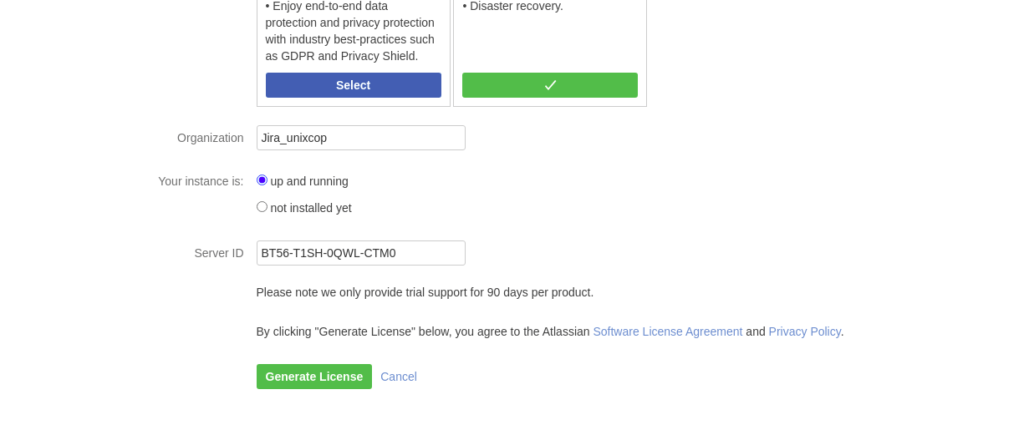
Add organization name and click Generate Licence.
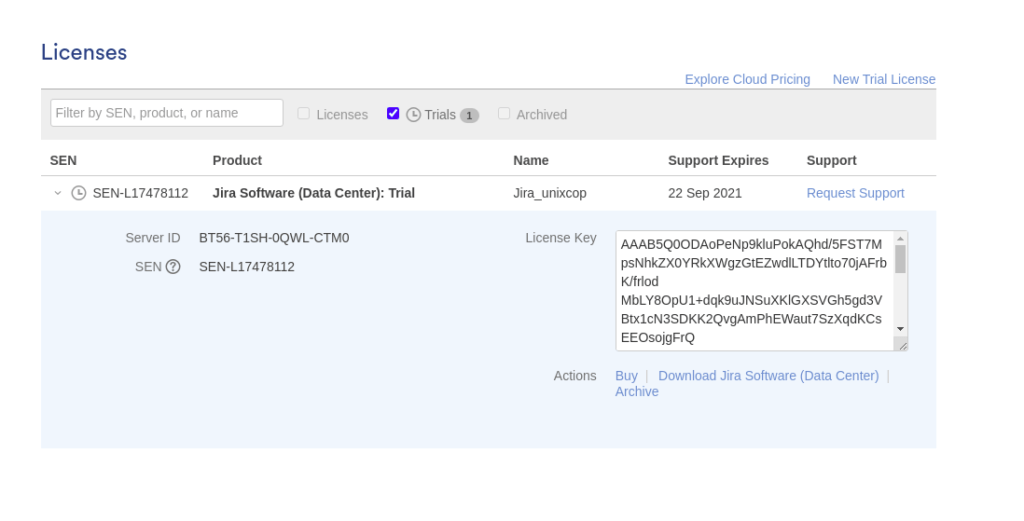
Copy the Licence Key then go back to continue setup.
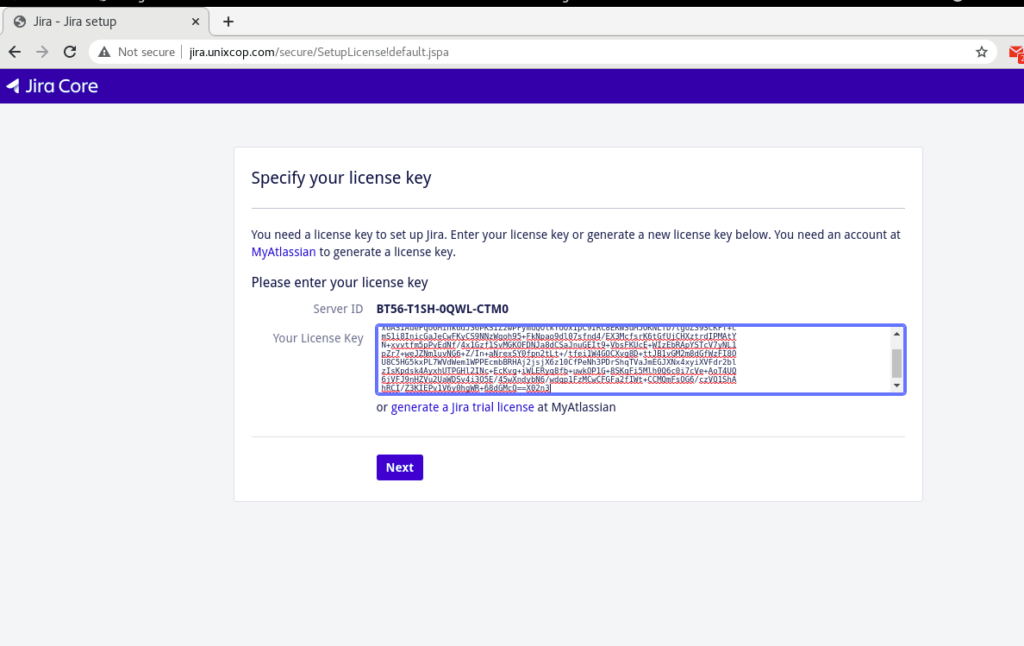
Paste the Licence Key as shown above then click Next.
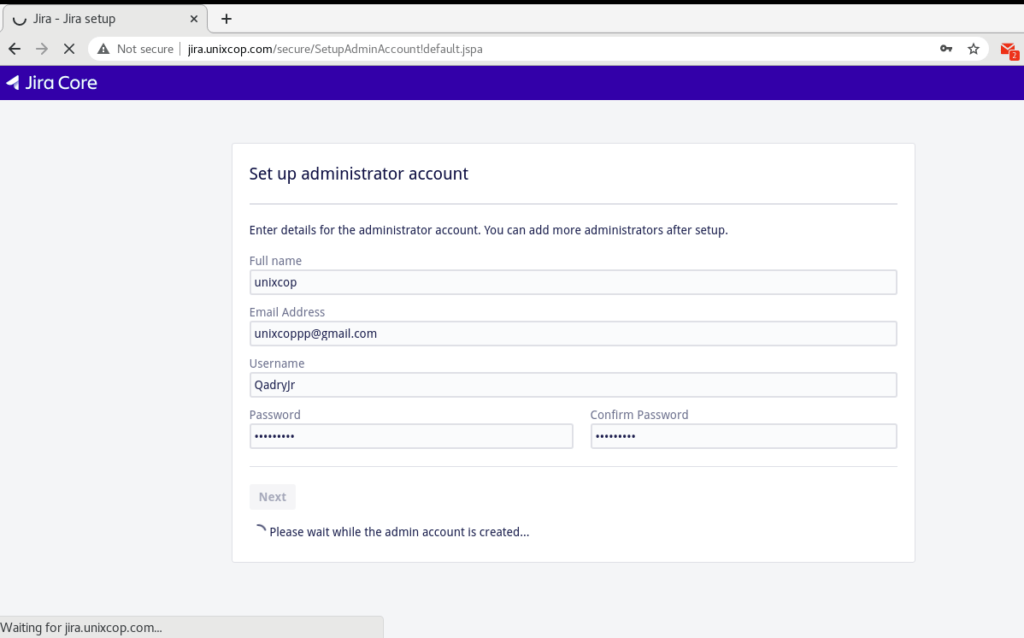
The Final is to set up admin account.
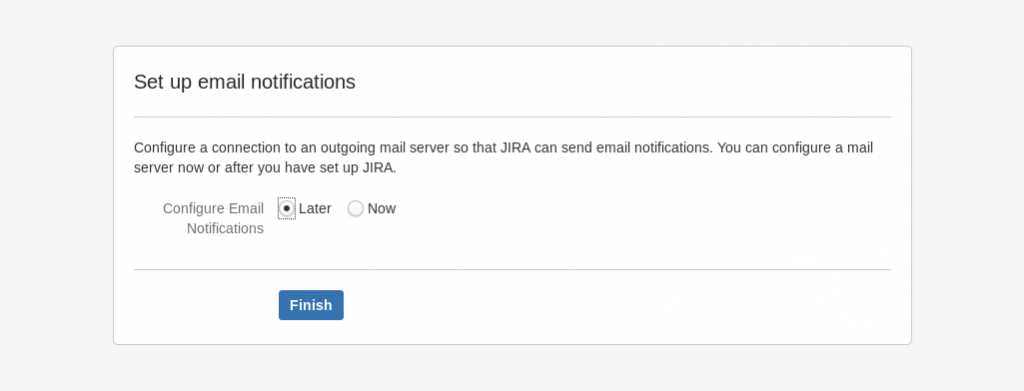
Then Choose whether to set up email notification or not and click the ‘Finish’ button.
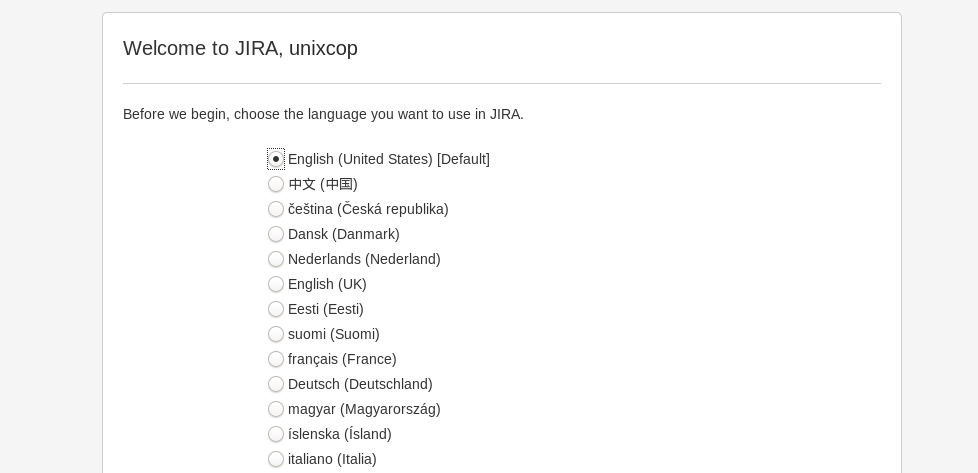
select your language and click Next as shown below.
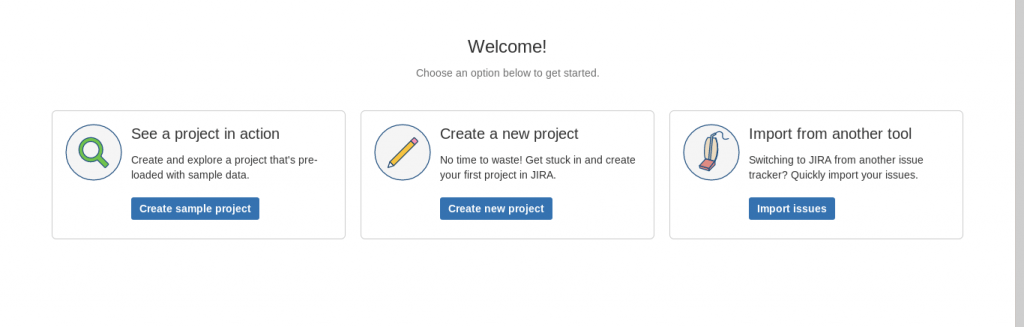
Then you will be directed to the dashboard.
I’ll set it up myself Installation Method:
Also You can Select “I’ll set it up myself“ in screenshot below at the first step of installation.
Click “Next” and provide the MySQL database credentials. For the type, choose “My Own Database“
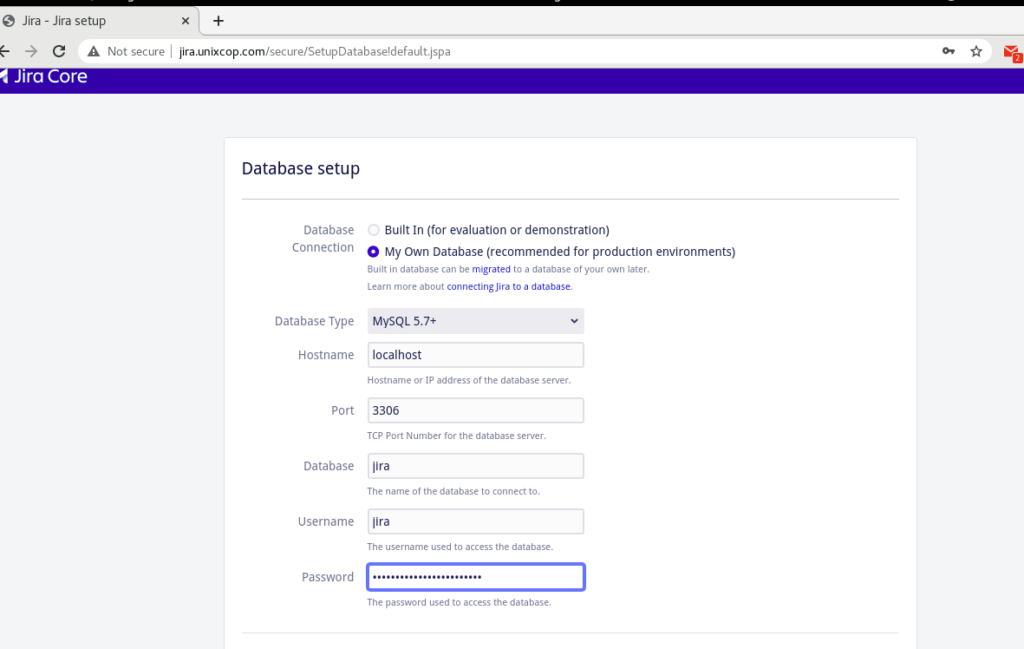
Click Test Connection and a successful connection message should_be displayed.
In the next pages, fill out the ‘Application title‘, ‘Mode‘, JIRA License , Admin Account, email notification. The last page will ask you to select default Language.

Then Access Jira Admin dashboard to create more users.

Conclusion
JIRA can be a great source of information, or to know the status of the running project. As the whole team working on it, and would agree on the points mention in it. It keeps on giving reminders or updating with the running state of the project. So if you are new to JIRA and are working in Software Development or Testing and not aware of how to install and use JIRA effectively, then we hope have at the end of this tutorial you are now able to install JIRA without any problem. If you still find any problem then feel free to contact us right here.