Hi! I’ve already published some articles about some lesser known free/open source Operating Systems that are not Linux. OSes like ReactOS, Minix, or OmniOS. Today I’ll show you how to install Haiku.
About Haiku OS
Back in late 90s, early 00s maybe, a friend from high school handled me a cdrom and told me: «So you are on that “linux” thing, you should try this». It was a copy of BeOS. It got nothing to do with Linux, apart from not being Windows.
Anyway, more than being on ‘that “linux” thing‘ I was like ‘let’s try them all!‘ (try any operating system that was available, at least for a couple of days). So, I’ve made a partition on my disk, installed and tried for a couple of days. My first impression was the speed, BeOS was fast. Everything was even smoother than with linux on a regular PC of the Win9x/Me era. It was also visually pretty, at least for the GUIs available at that time. Unfortunately it was discontinued.
From the Haiku FAQ «Haiku is an open-source operating system that specifically targets personal computing. Inspired by the BeOS, Haiku is fast, simple to use, easy to learn and yet very powerful» . In other words, is the spiritual successor of BeOS, and is also compatible with BeOS.
By the way, is not called Haiku OS, it’s just Haiku.
Download Haiku
You can get your ISO file from here: https://www.haiku-os.org/get-haiku/r1beta3/
Or, if you use gnome boxes as me, you can download directly from that program during the VM creation.
Install Haiku
Some 20 years later I’m installing Haiku, the BeOS successor. I’ve just mounted the CD and launched the virtual machine and my first impression is: woah, fast.

As with many other operating systems, the first step is to choose the language and keymap to use during the installation. From this screen you can also choose to test Haiku on live-cd mode.
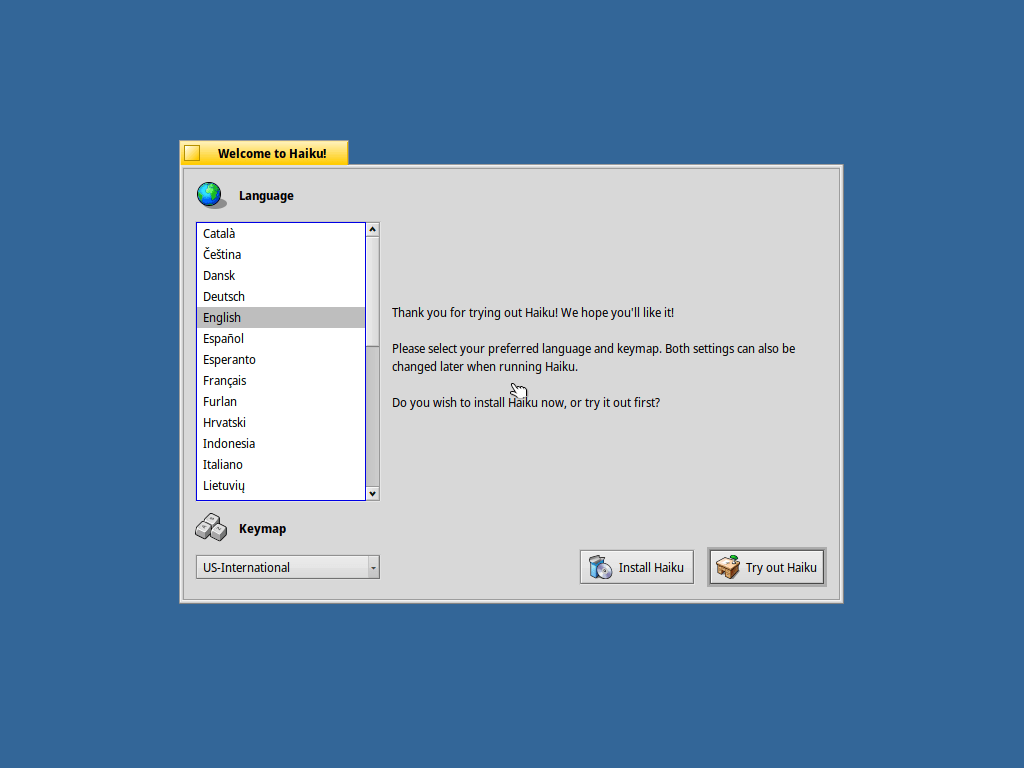
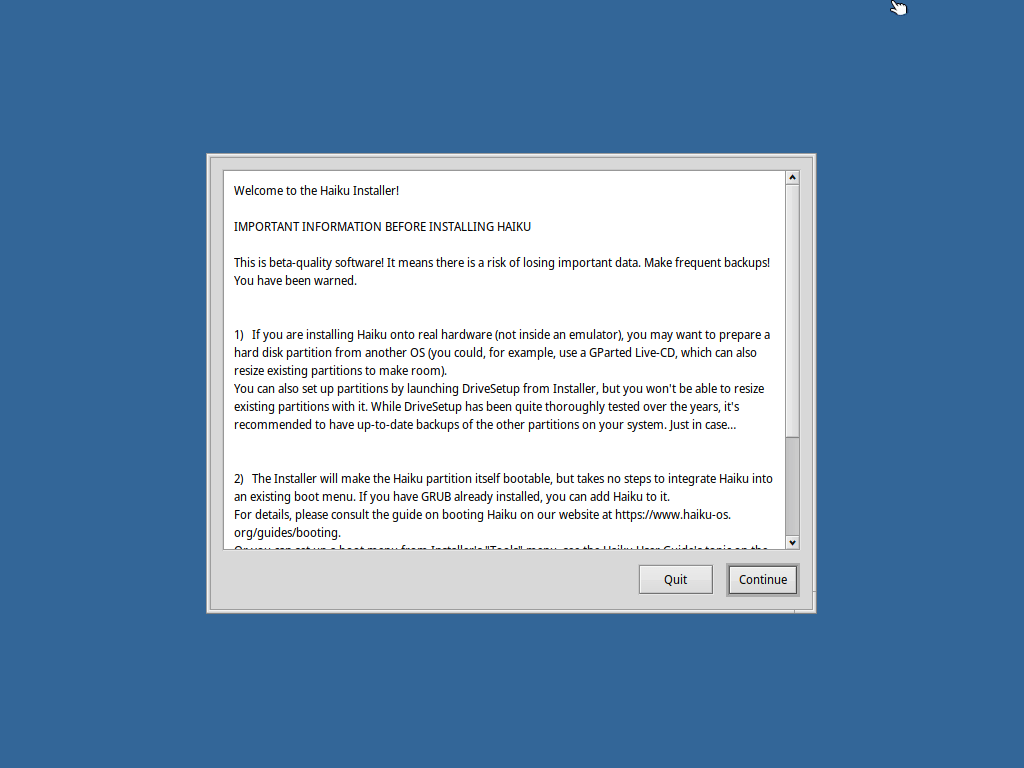
If you are installing Haiku on real hardware you should pay attention to the information displayed on the next screen.
Disk and partition
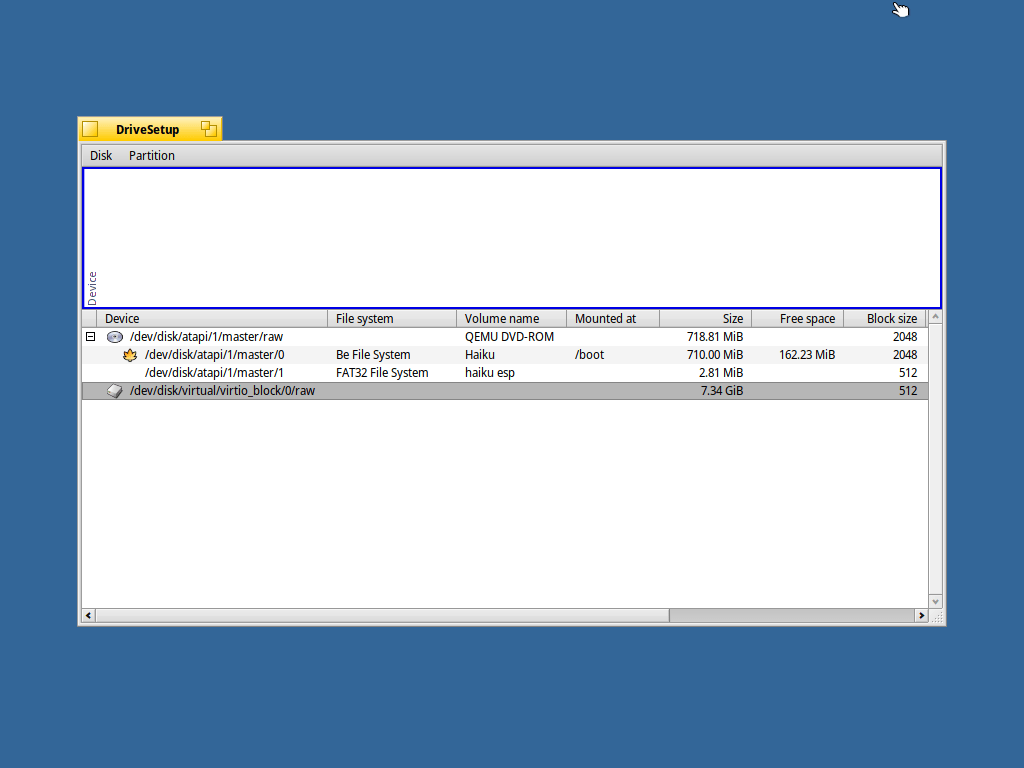
Also as with many operating systems, the installer will look for a partition to install. Click on the “Set up partitions…” button down-left on the screen.
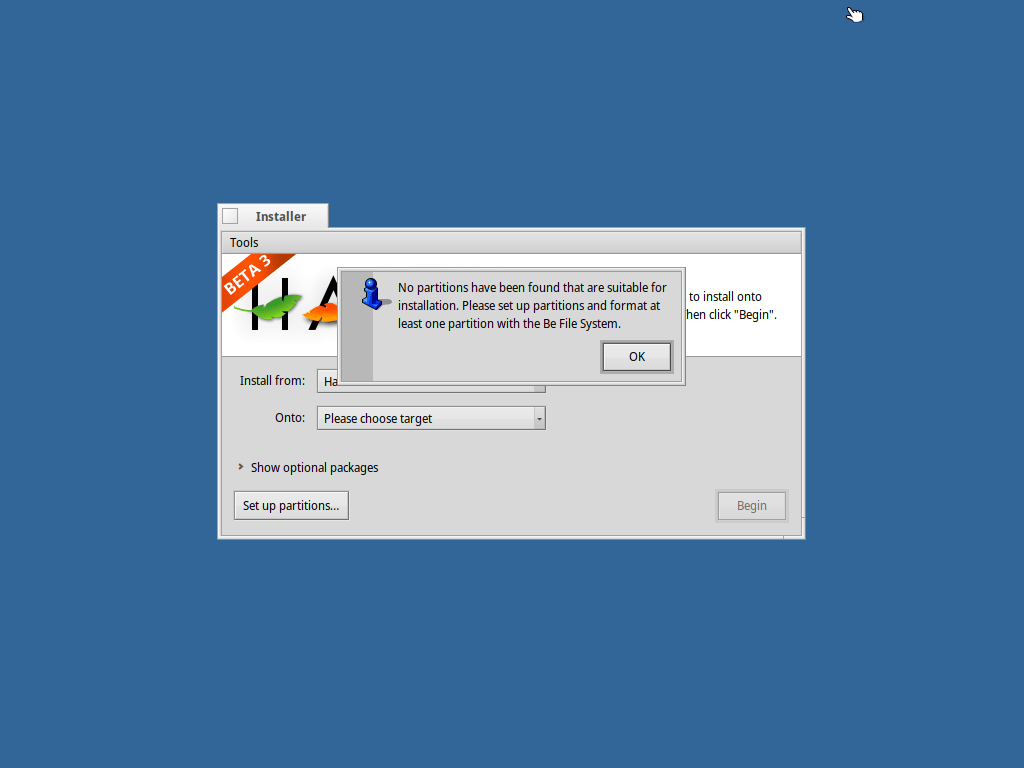
DriveSetup shows me two disks, the first one is the CD ROM installer, and the second is an empty disk on my virtual machine.
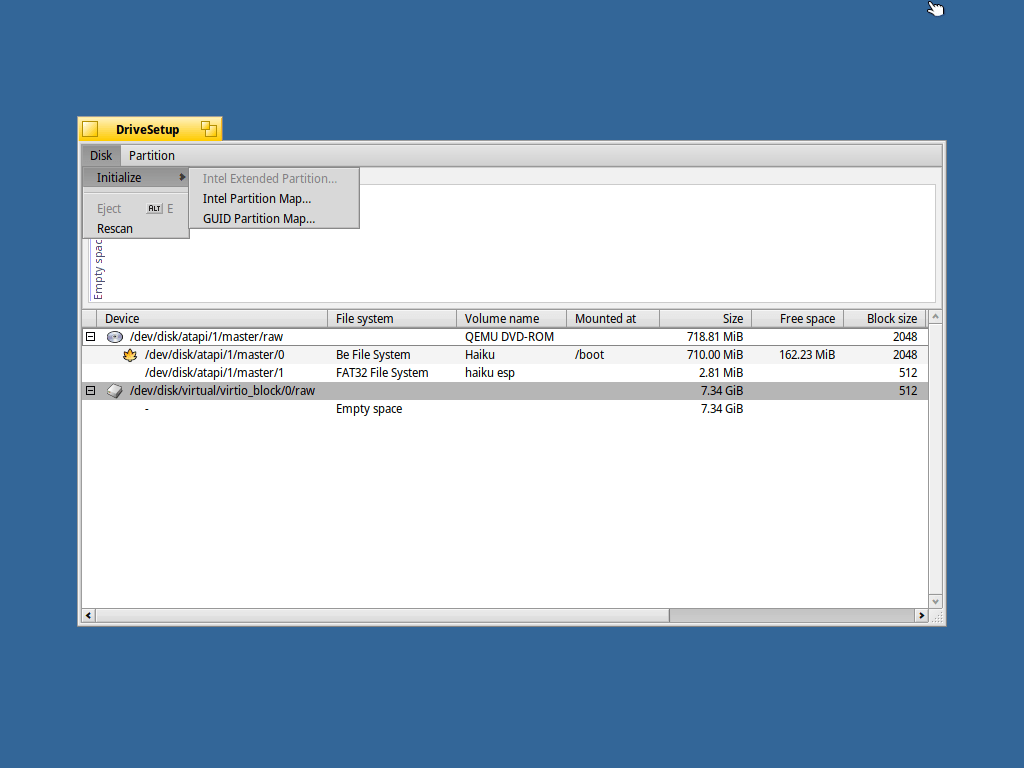
First I need to Initialize the disk, by choosing that option under the Disk menu.
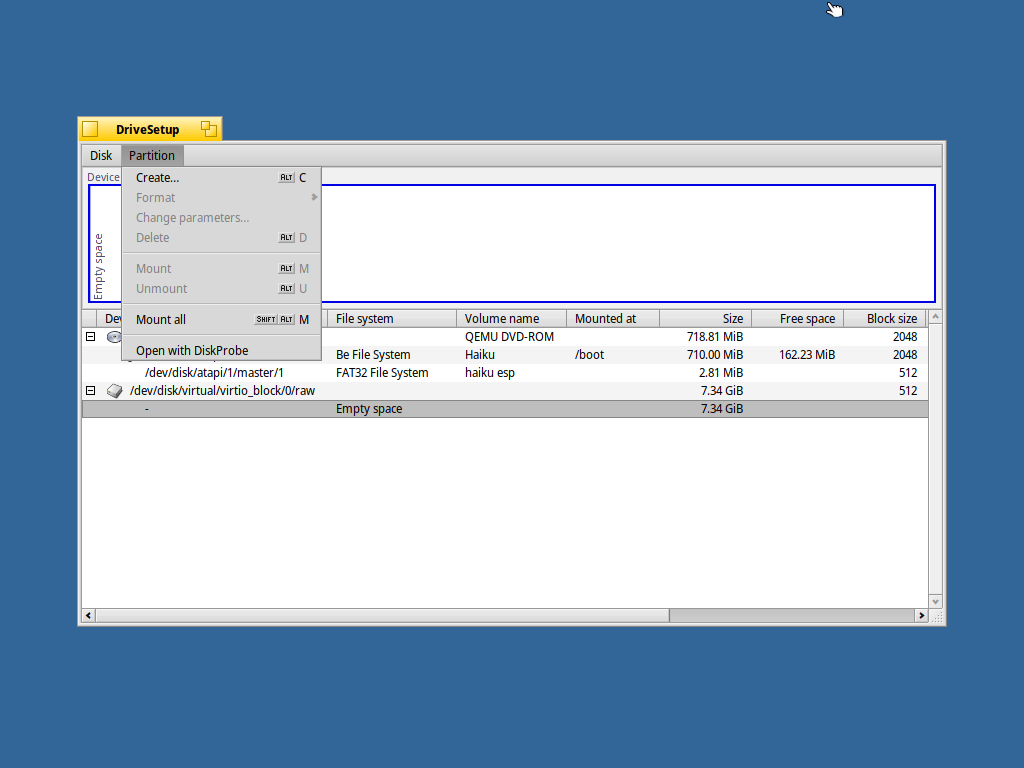
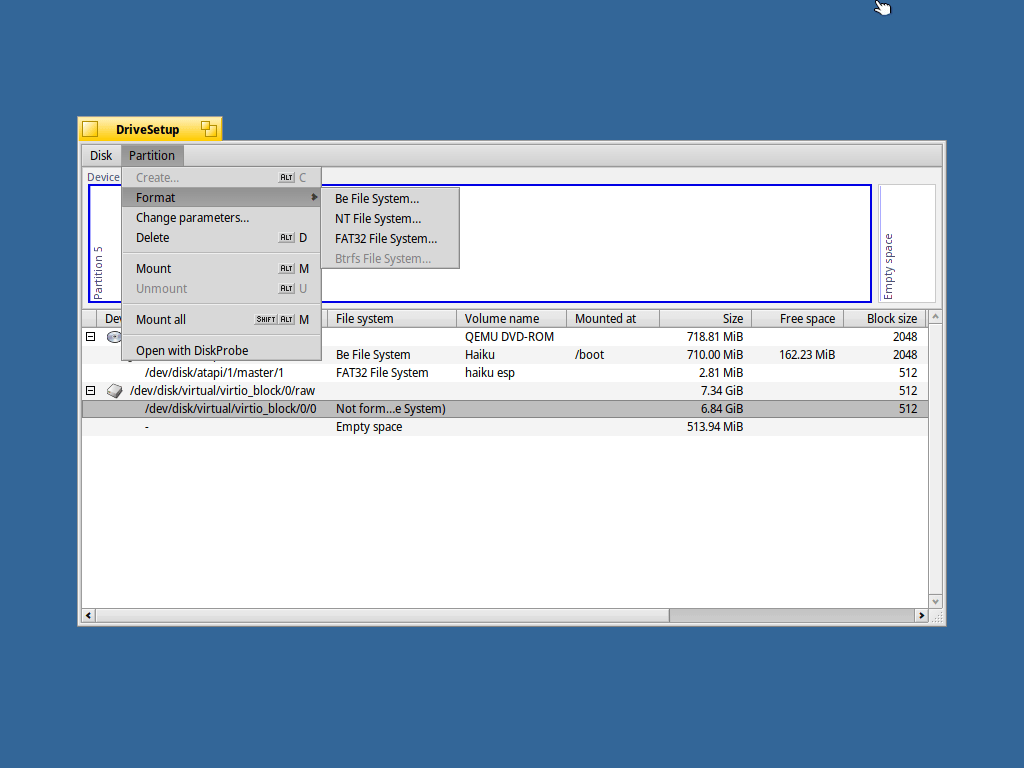
Second I need to create a partition. The option is under the Partition menu
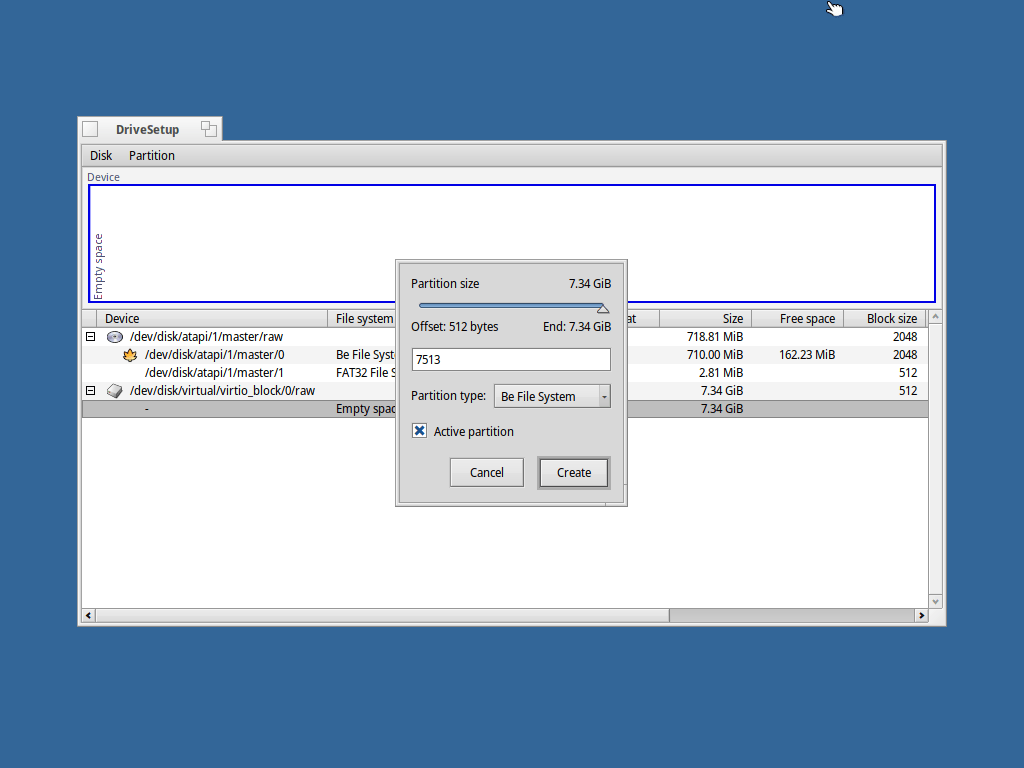
I didn’t assign the whole disk. I don’t know if I will need later, but I’m saving space for a swap partition. Just in case.
The third step on partition preparation is to format with the Be filesystem. The option is under the Partition menu
Copy the data
Now with our partition ready, go back to the previous screen. Which happens to be almost the only screen in the installer. Here we need to set three things:
- From where to install Haiku. The haiku disk of course.
- Where to install haiku. The partition I’ve just created.
- Choose some optional packages. It’s just ~90mb extra. And maybe I (or you) like Haiku enough to become a Haiku developer 😉
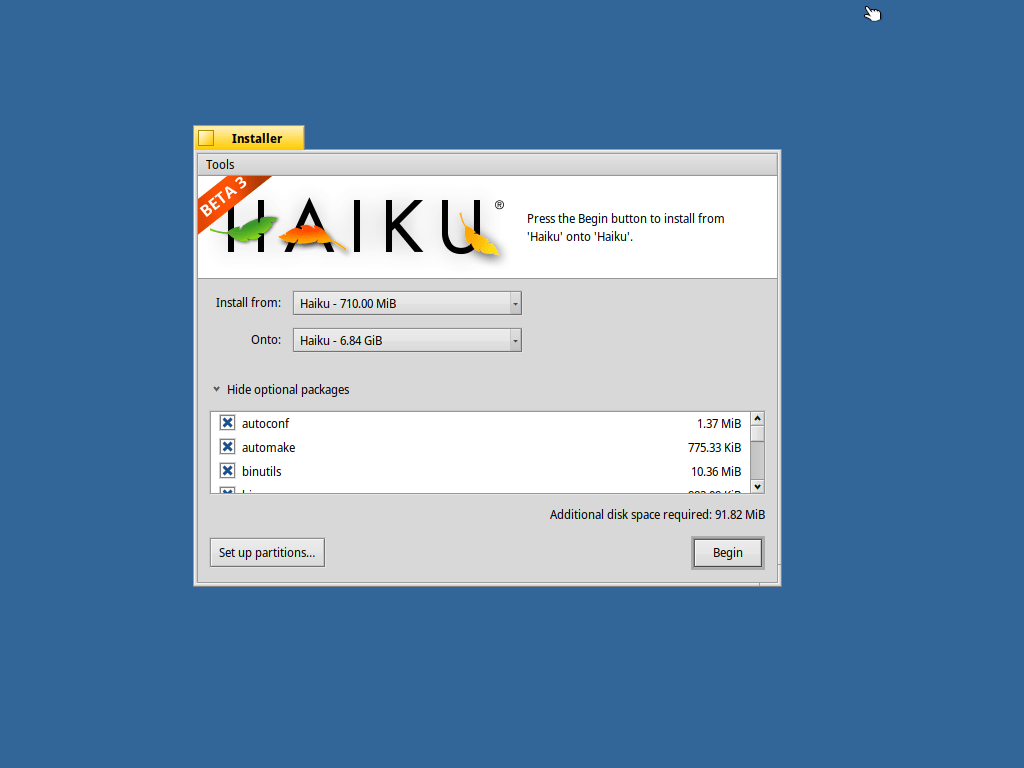
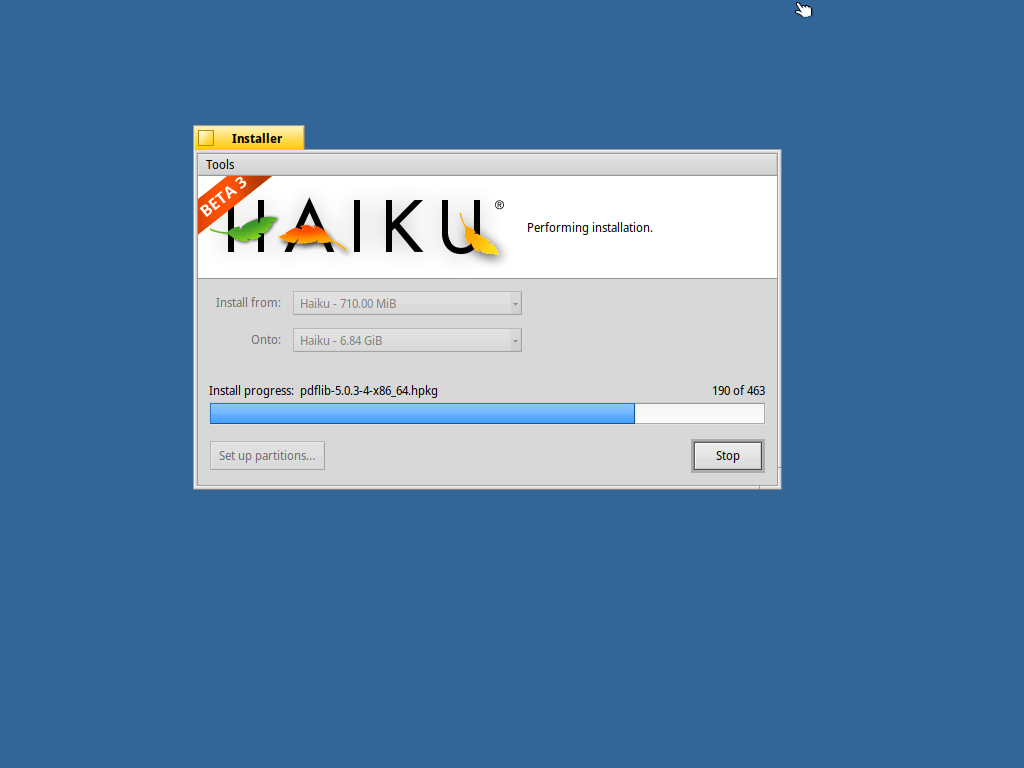
Click on “Begin” to begin the copy.
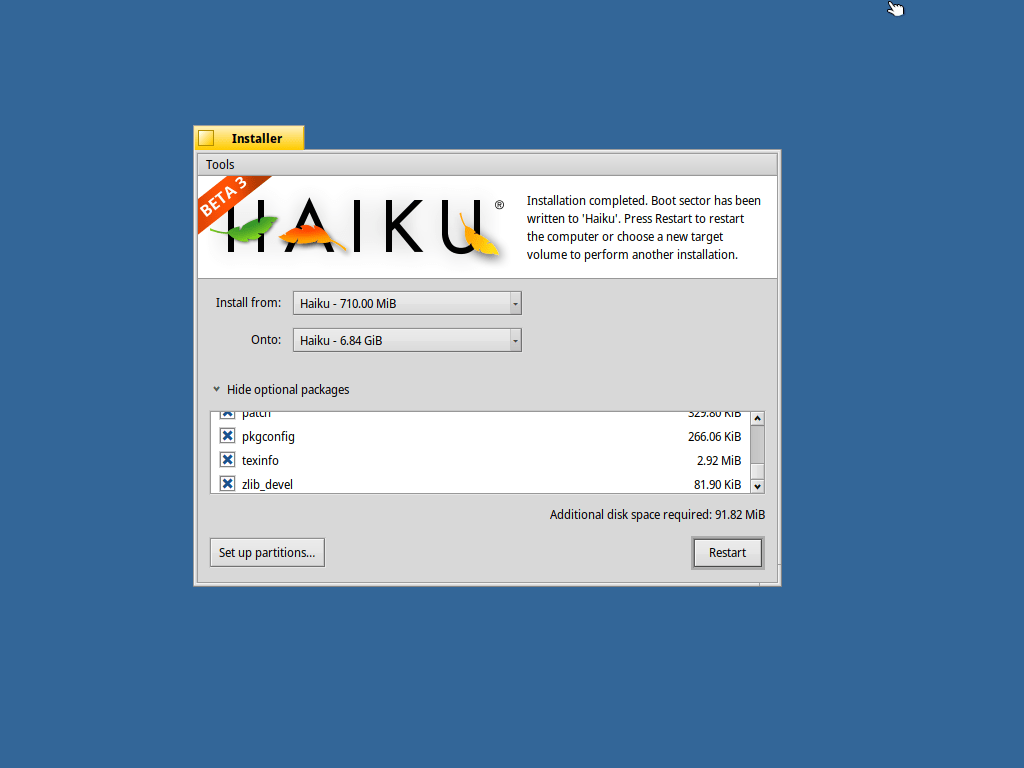
After a few minutes the installer goes back to the previous screen. On the top-right there is a legend explain what’s been done. Before reboot, let me tell my second impression: Simple. And easy. And fast.
Working with Haiku
Some seconds after click on the Restart button the system was ready for use.
One should start with the Quick tour, continue with the User Guide and then read the BeBook on the desktop. Or those impatient as me, start clicking everywhere and see what happens.
The “start menu” is located top-right on the screen, that blue feather button.
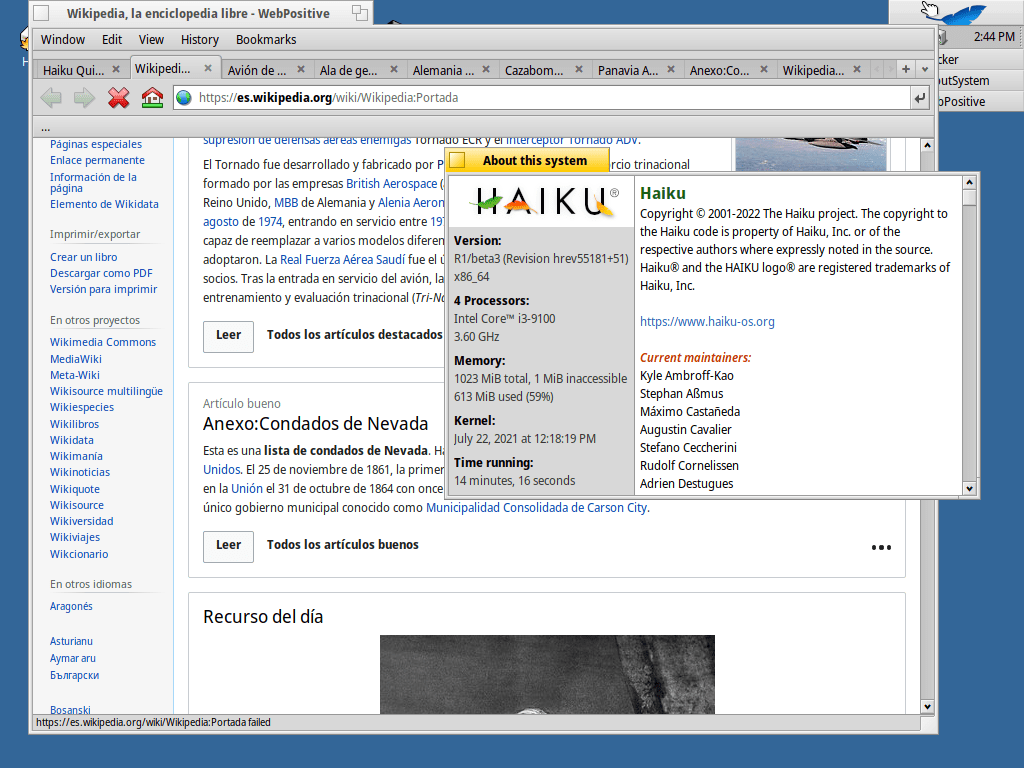
The web browser included, WebPositive, is based on webkit and is fast and light. Just for test I’ve opened several wikipedia tabs.
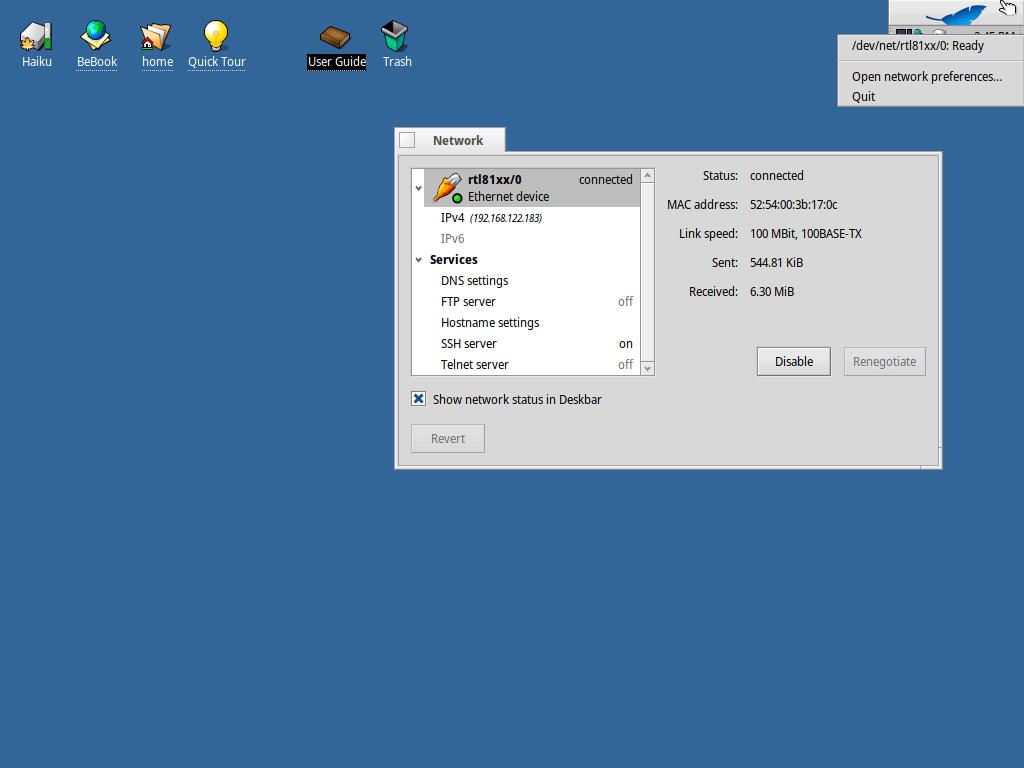
To configure the network, for example if yours isn’t using dhcp, right-click on the network icon down the “start menu” (I don’t know how is called here hehehe).
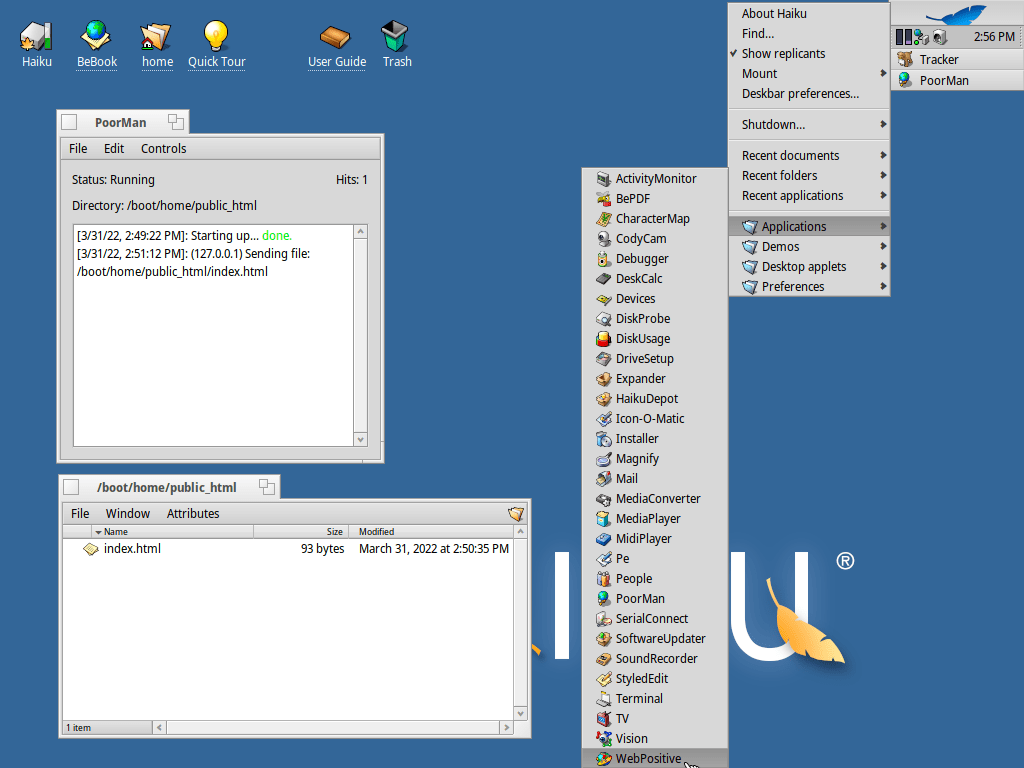
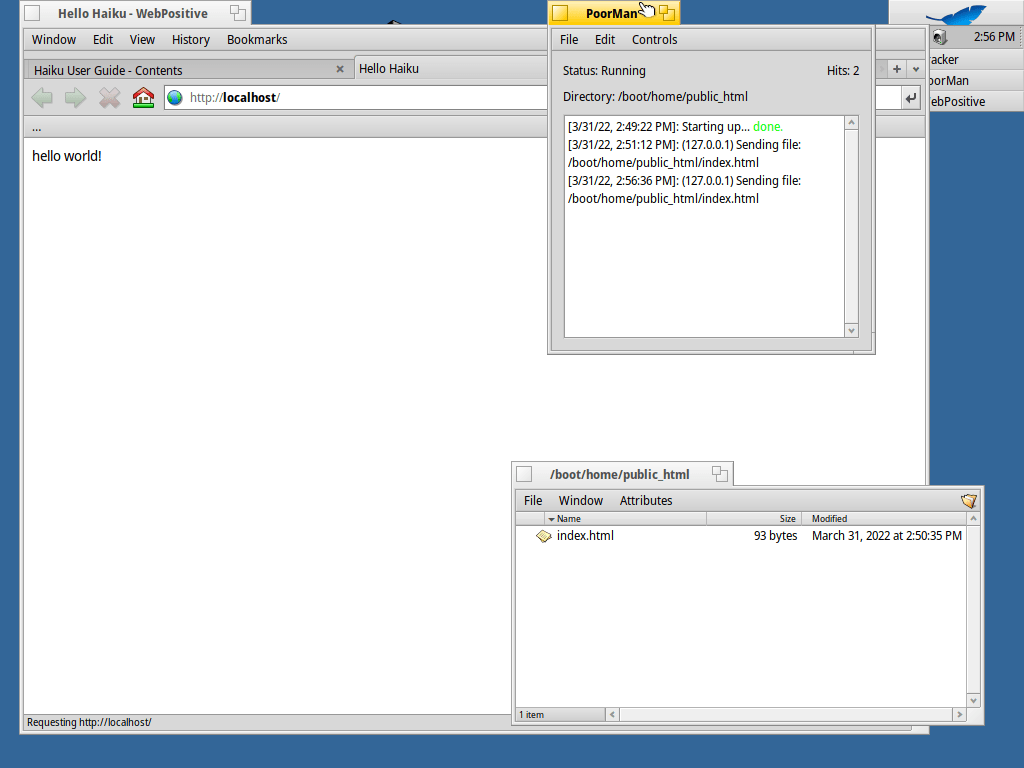
Navigation through installed applications I’ve found a Http server called PoorMan. I’ve created a very basic hello world html for testing:
Installing and updating software
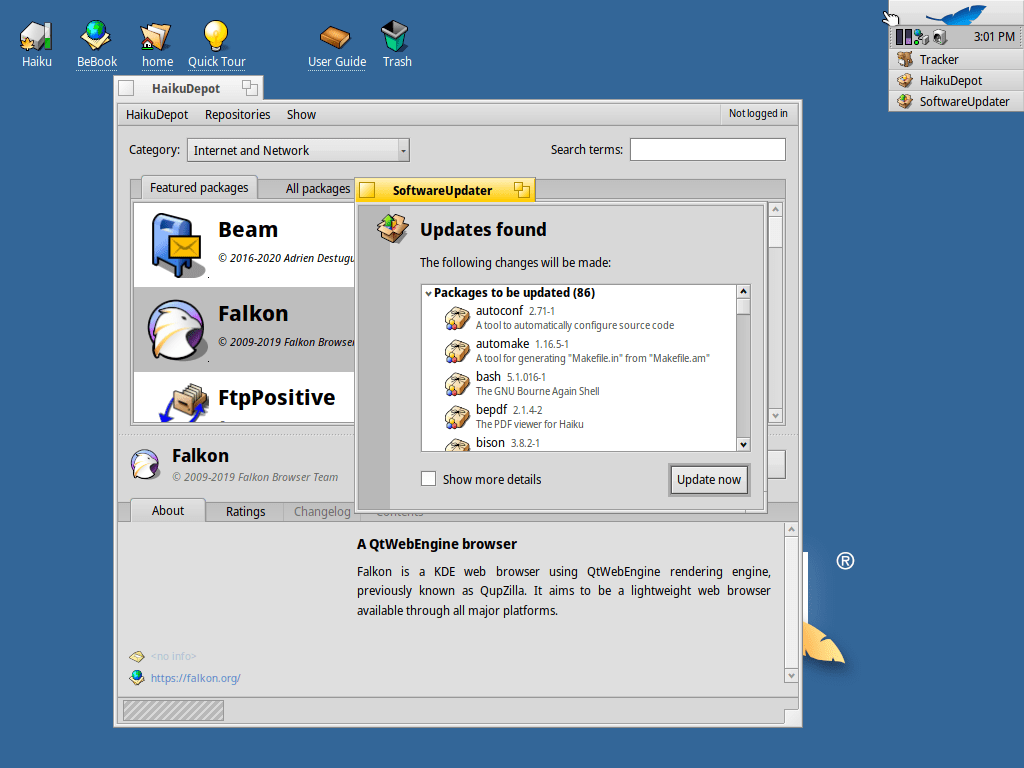
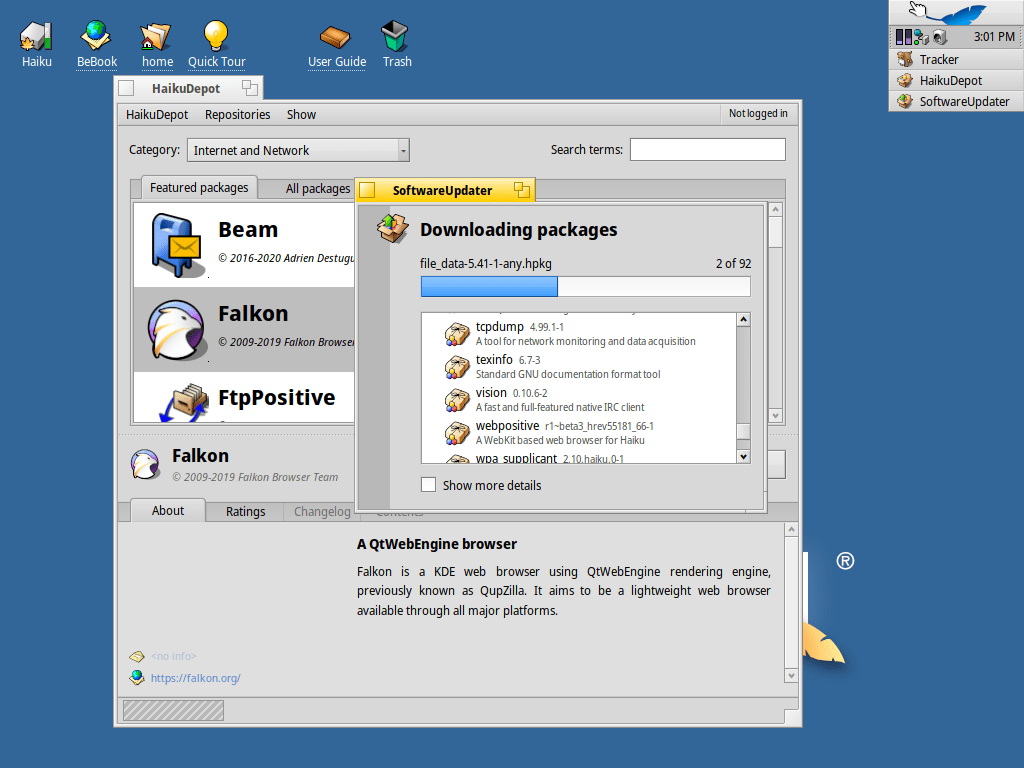
The Haiku software repository is pretty complete, you can use the HaikuDepot program to navigate available packages to install or to upgrade the installed ones.
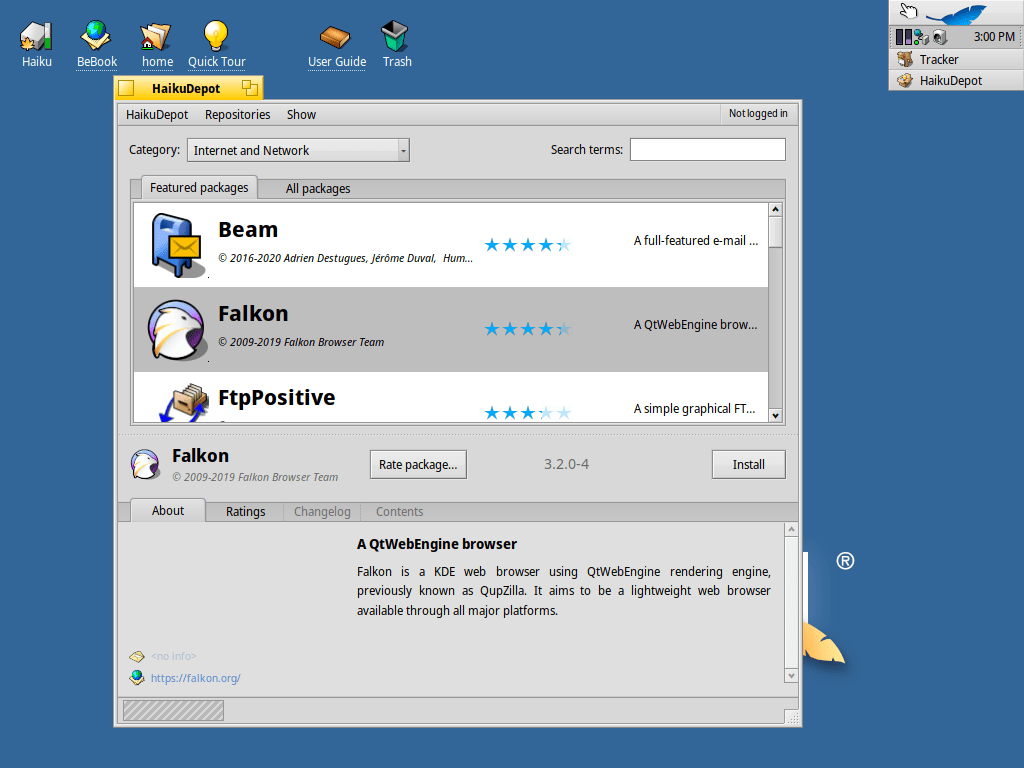
I missed some tooltip on the applications menu, to know what a program do when the name isn’t obvious. On the other hand, to find PoorMan Http Server included was a pleasant surprise.
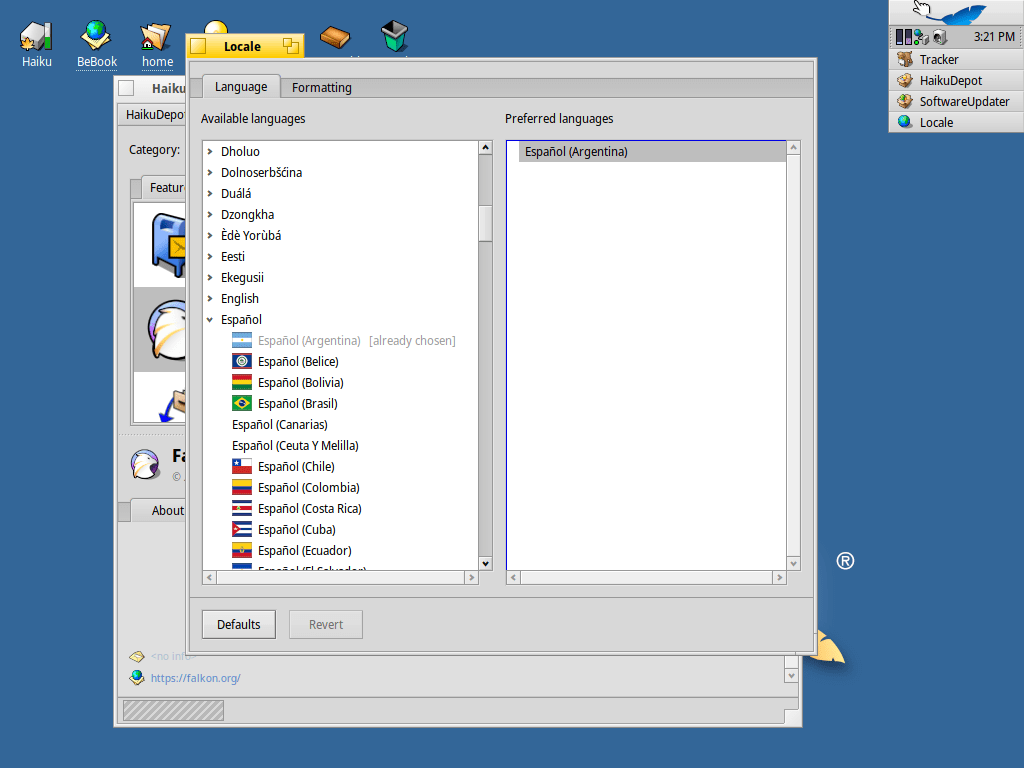
As this tutorial is ready, my last step was to change my locale settings under Preferences, and reboot to use it in Spanish. I’m thinking seriously and use Haiku as my main desktop OS as it have almost anything I need to do my work (i.e. an ssh client).