Today you will learn how to install Glassfish server on Ubuntu / Debian
GlassFish is a fully open-source reference implementation of JAVA EE application server which can be used for developing and deploying Java based applications. It supports Enterprise,JavaBeans, JPA,JSF, JSP/Servlet,JMS, RMI and many other Java-Based Technologies. It also provides us with a Web Based Panel and a CLI-Based administration console which allows easier configuration and management of our deployed applications.
Requirements :
- Minimum 1-2GB or more RAM (The more the better performance)
- 1vCore CPU or more (The more the lesser hiccups)
- 5-10GB of Disk Space (Depending upon the complexity and intensity of your application deployed)
Step 1 : Update your server
First step is to update your server and look for newer packages or security release that may be available for your distribution.
apt-get update -y
apt-get upgrade -y
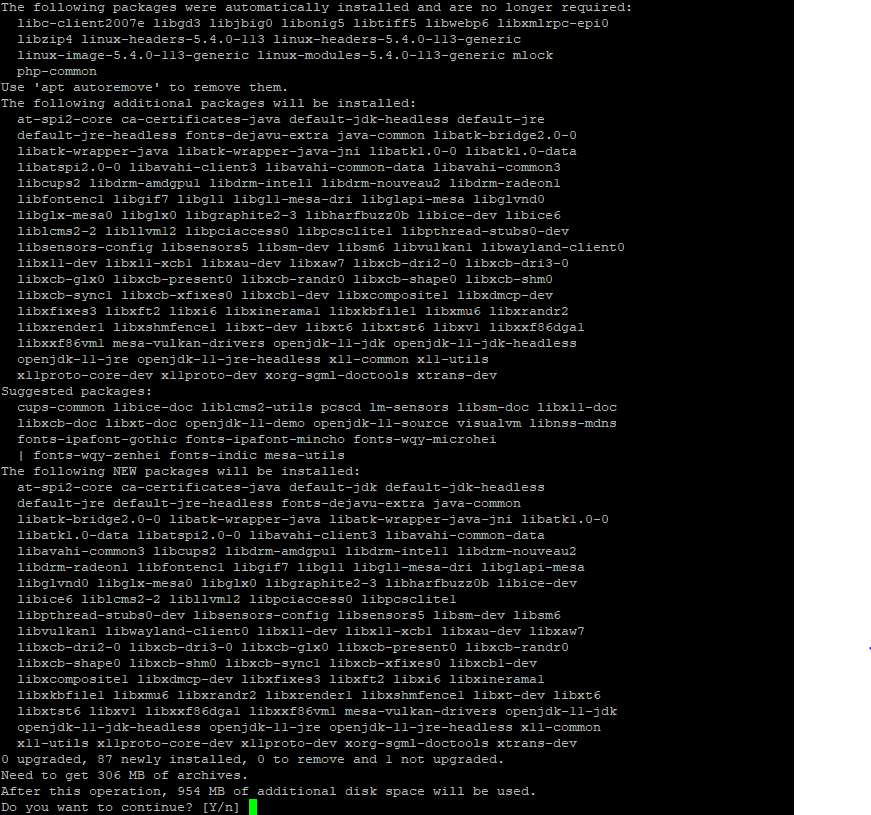
Step 2 : Installing Software Dependencies
Some important software dependencies are required before we get to the actual installation of the GlassFish Server :
apt-get install wget unzip software-properties-common
Step 3 : Installing & Configuring Java
GlassFish Server is based on Java and the latest version of GlassFish till now is 5 which uses Java 8, To install Java 8, Run the following command :
For Ubuntu 20.04
add-apt-repository ppa:linuxuprising/java
apt-get update -y
apt-get install oracle-java8-installer
For Debian 10 :
apt-add-repository ‘deb http://security.debian.org/debian-security stretch/updates main’
apt-get update
apt-get install openjdk-8-jdk
After its completion, Verify that Java is completely installed by running the following command :
java –version

Install GlassFish on Linux
Next Step is to download the files from the official server link :
cd /opt/
wget http://download.oracle.com/glassfish/5.0.1/nightly/latest-glassfish.zip
Extract the downloaded files :
unzip latest-glassfish.zip
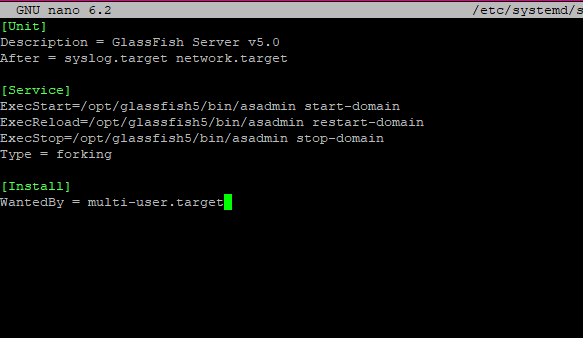
Now create a Service File for Glass Fish Server :
nano /etc/systemd/system/glassfish.service
Add the following content into the file and save it :
[Unit]
Description = GlassFish Server v5.0
After = syslog.target network.target
[Service]
ExecStart=/opt/glassfish5/bin/asadmin start-domain
ExecReload=/opt/glassfish5/bin/asadmin restart-domain
ExecStop=/opt/glassfish5/bin/asadmin stop-domain
Type = forking
[Install]
WantedBy = multi-user.target
Save the daemon and start the GlassFish Server
systemctl daemon-reload
systemctl enable glassfish
systemctl start glassfish
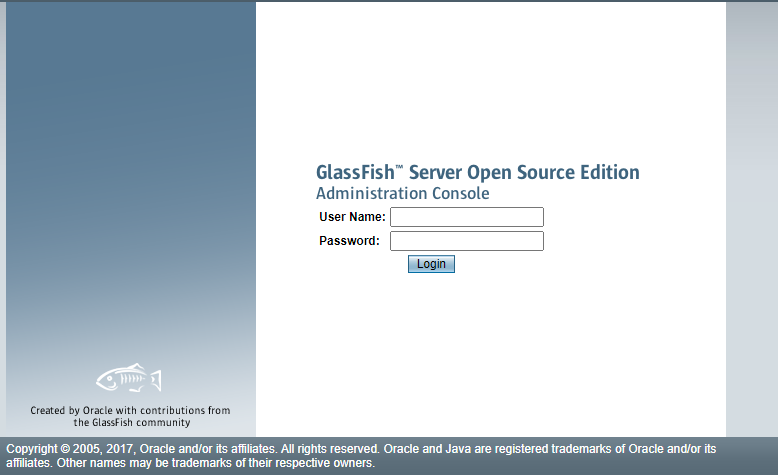
To change the password of the GlassFish5 Web Panel (Press enter for default admin password)
cd /opt/glassfish5/bin
./asadmin change-admin-password

Open up your browser, open http://localhost:4848, Login up with the password you used.
Conclusion :
You have installed GlassFish5 Server on your VPS on Ubuntu or Debian. This tutorial assumes you are root!