
Hello, dear friends. In this post, you will learn how to install CyberPanel on Ubuntu 22.04 / 20.04. This is one of the best admin panels that we can find for all Linux and the installation of this is very easy.
Introducing to CyberPanel
CyberPanel is defined as one of the most advanced and easy to administrate panels you can find. In short, it is the set of tools that allows us to manage a hosting and has an elegant and well-designed web interface to achieve the goal.
With CyberPanel we will be able to have a fast and efficient Panel. The fast is because it uses neither Nginx nor Apache as a web server but the very fast OpenLiteSpeed. In addition to this, you can deploy WordPress sites with SSL in a few clicks and quickly.
Besides this, CyberPanel comes with a one-click app installer for WordPress (with LSCache), Joomla, and Prestashop. So not only for your websites, but all your web applications can be quickly deployed.
So, in this post, we will help you to understand the whole installation process on an Ubuntu 22.04 / 20.04 server.
Install CyberPanel on Ubuntu 22.04 / 20.04
CyberPanel provides us with an installation script that facilitates the whole process. This script must always be run as root user and will not allow you to use sudo.
So, download the script using wget.
wget -O installer.sh https://cyberpanel.net/install.sh
--2023-04-24 22:57:00--  https://cyberpanel.net/install.sh
Resolving cyberpanel.net (cyberpanel.net)... 2606:4700:3031::ac43:cbee, 2606:4700:3030::6815:2cd8, 172.67.203.238, ...
Connecting to cyberpanel.net (cyberpanel.net)|2606:4700:3031::ac43:cbee|:443... connected.
HTTP request sent, awaiting response... 200 OK
Length: 1934 (1.9K) [application/x-sh]
Saving to: ‘installer.sh’

installer.sh                      100%[============================================================>]   1.89K  --.-KB/s    in 0s

2023-04-24 22:57:00 (10.7 MB/s) - ‘installer.sh’ saved [1934/1934]
Give it permissions to run with the command
chmod +x installer.sh
After that, you have to run it like this
sh installer.sh
The first system checks will start and you will be asked if you want to install CyberPanel.
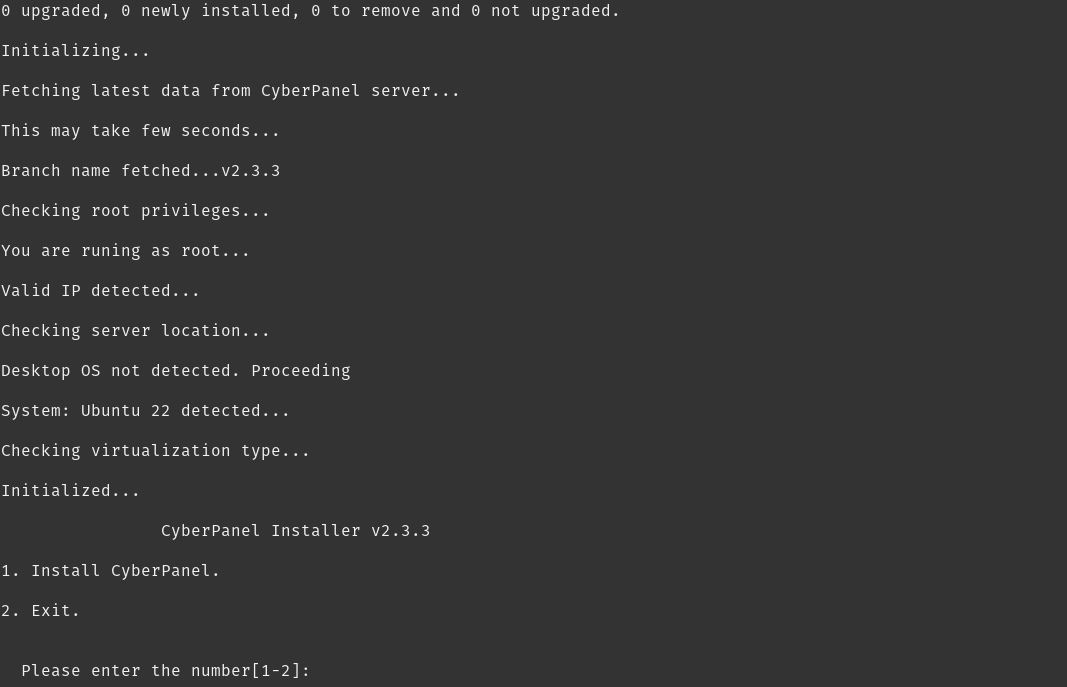
Press 1 and the installer will start asking you a series of configuration questions.
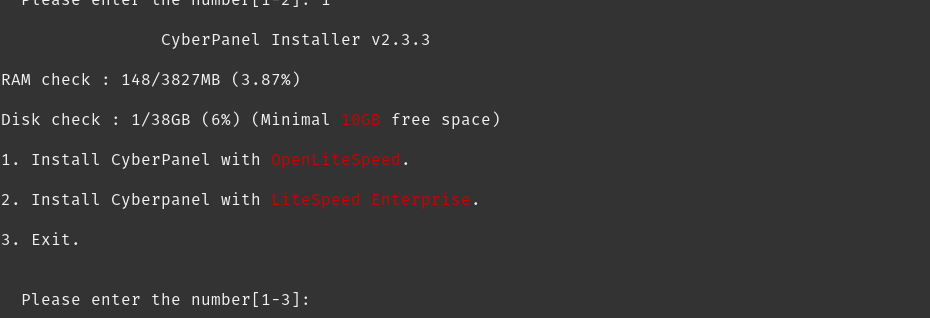
First, you have to specify if you want to use the free OpenLiteSpeed or the enterprise version.
The second question asks if you want to install CyberPanel completely.
Install Full service for CyberPanel? This will include PowerDNS, Postfix and Pure-FTPd.
Full installation [Y/n]: Y
Next, you will be asked if the MySQL installation is on the same server or remote. If you want it to be on the same server, answer N. If there is such a remote instance, you have to choose Y and enter the credentials.
In my case, I have answered N so the MySQL installation will be local.
Do you want to setup Remote MySQL? (This will skip installation of local MySQL)
(Default = No) Remote MySQL [y/N]:
Now it is time to choose the CyberPanel version to install.
Press Enter key to continue with latest version or Enter specific version such as: 1.9.4 , 2.0.1 , 2.0.2 ...etc
Continuing the installation
Then, you will have the option to use the default password for the web interface, generate a random one, or specify one.
Please choose to use default admin password 1234567, randomly generate one (recommended) or specify the admin password?
Choose [d]fault, [r]andom or [s]et password: [d/r/s]
After this, you will be asked if you wish to install the Memcached and Redis extensions for PHP.
Do you wish to install Memcached process and its PHP extension?
Please select [Y/n]:

Do you wish to install Redis process and its PHP extension?
Please select [Y/n]: Y
Next, it is recommended to enable WatchDog as this plugin will help CyberPanel to detect problems in the tables and data.
Would you like to set up a WatchDog (beta) for Web service and Database service ?
The watchdog script will be automatically started up after installation and server reboot
If you want to kill the watchdog , run watchdog kill
Please type Yes or no (with capital Y, default Yes):
Then relax as the whole installation process will start. When finished, you will see a screen similar to this one.
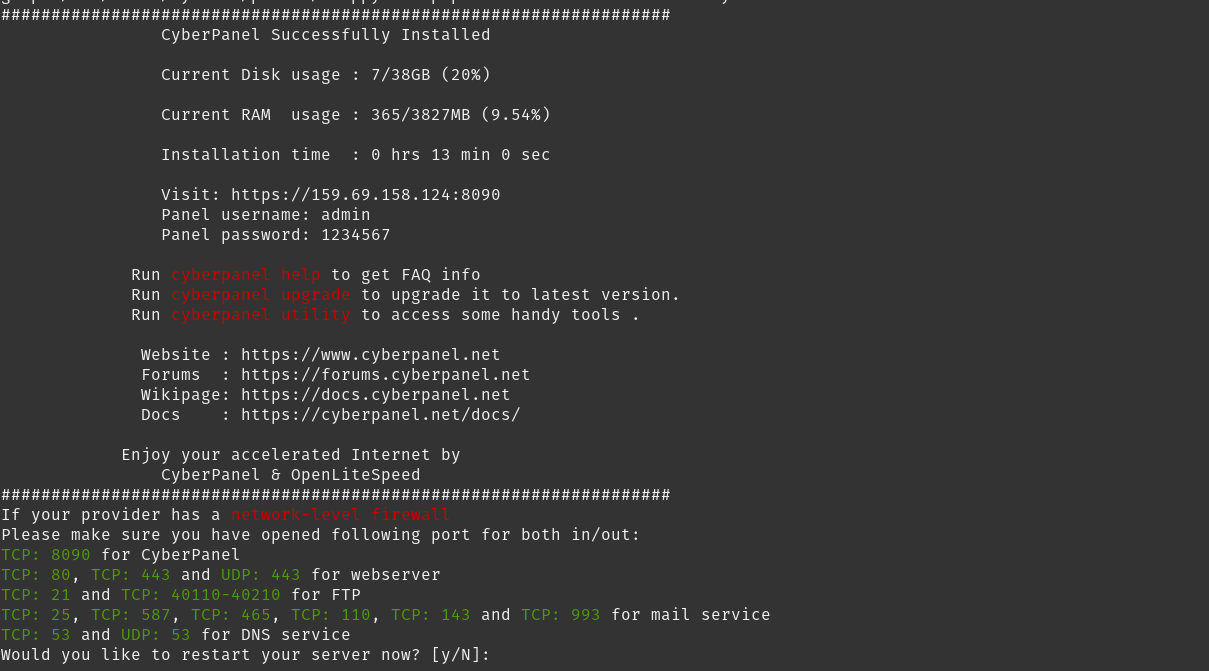
There you will see the login credentials. After that, reboot you server.
Testing CyberPanel on Ubuntu
As CyberPanel uses a lot of services there are many ports you have to open in the firewall.
To open the ports you can read our post about it.
How to open ports on Ubuntu / Debian?
And in summary, the ports you have to open are 8090, 80, 443, 21, 40110-40210, 25, 587, 465, 110, 143, 993, and 53 by both TCP and UDP.
Now yes, open your web browser and go to http://your-server:8090 or https://your-server:8090 and you will see the following

This is the login screen. Enter your login credentials.
Finally, you will see the dashboard along with all the options available.
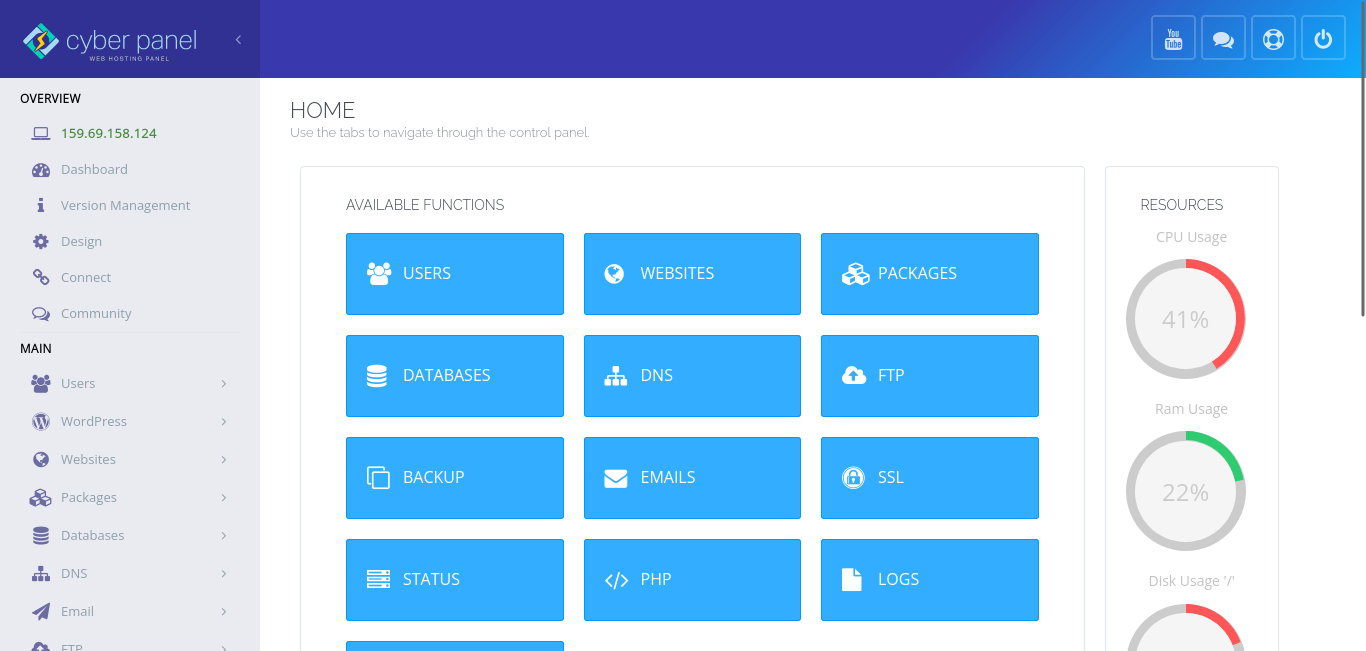
Enjoy it.
Conclusion
CyberPanel is one of the easiest panels to use and is quite powerful. In this post, we have helped you with the process and you will have a very versatile managed panel.