
Hello, dear friends. In this post, you will learn how to install CSF Firewall on Debian 11. This firewall which is more advanced than UFW will help us to improve the security of our system.
Introducing to CSF
A Firewall helps us to block incoming and outgoing connections to an operating system. This is so that we can filter third-party access to our system. In addition to this, we can filter which applications can make use of the network.
Usually, an operating system incorporates a firewall but they need more sophisticated tools to increase the security of the system.
We have talked about CSF because we have explained how to install it on CentOS 8.
On the CSF web site, we find the following definition
A Stateful Packet Inspection (SPI) firewall, Login/Intrusion Detection, and Security application for Linux servers.
It has advanced features that allow us to further secure the system and that are easy to define thanks to its readable configuration file.
So, let’s go for it.
Install CSF Firewall on Debian 11
I will assume in this post that the system is a server. So, connect via SSH and make sure the system is up to date.
sudo apt update
sudo apt upgrade
After that, install with this command all the dependencies we need to install CSF.
Now run this command to install all CSF dependencies
sudo apt install libio-socket-inet6-perl libsocket6-perl sendmail dnsutils unzip libio-socket-ssl-perl libcrypt-ssleay-perl git perl iptables libnet-libidn-perl
Once you have these packages downloaded and installed then you can continue with the installation.
Now you have to make sure that there is no other firewall running on the system. So, disable UFW as follows
sudo ufw disable
Now you can install CFS. To do this, download it using the wget command.
wget http://download.configserver.com/csf.tgz

Now unzip the file
sudo tar -xvzf csf.tgz
This will generate a folder called csf that we have to access. And inside it, run the install.sh file.
cd csf
sudo sh install.sh
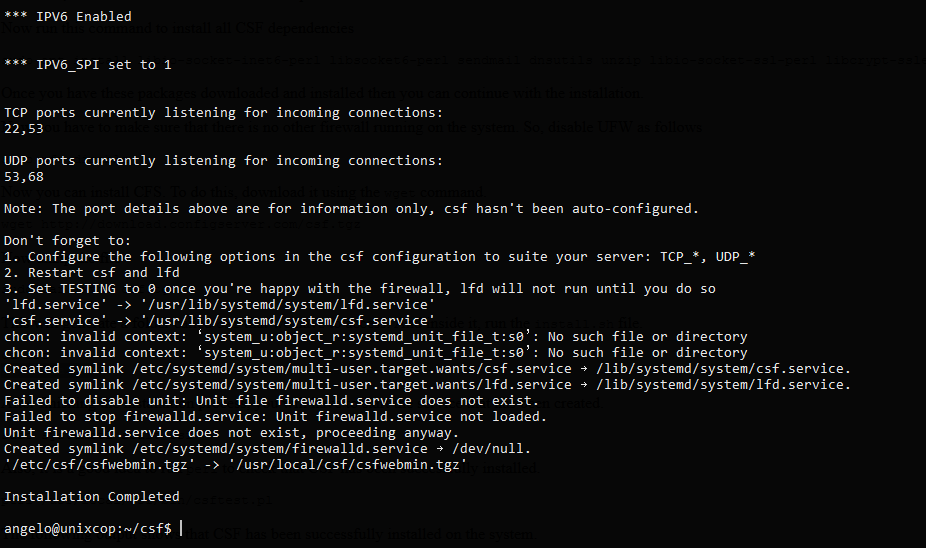
After finishing the installation process, you will have to start the service that has been created.
sudo systemctl start csf
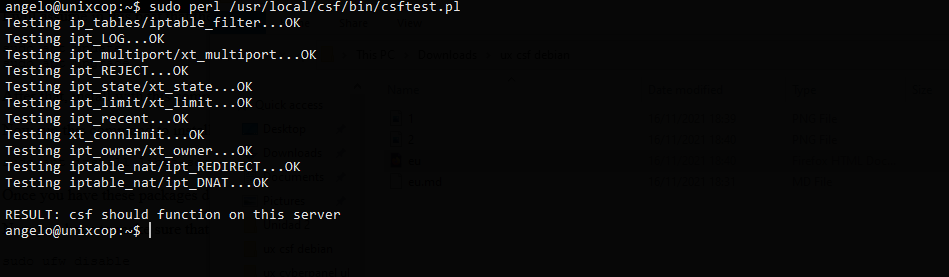
Also, it is a good idea to run perl to check that CSF has been successfully installed.
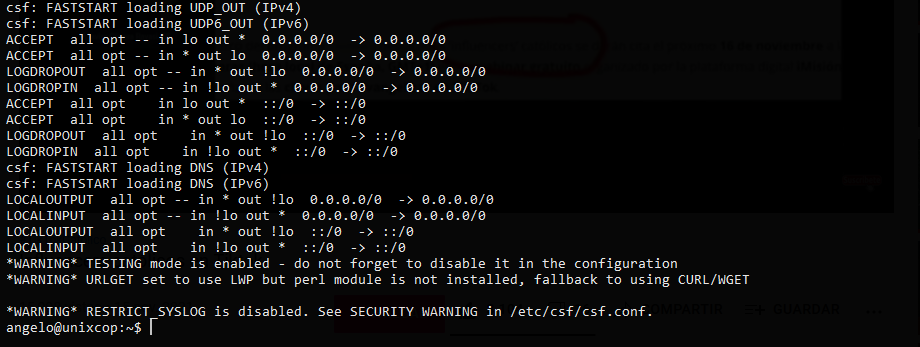
sudo perl /usr/local/csf/bin/csftest.pl
The following output shows that CSF has been successfully installed on the system.
Now, enable CSF to start with the system.
sudo systemctl enable csf
Now we can configure it to make it ready.
Configuring CSF Firewall on Debian before using it
With CSF installed on the system, we then have to configure it so that we can use it.
So, the main CSF configuration file is /etc/csf/csf.conf.
This file must be backed up before editing it.
sudo cp /etc/csf/csf.conf /etc/csf/csf.conf.bak
And now yes, open it using for example the nano editor
sudo nano /etc/csf/csf.conf
The most basic thing we can do with a firewall is to open and close access ports. This can be done in the TCP_IN and TCP_OUT sections where we can specify the ports that will have access to the outside and incoming connections. Also, it works for the UDP protocol-
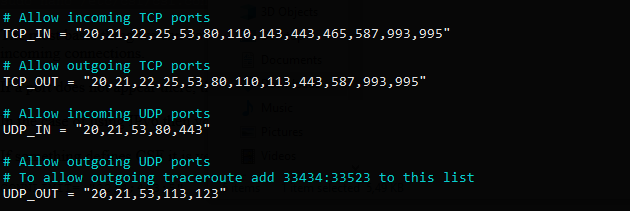
If a port does not appear there, then it is not enabled.
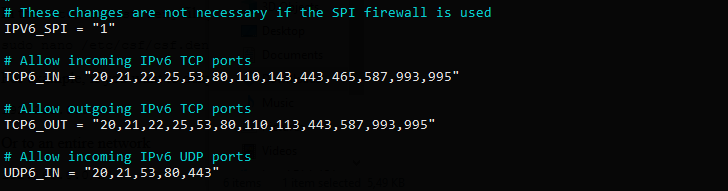
In the case of using IPv6 then you have to define the ports in the TCP6_IN and TCP6_OUT sections.
If something defines CSF it is versatility and security since we can also define the number of connections to the ports quickly. To do this, go to the CONNLLIMIT value, and to use it, better to give an example
CONNLIMIT= "22;4;443;5"

In this case, we are defining that only 4 IP addresses can simultaneously use port 22 and only 5 IP addresses can use port 443.
But there are many more configurations that you can do and to know them, you can consult the official CSF documentation.
When you are ready, you can save the changes and close the editor.
More configuration files
In the /etc/csf/csf.deny file you can specify IP ranges and addresses that will be blocked by the Firewall.
sudo nano /etc/csf/csf.deny
For example, if you want to deny access to an IP you only have to add it
192.168.0.3
Or to an entire network
192.168.0.0/24
Save the changes and close the editor.
Also, there is the /etc/csf/csf.allow file that gives the opposite effect. These are addresses and IP ranges that are enabled for access.
Or the /etc/csf/csf.ignore file which will cause the specified IP addresses not to be filtered.
Once you have configured everything, you have to run the following command to apply the changes.
sudo csf -r
So, enjoy it.
Conclusion
In this tutorial, you learned how to install and configure CSF on Debian 11. This way you will be able to secure your server much better.