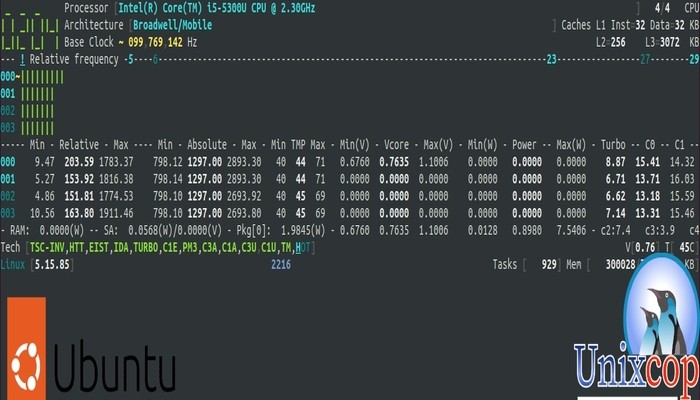
CoreFreq is a CPU monitoring tool that provides detailed information about your processor’s performance, including real-time temperature readings, clock speeds, and utilization statistics. In this article, we’ll walk you through the steps required to install CoreFreq on Ubuntu 22.04 LTS using the GitHub method.
Step 1:
Open the Terminal To begin the installation process, you’ll need to open the Terminal on your Ubuntu system. You can do this by pressing the Ctrl+Alt+T keys simultaneously or by searching for the Terminal application in the Applications menu.
Step 2:
Install Dependencies Before you can install CoreFreq, you need to install some dependencies on your system. Enter the following command in the Terminal to install the required dependencies:
sudo apt-get install -y git build-essential libncurses-dev
This command will install Git, build-essential, and libncurses-dev packages on your Ubuntu system.
Step 3:
Clone CoreFreq Repository After installing the required dependencies, you can clone the CoreFreq repository from GitHub using the following command:
git clone https://github.com/cyring/CoreFreq.git
This command will clone the CoreFreq repository to your current working directory.
Step 4:
Build and Install CoreFreq Once you have cloned the CoreFreq repository, navigate to the CoreFreq directory using the following command:
cd CoreFreqNext, build and install CoreFreq by entering the following commands:
make
sudo make install

These commands will build and install CoreFreq on your Ubuntu system.
- Next, run the following command to load the Linux kernel module from the local directory:
sudo insmod ./corefreqk.ko
- Now, start the daemon in the background:
sudo ./corefreqd &
Step 5:
Launch CoreFreq After the installation is complete, you can launch CoreFreq by entering the following command in the Terminal:
sudo corefreq-cli

This command will start CoreFreq and display a real-time view of your CPU performance statistics.

Customize your Dashboard as shown above with the option lists.
Conclusion
In conclusion, installing CoreFreq on Ubuntu 22.04 LTS using the GitHub method is a straightforward process that requires only a few simple steps. By following the steps outlined in this article, you can easily install CoreFreq on your Ubuntu system and start monitoring your CPU performance today.


