
In this guide, we will show you how to install Concrete5 CMS on Ubuntu systems
Concrete5 is a free, open-source Content Management System (CMS) used for building and managing websites. It is written in PHP and uses the Model-View-Controller (MVC) architectural pattern.
One of the unique features of Concrete5 is its in-context editing, which allows website owners to make changes to their website directly from the front-end interface without having to go through the back-end dashboard.
With Concrete5, content is organized into blocks, making it easy to add, delete, and rearrange content on your website. It also has a user-friendly dashboard that is easy to navigate and manage.
Concrete5 is a versatile CMS that can be used for a wide range of websites such as blogs, e-commerce sites, portfolios, and corporate websites. It also supports multiple languages, which makes it an ideal option for creating multilingual websites.
Overall, Concrete5 is a powerful and user-friendly CMS that is perfect for both beginners and experienced users who want to create dynamic and customizable websites.
Install Concrete5 CMS on Ubuntu
Here is a step-by-step guide on how to install Concrete5 CMS on Ubuntu 22.04 LTS:
- First, update the system packages by running this command:
sudo apt update- Install Apache web server by running the following command:
sudo apt install apache2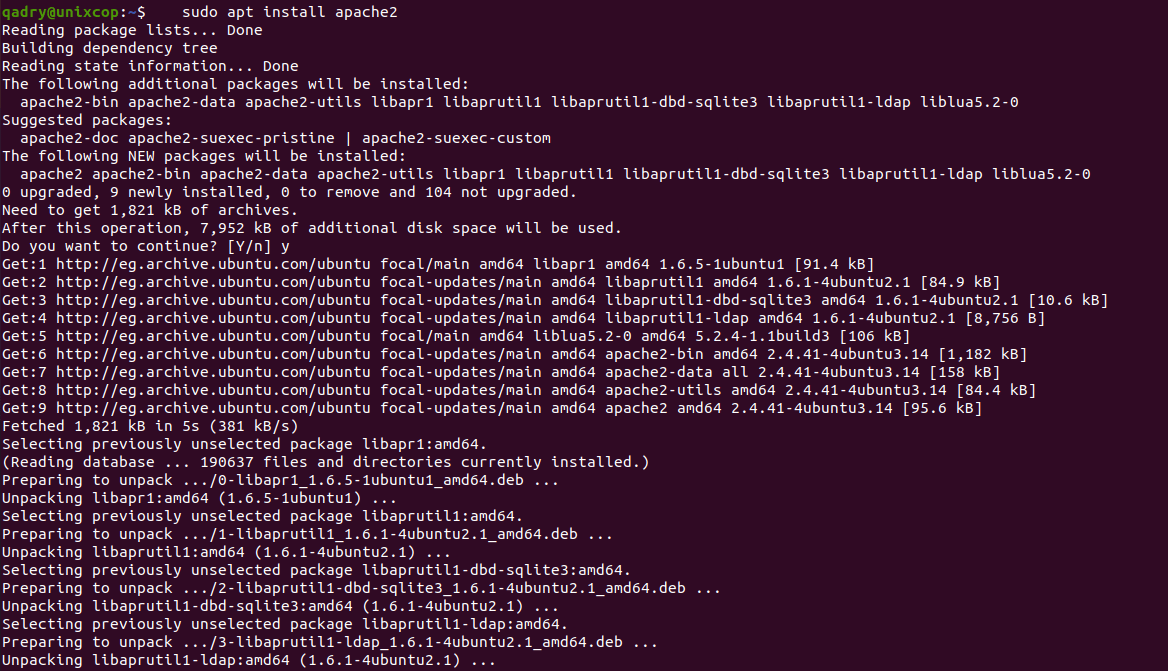
Install the required php-extensions by running the command below:
sudo apt install php-zip php-curl php-gd- Install MySQL database server and PHP by running this command:
sudo apt install mysql-server php php-mysql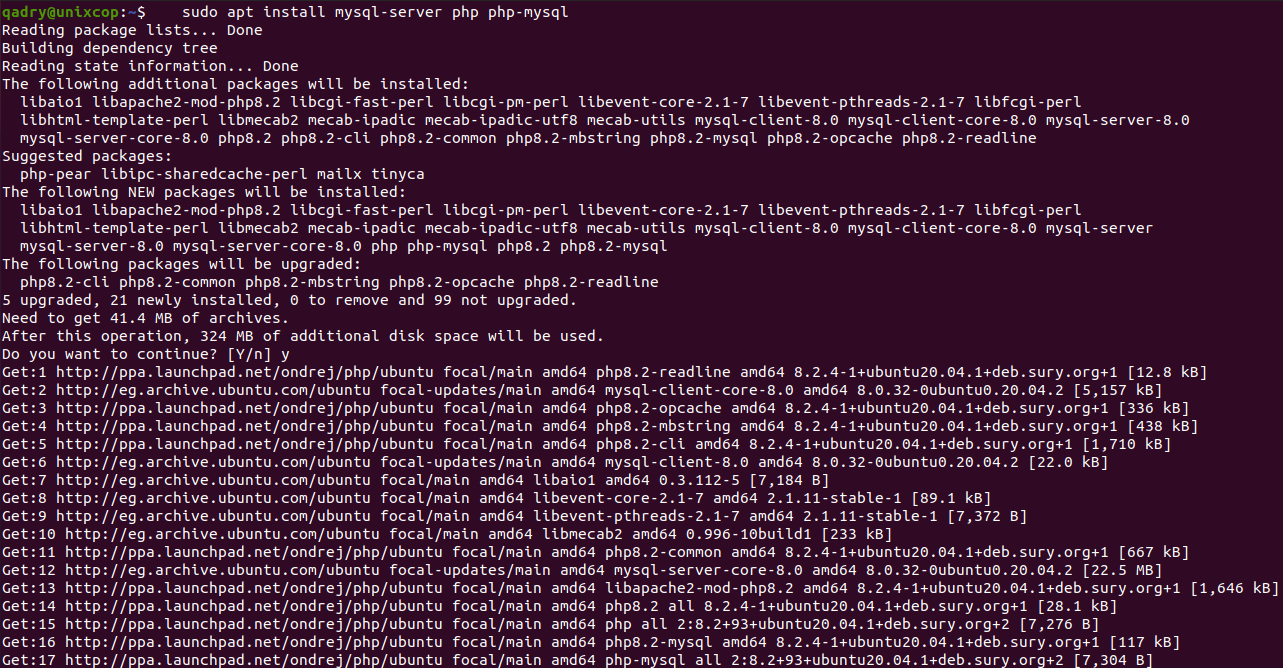
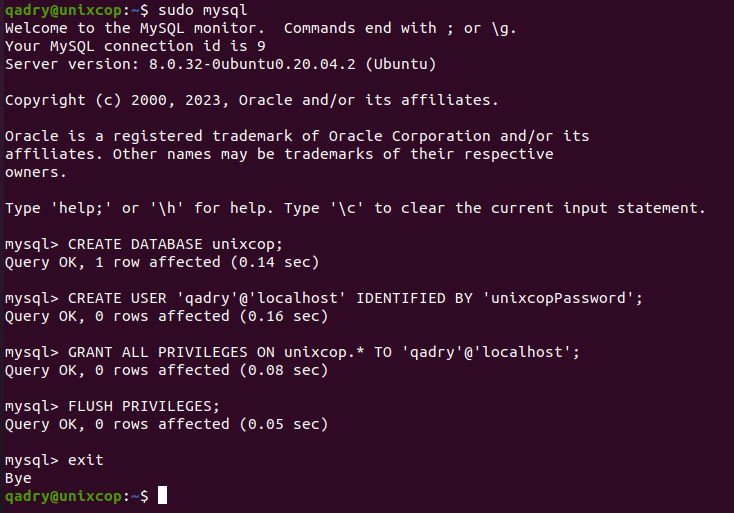
- Once the packages are installed, open the MySQL prompt with the following command:
sudo mysql- Create a new MySQL database and user for Concrete5 CMS with the following commands below.
Remember to replacedatabase-name,usernameandpasswordwith your own desired and secure information
CREATE DATABASE database-name;
CREATE USER 'username'@'localhost' IDENTIFIED BY 'password';
GRANT ALL PRIVILEGES ON database-name.* TO 'username'@'localhost';
FLUSH PRIVILEGES;
exit
For Example:
- Download the latest version of Concrete5 CMS with the following command:
wget https://www.concretecms.com/application/files/8816/6724/9697/concrete-cms-9.1.3.zipNote: To install the latest Concrete5 CMS, please press the button below:
- Extract the downloaded package using the following command:
unzip concrete-cms-9.1.3.zip- Rename the extracted directory and move it to Apache’s document root directory with the following commands:
sudo mv concrete-cms-9.1.3 /var/www/html/concrete5- Change the ownership of the concrete5 directory to the Apache user then restart the apache service with the following commands:
sudo chown www-data:www-data /var/www/html/concrete5/ -R
sudo systemctl restart apache2
Access Concrete5 Web
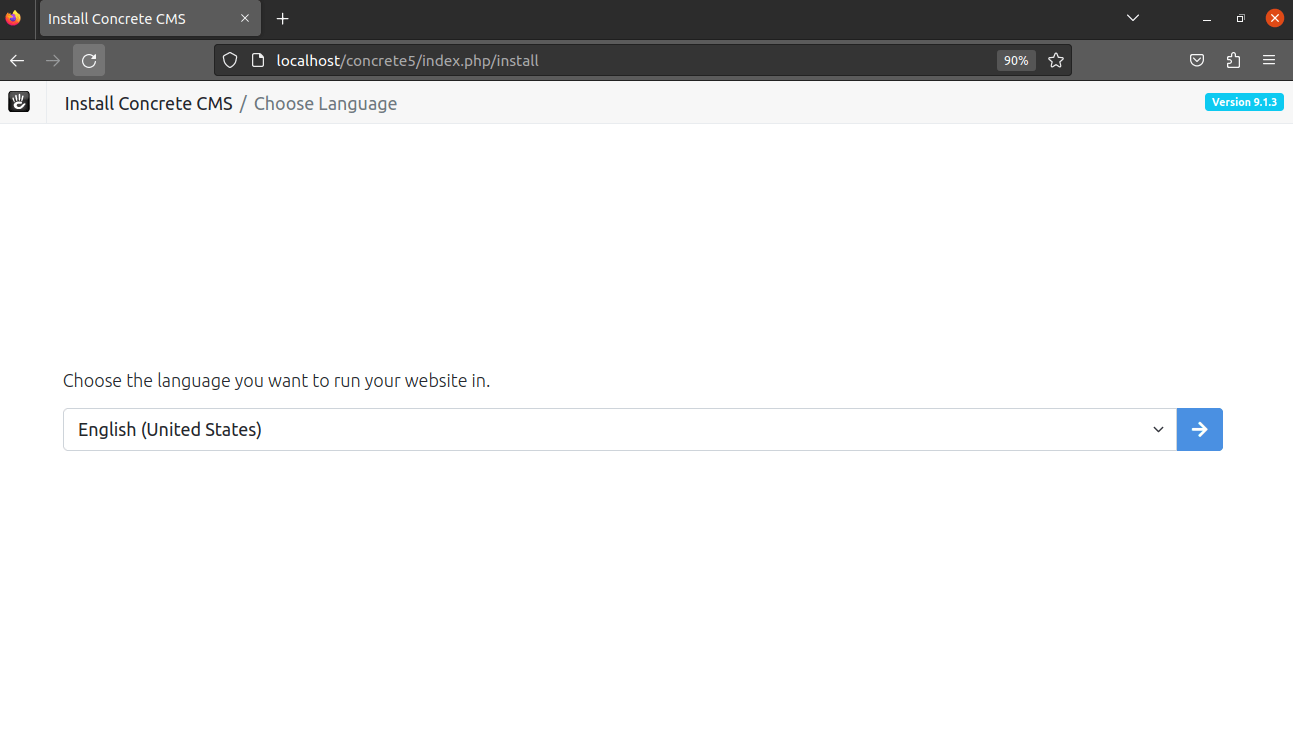
- Open your web browser and navigate to your server’s IP address followed by
/concrete5, e.g.,http://your-ip-address/concrete5. You should see the Concrete5 CMS installation page as shown below:
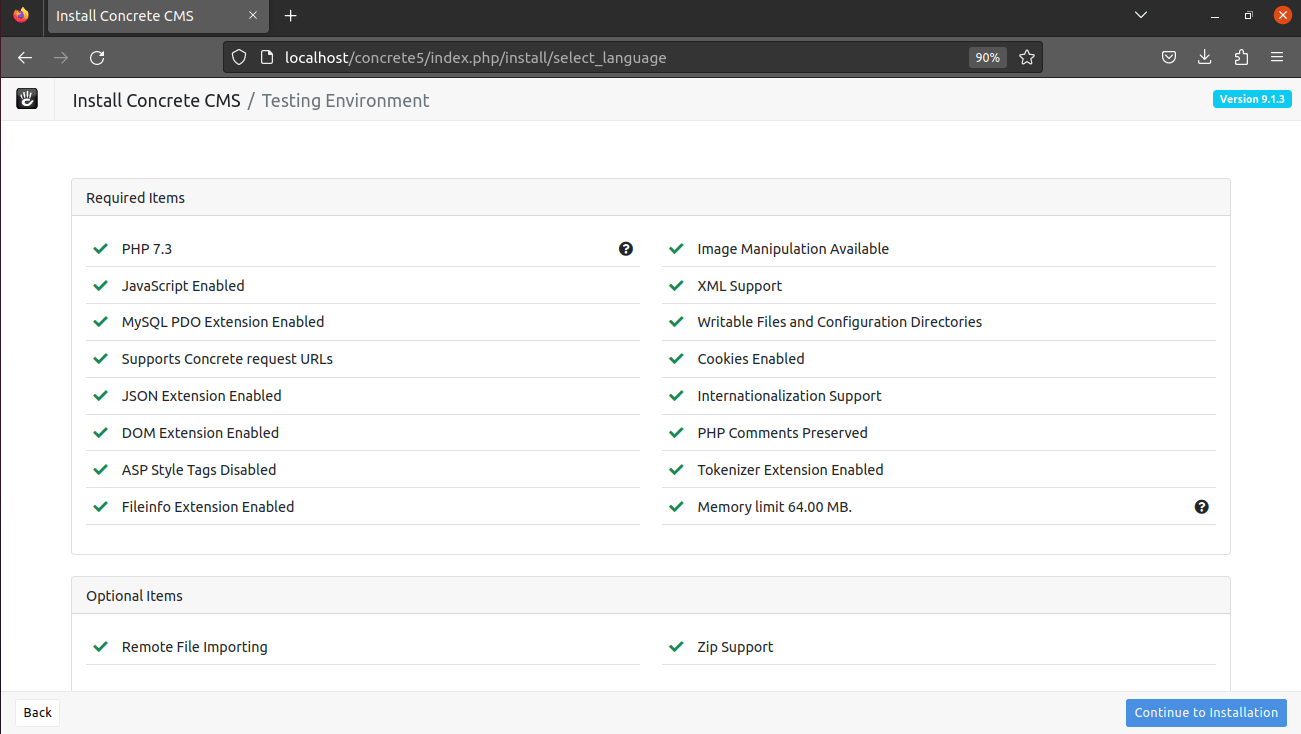
- After Concrete5 test the environment click continue to installation as shown below:
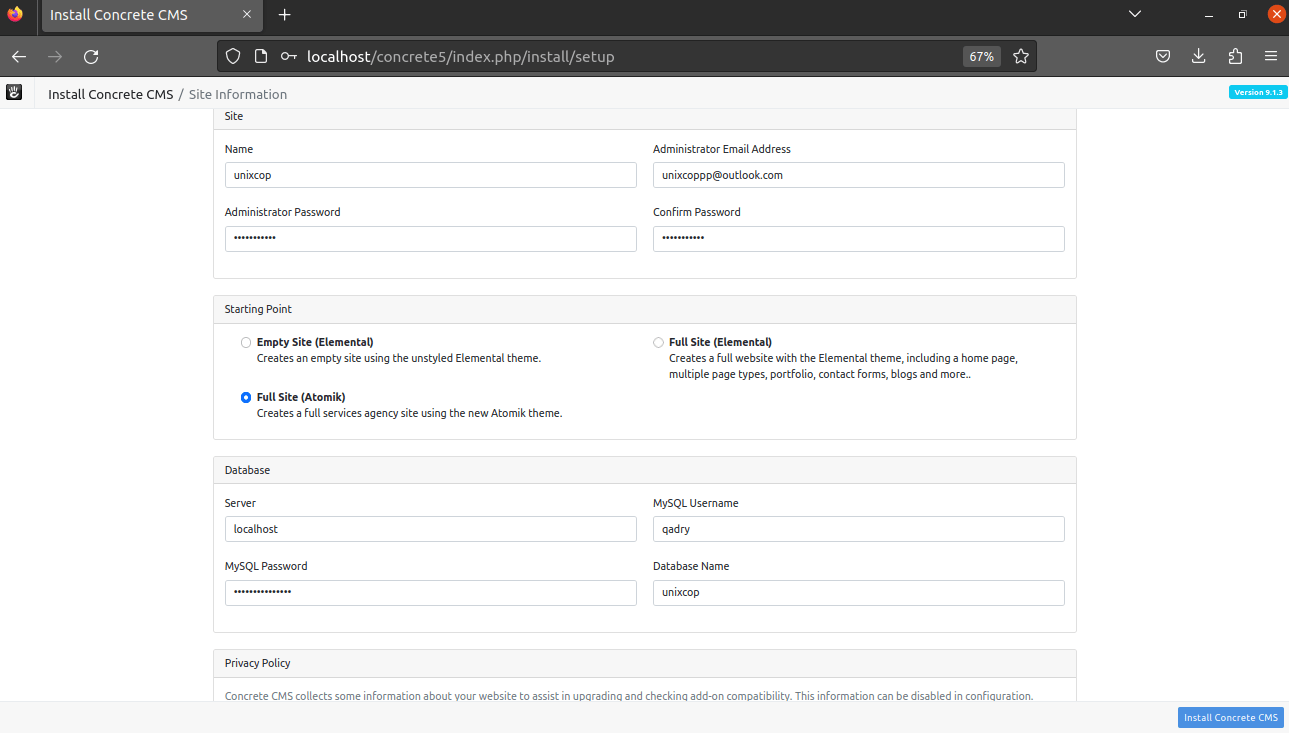
- Follow the prompts to install Concrete5 CMS on your Ubuntu 22.04 LTS server. You’ll be asked for a name for your site, your email address, and the database details as shown below in the screenshot:
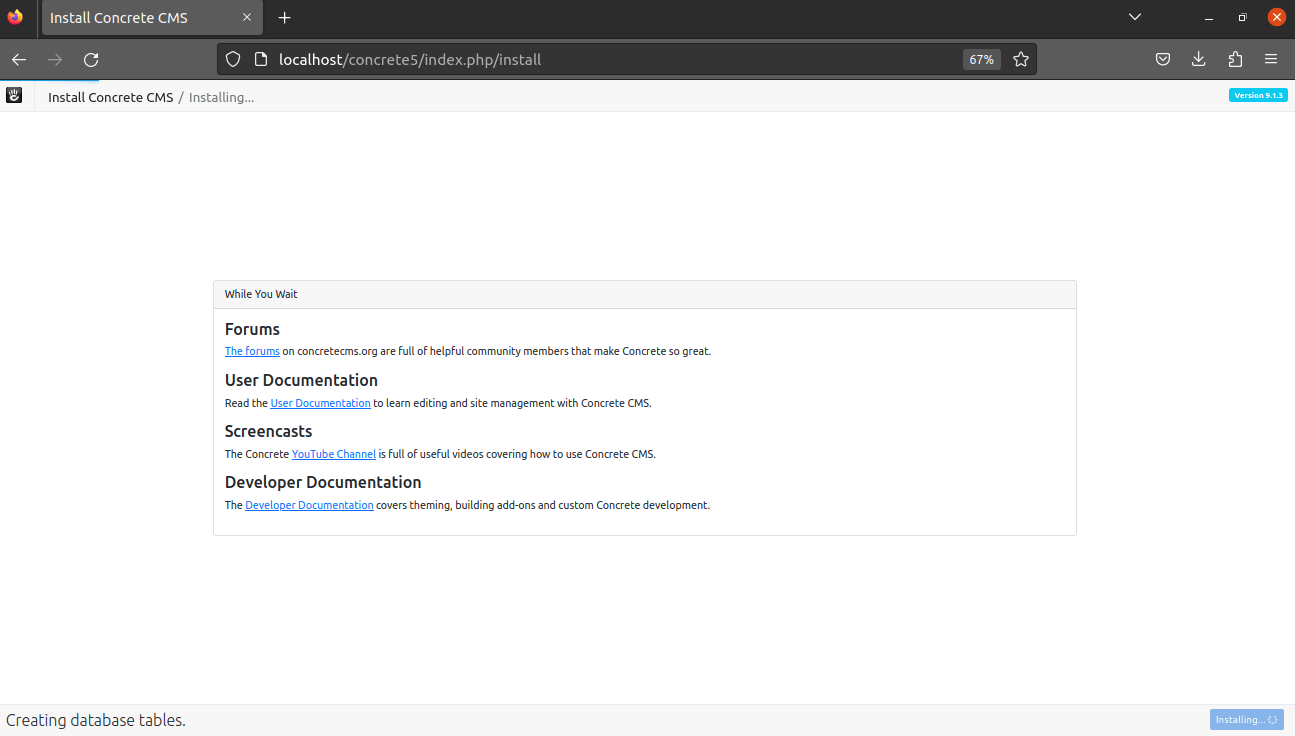
- Be patient untill the installation is complete as follows:
- Once you’ve completed the installation, you can log in to your Concrete5 CMS dashboard by navigating to your website’s URL followed by
/index.php/dashboard, e.g.http://your-ip-address/concrete5/index.php/dashboard
Install Concrete5 CMS -Conclusion
That’s it
Thanks.
That’s it! You now have Concrete5 CMS installed on your Ubuntu 22.04 LTS server.