In this article, we will show you how to install Bareos backup solution on Fedora 36
Bareos (Backup Archiving Recovery Open Sourced) is a backup software, originally forked from the Bacula project. It is network-based, multi-client and very flexible with an architecture oriented towards scalability. Thus the learning curve might be considered somewhat steep. The project is backed by the commercial company Bareos GmbH & Co. KG, based in Germany.
Install Bareos on Fedora 36/35/34
Follow the steps below to get start with the installation
- Update your system packages as follows
sudo dnf update -y && sudo dnf upgrade -y- Add PostgreSQL 14 on Fedora official repository by running the following command:
sudo dnf install -y https://download.postgresql.org/pub/repos/yum/reporpms/F-35-x86_64/pgdg-fedora-repo-latest.noarch.rpm- Install PostgreSQL 14 Server and Client
sudo dnf install postgresql14 postgresql14-server -y- Initialize the database instance for Postgresql by running the command below:
sudo /usr/pgsql-14/bin/postgresql-14-setup initdb
- Enable then restart PostgreSQL
sudo systemctl enable postgresql-14
sudo systemctl start postgresql-14- Create PostgreSQL role for system user
sudo -u postgres createuser --interactiveThen
grant all privileges on database test_db to root;- You’ll be asked to answer to the next
Enter name of role to add: bareos
Shall the new role be a superuser? (y/n) y- Install Apache and PHP
sudo dnf install httpd php php-mbstring php-curl php-mysqli -y- Once Apache installed, Enable it
sudo systemctl enable --now httpd- The next step is to install Bareos
Bareos package by default is not available on the base repo of fedora systems, so we will download its repo as follows:
sudo wget -O /etc/yum.repos.d/bareos.repo http://download.bareos.org/bareos/release/21/Fedora_35/bareos.repo- Then update the repo and install Bareos as shown below:
sudo dnf update -y
sudo dnf install bareos bareos-database-postgresql -y- Run the following commands to start all of the Bareos services.
sudo systemctl enable --now bareos-dir
sudo systemctl enable --now bareos-fd
sudo systemctl enable --now bareos-sd- Create Bareos Database with running the commands below
sudo su - postgres
/usr/lib/bareos/scripts/create_bareos_database
To create a database table, run :
/usr/lib/bareos/scripts/make_bareos_tables

- Grant the Bareos all access
/usr/lib/bareos/scripts/grant_bareos_privileges
Then exit postgresql console
exit- Install the Bareos Web GUI:
sudo dnf install bareos-webui -y- Restart the httpd and Bareos services
sudo systemctl restart httpd
sudo systemctl restart bareos-dir bareos-sd bareos-fd- Check the status of Bareos services as follows:
systemctl status bareos-dir bareos-sd bareos-fd
- Create an adminstrator user to use the WebUI.
sudo bconsoleYou will be directed to the Bareos console as shown below:

Use the following command to create an admin user and password:
configure add console name=adminstrator password=UnixcopPassword profile=webui-admin
- Exit then disable TLS in Bareos configuration file
exit
sudo vim /etc/bareos/bareos-dir.d/console/adminstrator.conf
Add the “TLS Enable = No” line as seen below:
Console {
  Name = "admin"
  Password = "StrongPassword"
  Profile = webui-admin
TLS Enable = No
}- Save and quit then restart the Bareos services
sudo systemctl restart bareos-dir bareos-sd bareos-fd- Also allow the following ports on Firewall:
sudo firewall-cmd --add-port=80/tcp --permanent
sudo firewall-cmd --add-port=9101/tcp --permanent
sudo firewall-cmd --add-port=9102/tcp --permanent
sudo firewall-cmd --add-port=9103/tcp --permanent
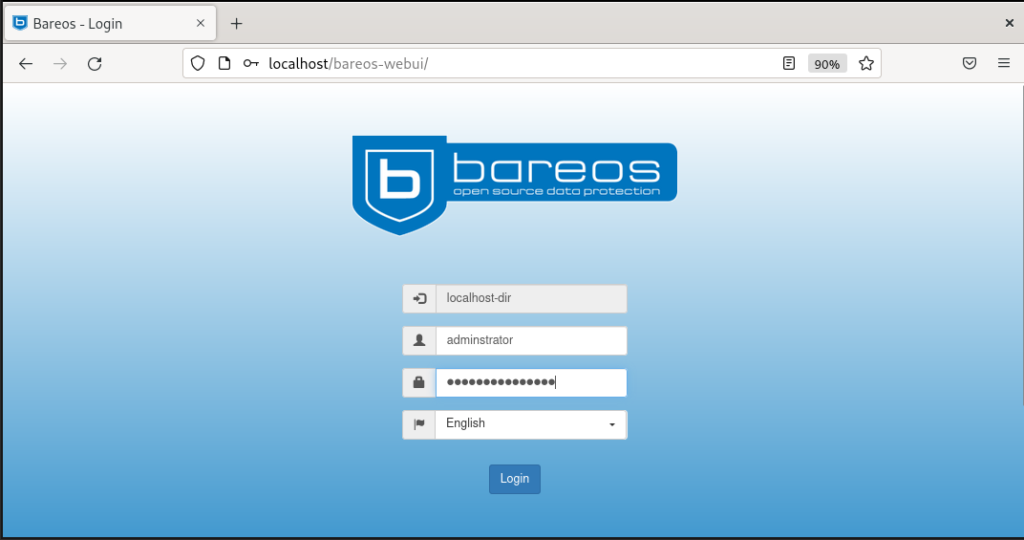
sudo firewall-cmd --reload- Finally, open your web browser and go to http://your-server-ip/bareos-webui.
Bareos will ask you to enter your Bareos username and password

- Then here we go, you will be directed to the Bareos Dashboard as shown below:

Conclusion
That’s it
In this article, we showed you how to install Bareos backup solution on Fedora 36
Also you can read more Fedora posts.


