
Asterisk is a free to use, opensource and powerful communication system that is why it is used IP PBX systems, VoIP gateways, conference servers used in SMBs, enterprises, call centers, carriers and government institutions around the globe. Installing Asterisk Server is the first step towards implementation of an affordable, reliable and highly available PBX and VoIP systems because it is an open source platform so user may use it as per their requirement. In today’s guide we will be covering the installation and configuration of Asterisk 18 LTS on CentOS 8 because Asterisk 18 recently released for production use and is available for download. If you’re using earlier releases of Asterisk then it is the right time to plan for upgrade.
Lets Start the Installation of Asterisk and its pre-requisites use following steps:
Step 1: Updating system
Update your system before installing Asterisk.
sudo yum -y updateAfter updating set SELinux in permissive mode by running following commands:
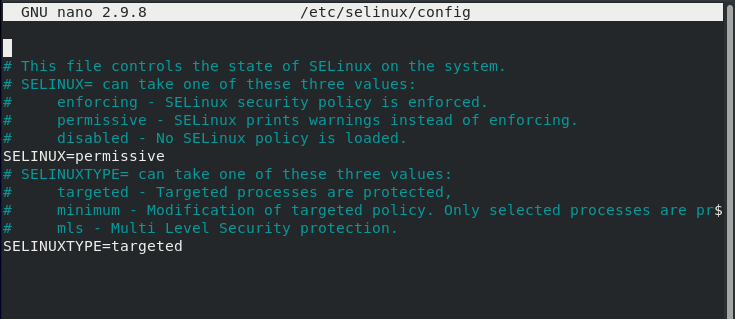
setenforce 0sudo sed -i 's/\(^SELINUX=\).*/\SELINUX=permissive/' /etc/selinux/configrebootif you open selinux using “sudo nano /etc/selinux/config” will look like this because we have set selinux in permissive mode:
Step 2: Add EPEL Repository
Add EPEL repository to your CentOS 8 by using following commands:
sudo yum -y install epel-release
sudo yum config-manager --set-enabled powertools
Step 3: Install Development Tools
Now install Development tools and required packages because they are pre-requisite for Asterisk.
sudo yum group -y install "Development Tools"sudo yum -y install git wget vim net-tools sqlite-devel psmisc ncurses-devel libtermcap-devel newt-devel libxml2-devel libtiff-devel gtk2-devel libtool libuuid-devel subversion kernel-devel kernel-devel-$(uname -r) crontabs cronie-anacron libedit libedit-develStep 4: Download and Install Jansson
We will install Jansson which is a C library because it will_be used for media data encoding and decoding.
cd /usr/src
git clone https://github.com/akheron/jansson.git
cd jansson
autoreconf -i
./configure --prefix=/usr/
make
make install
Step 5: Download and Install PJSIP
PJSIP is a powerful multimedia communication library written in C language. It used in implementation of standard based protocols such as SIP, SDP, RTP, STUN, TURN, and ICE.
Build PJSIP from source by running the following commands in your terminal.
cd /usr/src
git clone https://github.com/pjsip/pjproject.git
cd pjproject
./configure CFLAGS="-DNDEBUG -DPJ_HAS_IPV6=1" --prefix=/usr --libdir=/usr/lib64 --enable-shared --disable-video --disable-sound --disable-opencore-amr
make dep
make
sudo make install
sudo ldconfig
Step 6: Download and Install Asterisk
cd /usr/src
wget http://downloads.asterisk.org/pub/telephony/asterisk/asterisk-18-current.tar.gz
tar xvfz asterisk-18-current.tar.gz
cd asterisk-18.6.0
Configure the asterisk that has been downloaded by using following command:
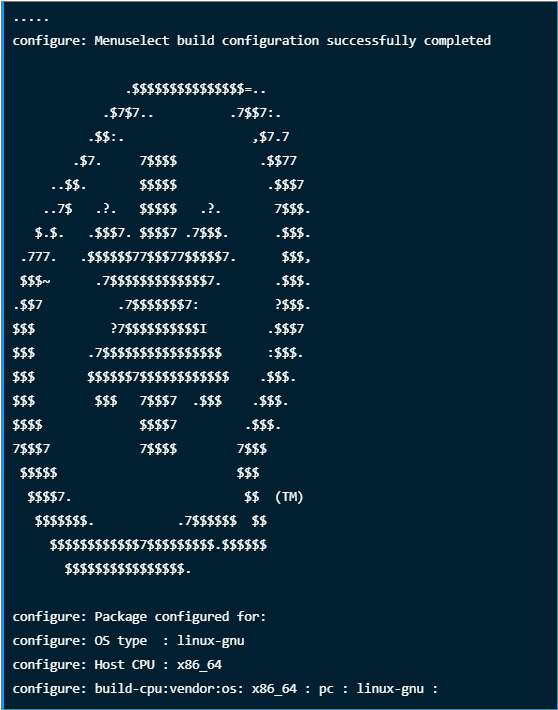
./configure --libdir=/usr/lib64After successful configuration of asterisk output will show like this:
Step 7: Set Asterisk menu options
Setup asterisk menu options using following command:
make menuselectUse Arrow keys to navigate through the menu and Enter key to select the menu option.
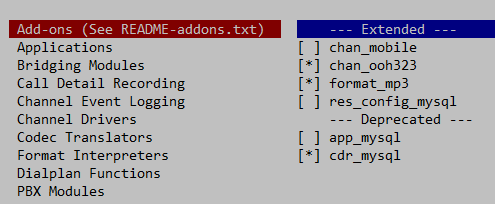
1: Under Add-ons select chan_ooh323 and format_mp3 as shown below
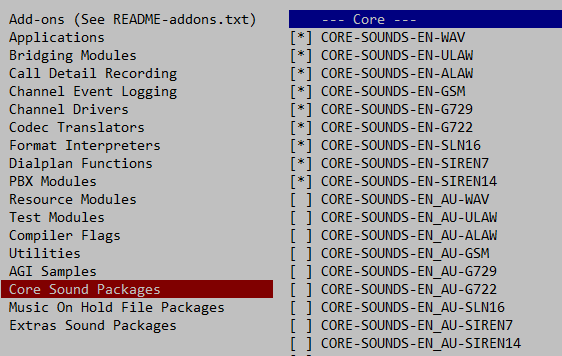
2: On Core Sound Packages, select the formats of Audio packets like shown below:
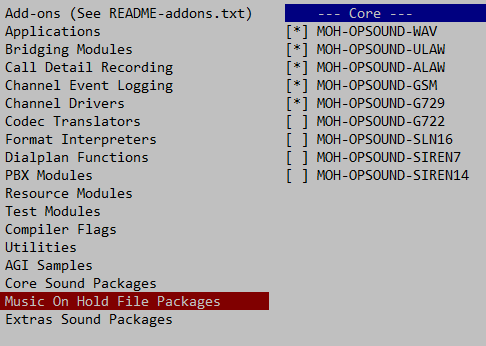
3: For Music On Hold, select the following minimal modules
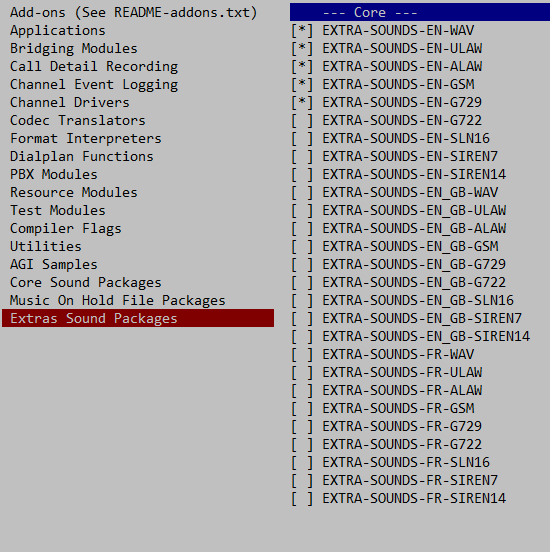
6: On Extra Sound Packages select as shown below:
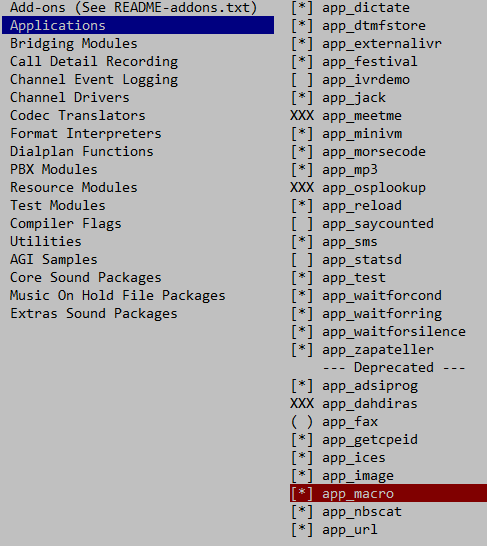
6: Enable app_macro under Applications section.
Feel free to modify any other settings according to your needs then save and exit when done.
Step 8: Build and Install Asterisk
Download mp3 decoder library into source tree because asterisk may use mp3.
contrib/scripts/get_mp3_source.shBuild and install asterisk using following commands:
make
sudo make install
make samples
make config
sudo ldconfig
Step 9: Start and Use Asterisk
Start Asterisk:
sudo systemctl start asteriskEnable Asterisk Service so that it may get started automatically whenever system is rebooted.
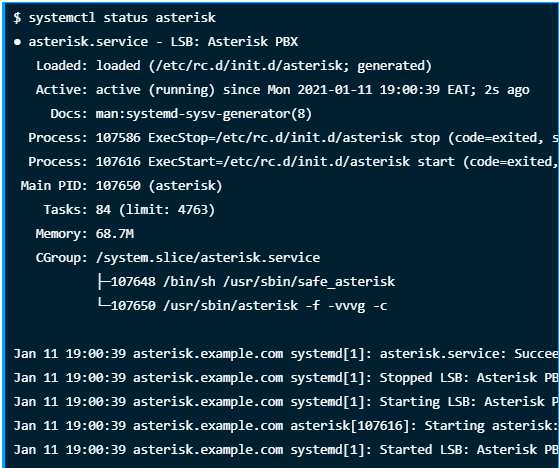
sudo systemctl enable asteriskConfirm service status using the following command:
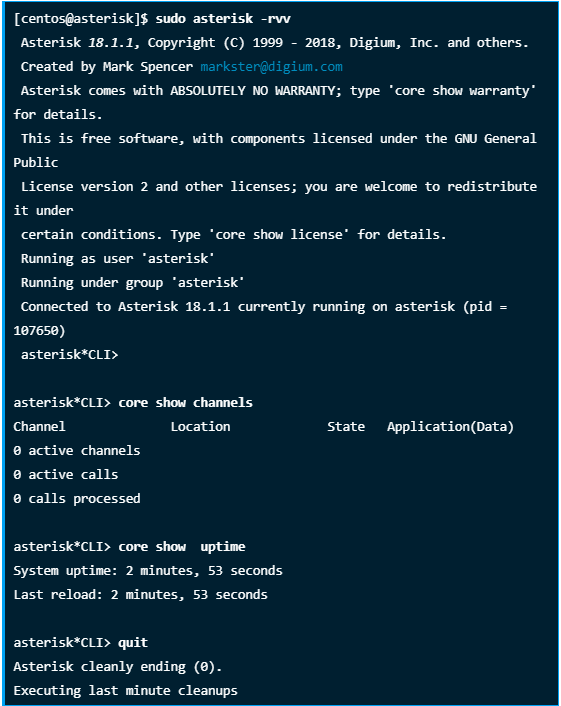
Test with asterisk command to confirm Asterisk CLI is working:
Thank you! Now you can do your configuration to run asterisk as per your requirement.