Server Message Block (SMB) is used in a variety of operating systems for file sharing and print services.
Microsoft networking is based on CIFS (Common Internet File system) which was built on SMB protocol.
SAMBA was developed in 1980 by IBM, Microsoft and Intel as a way to share file and printers over a network.
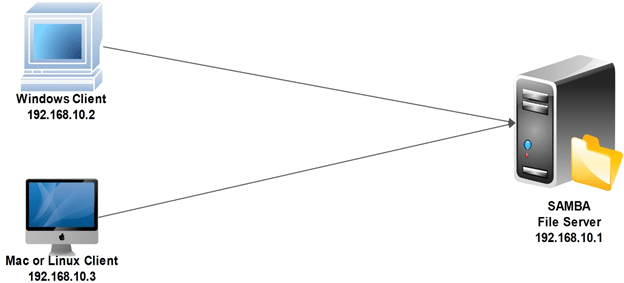
Samba service provides interoperability between Microsoft Windows and Unix/Linux computer.
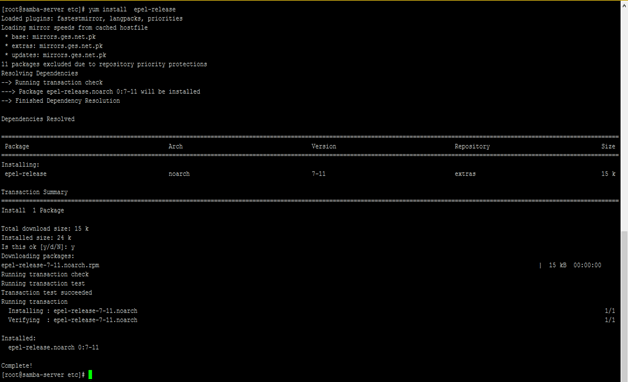
To setup SAMBA file server you need to install epel-release repository.
Login to your centos server via SSH or KVM and run below command.
[root@samba-server ~]# yum install epel-release
Now install Samba server and Samba client
[root@samba-server etc]# yum install samba samba-client samba-common
After successful installation we then configure samba server for simple file sharing.
But , before go further make sure that your pc must be on same “Workgroup” To check the Workgroup run command “net config workstation” at command prompt as shown below .
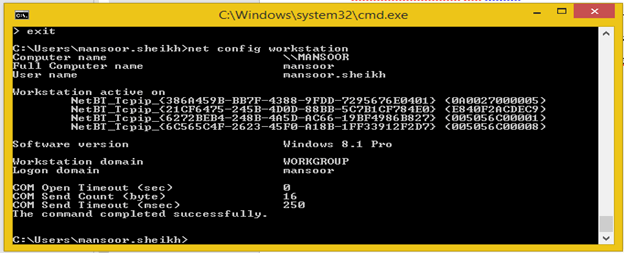
As you can see in above snapshot that my workgroup name is Workgroup which is default with windows installation.
Lets configure the simple file server using Samba so that user can access the file server .
First, make a copy of smb.conf file in case of any misconfiguration then you may have a chance to revert the configuration to its default.
[root@samba-server etc]# cp /etc/samba/smb.conf /home/smb.conf.bk
You may copy the smb.conf anywhere on your system.
Run below command to remove any content from smb.conf file.
Echo “ ” > /etc/samba/smb.conf
Using any text editor to edit the smb.conf file, in our case we will use vim text editor.
[root@samba-server etc]# vi /etc/samba/smb.conf
[global]

workgroup = WORKGROUP     #———–work group name

server string = Samba Server %v

netbios name = samba-server   #————server name that is single label name

security = user

map to guest = bad user

dns proxy = no

#============================ Share Definitions ============

[unixcop]                  #———–you may choose any name

path = /samba/unixcop    #—actual path where you have files/folders which the users will access via file sharing

browsable =yes

writable = no                   #—————–no user can write permission on share folder

guest ok = yes                  #————guest allow so that user can access without user name and password

read only = yes                #———–only allow users to copy from share directory of samba server
Save and exit the editor and make directory with name “unixcop” in “/samba” directory as shown below .
[root@samba-server etc]# mkdir -p /samba/unixcop
This time we will allow file and print sharing port form firewall and SELINUX as well
[root@samba-server etc]# firewall-cmd --permanent --zone=public --add-service=samba
[root@samba-server etc]#firewall-cmd --reload
[root@samba-server samba]# systemctl enable firewalld
From Selinux
setsebool -P samba_export_all_ro=1 samba_export_all_rw=1
getsebool –a | grep samba_export
semanage fcontext –at samba_share_t "/samba/unixcop(/.*)?"
restorecon /samba/unixcop
Start and enable samba file server.
[root@samba-server etc]# systemctl enable smb.service
Created symlink from /etc/systemd/system/multi-user.target.wants/smb.service to /usr/lib/systemd/system/smb.service.
[root@samba-server etc]# systemctl enable nmb.service
Created symlink from /etc/systemd/system/multi-user.target.wants/nmb.service to /usr/lib/systemd/system/nmb.service.
[root@samba-server etc]# systemctl restart smb.service
[root@samba-server etc]# systemctl restart nmb.service
Finally, set the permissions.
cd /samba
chmod -R 0755 unixcop/
chown -R nobody:nobody unixcop/
Access sharing using UNC path that is type server IP with double back slash \\192.168.10.1 at “run” and press “enter” .

The shared folder will appear on your pc screen , double click the “unixcop” folder and get into the shared folder.
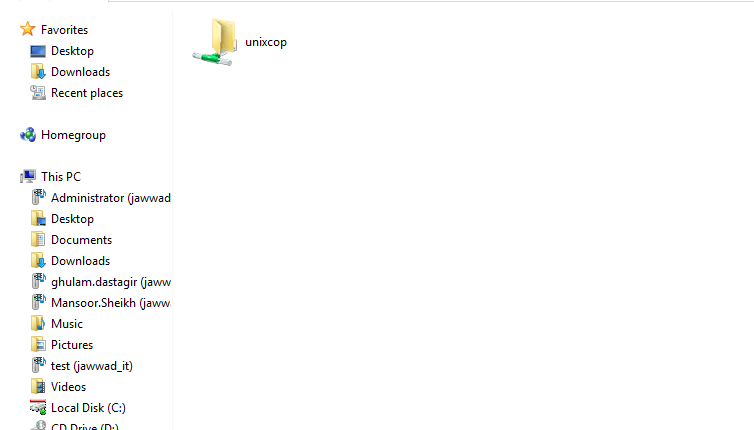
Congratulations you have successfully setup the file server on Centos 7.
Thank you very much for reading the article.