
In this article, we will learn how to Install and configure PostgreSQL with phpPgAdmin on Ubuntu 20.04 LTS
PostgreSQL is powerful object-relational database systems. It is a free and open-source database management system. PhpPgAdmin is a fully managed web-based administration tool for the PostgreSQL database server.
Prerequisites:
Ubuntu 20.04 Server
Root user or Sudo Privileged user account.
Step # 1: Update server and all install packages:
First, make sure all the existing packages on your system are up to date.

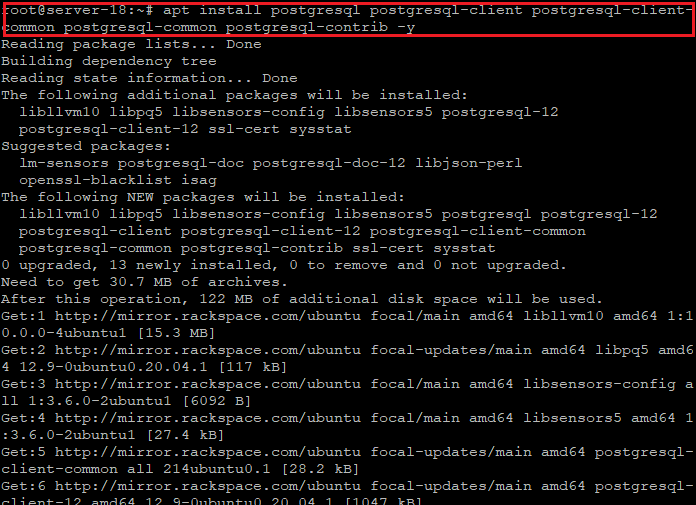
Step # 2: Install PostgreSQL server.
Now execute the following command to install the Postgre SQL server.
apt install postgresql postgresql-client postgresql-client-common postgresql-common postgresql-contrib -y
So, the PostgreSQL service will automatically be started after installation, you can check the status with this command:
systemctl status postgresql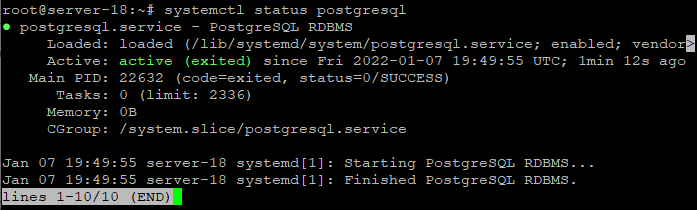
Step # 3: Configure PostgreSQL.
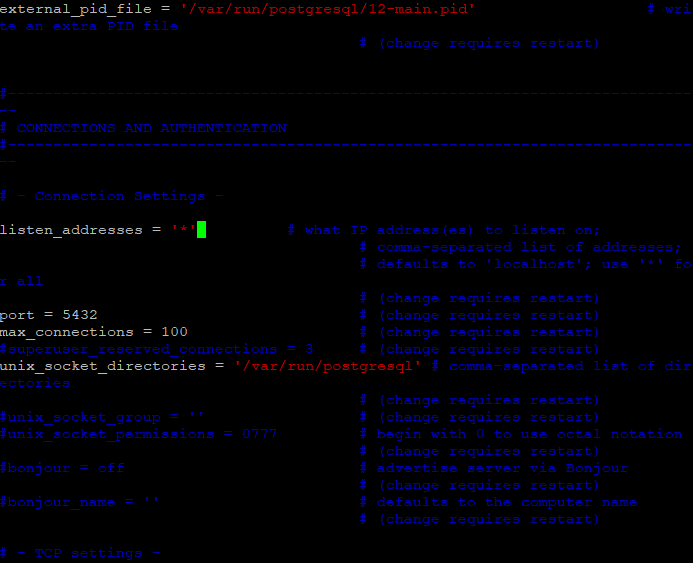
By default, the PostgreSQL server will listen on localhost. If you want to access from another network, we need to modify the configuration file to listen on all addresses or a specific address, this time we will make it listen on all addresses.

vim /etc/postgresql/12/main/postgresql.conf

Now make following changes.
listen_addresses = '*'
systemctl restart postgresql

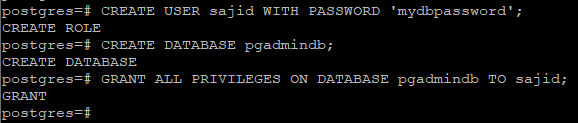
Step # 4: Setup a Database for PhpPgAdmin
You can access the PostgreSQL shell using user ‘postgres’.
su – postgres
psql
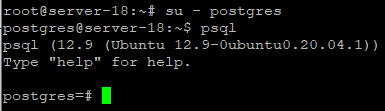
You will need to set up a database and create a user for PhpPgAdmin. Login into postgres user account and type psql to enter the PostgreSQL shell.
CREATE USER sajid WITH PASSWORD 'mydbpassword';
CREATE DATABASE pgadmindb;
GRANT ALL PRIVILEGES ON DATABASE pgadmindb TO sajid;
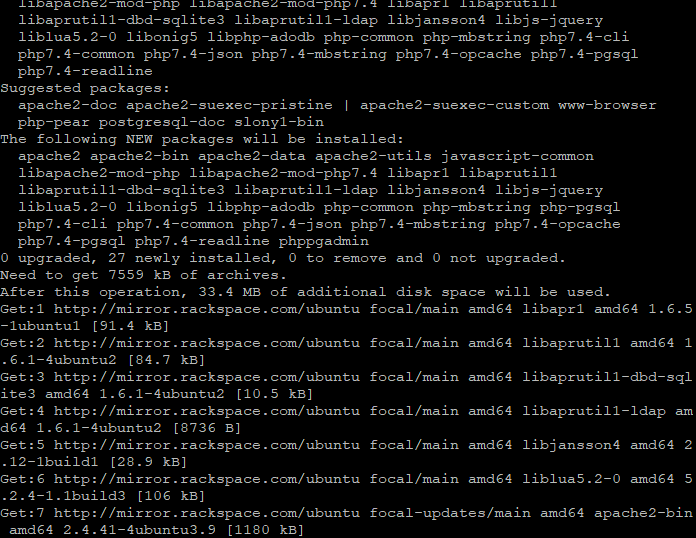
Step # 5: Install PhpPgAdmin
Now, execute following command to install the phppgadmin.
apt install phppgadmin php-pgsql -y
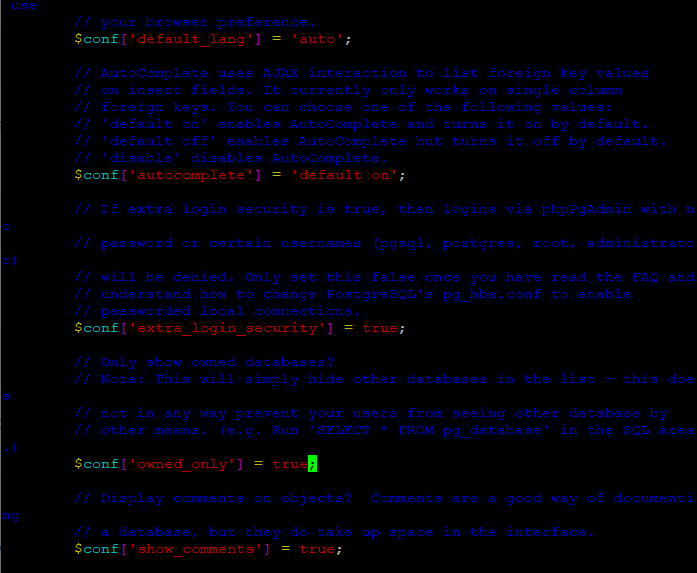
To allow login using user root or postgres, we need to modify the phpPgAdmin configuration.
vim /etc/phppgadmin/config.inc.php
Find the following value
$conf['extra_login_security'] = false;
and replace with
$conf['extra_login_security'] = true;
We can also configure phpPgAdmin to only show databases owned by the logged-in user, modify this line.
$conf['owned_only'] = false;
and change the value to:
$conf['owned_only'] = true;
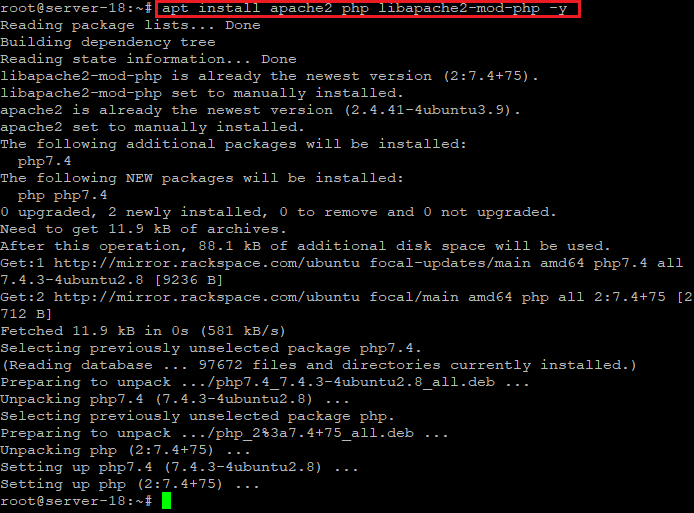
Step # 6: Install Apache and PHP
If you already have Apache and PHP installed, you can skip this step.
apt install apache2 php libapache2-mod-php -y
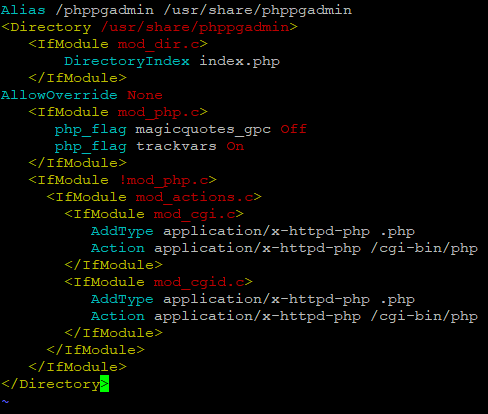
Now, let’s create an Apache configuration file for phpPgAdmin
vim /etc/apache2/sites-enabled/phppgadmin.conf
We are going to create an Apache configuration for phpPgAdmin, and it will be an alias.
PhpPgAdmin is accessible only from localhost by default. To make it accessible externally, you need to make changes in the apache configuration file. Edit the file /etc/apache2/conf-available/phppgadmin.conf configuration file with vim text editor and replace Require local to Allow from all.
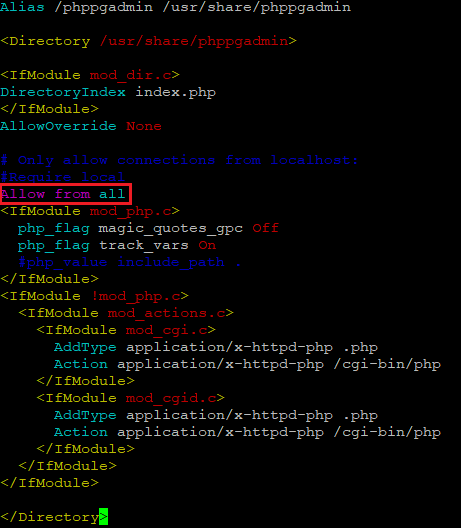
Save and quit the file, then restart Apache.
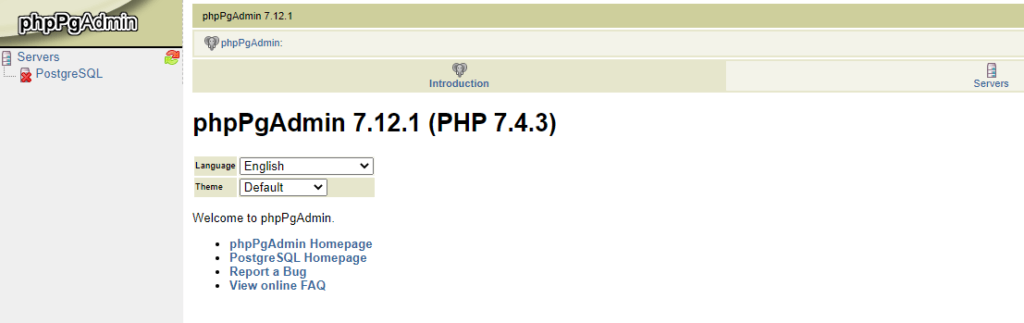
Step # 7: Access phpPgAdmin through web browser:
Open http://your-server-IP/phppgadmin in your preferred web browser.
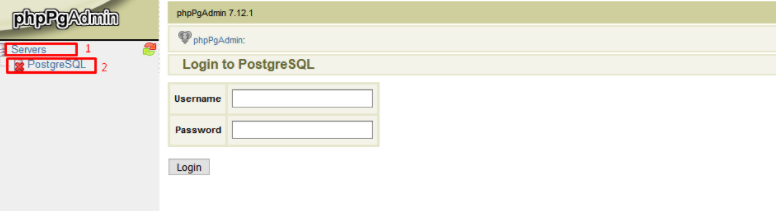
Click on the Servers=> PostgreSQL. You will get the PhpPgAdmin login screen as:
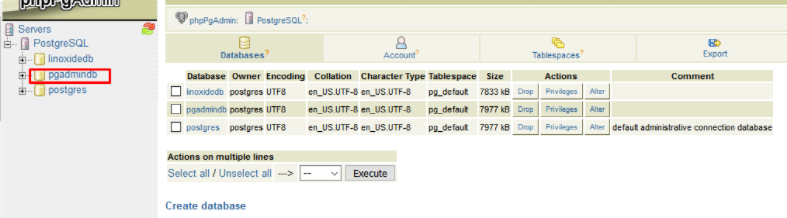
Finally, you can see the PhpPgAdmin dashboard as follow:
Conclusion:
PostgreSQL is an advanced object-relational database management system. In this article, we learned how to install PhpPgAdmin on Ubuntu 20.04 including some basic configurations.
it’s better to create apache vhost in /etc/apache2/sites-available then enable it with a2ensite