Storage devices play a critical role in the working of any system. Different operating systems use various types of file structures to store data. So generally we use GPT or MBL file storage styles for that. With the help of these two we can create partitions in a storage device. Also , We can split large memory sized devices into smaller sub-segments called partitions. Partitioning enables us to split our storage drive into multiple parts. Where each part acts as a seperate single storage drive. Apart from that we can use these partitions to install multiple operating systems in the same machine. Here we will learn to create partition in linux.
In general, this tutorial I will guide you through all the detailed wise steps. Here I am using the ubuntu server to create partitions. Furthermore ,with the help of this tutorial you will be able to create partitions on many similar linux distributions.
Creating Disk partition
Now , I will explain you how to create disk partition in ubuntu using parted command utility.
STEP(1) Check the partition table
We need to check all the available partitions and hard disks. For that, we will use the following command to display all the available partitions and hard disks. It will also dosplay the storage volumes which are not in use. Here, ‘-l’ flag means to ‘list’ the vailable partitions and hard disks.
# parted -l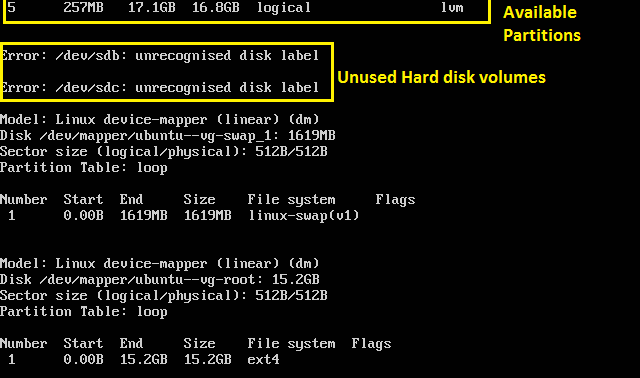
As you can see there are 3 available hard disks in this system. /dev/sda is the hard disk in use. Two other Hard disk volumes which are not in use are /dev/sdb and /dev/sdc .So here I will create partition in the unused disk /dev/sdb.
STEP(2) Manipulate the Disk partitions
Open the disk by using the following command.
# parted /dev/sdbThen enter the following command at the ‘parted’ prompt .
# mklabel msdos
Next we will create a new primary partition of size 2GB and then print the partition table. For that, we will use the following command.
# mkpart primary ext4 0 2048MB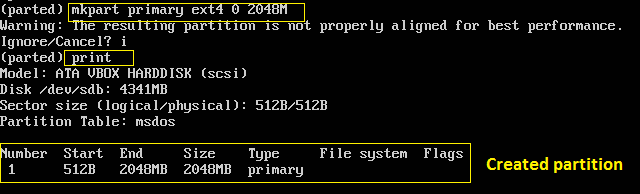
NOTE: Make sure that you specify the correct device for partition , otherwise it would randomly pick a storage device.
As the total size of the hard disk attached to the system is around 4 GB. Now , we can create another partition from the remaining hard disk available. Similarly enter the same command to create another partition out of it. enter the following:
# mkpart primary ext4 2048MB 4341MB 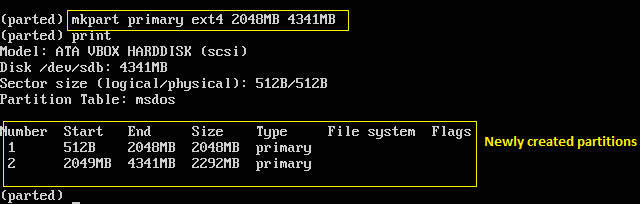
NOTE: Here 512B and 2049M are the starting blocks of the first and the second partition.
Now enter the ‘quit’ command to get out of the parted prompt . The changes made to the disk will be saved automatically.
STEP(3) Creating File system types
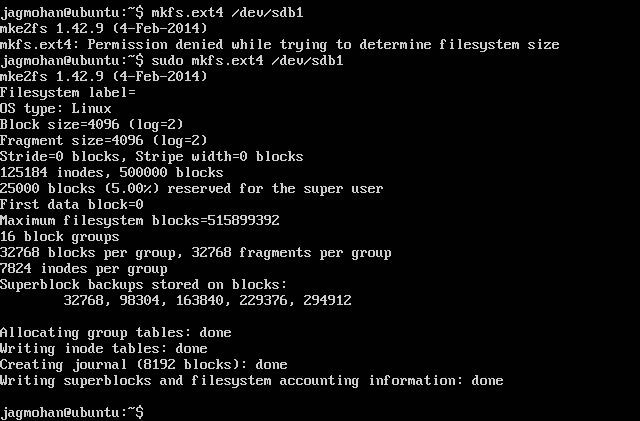
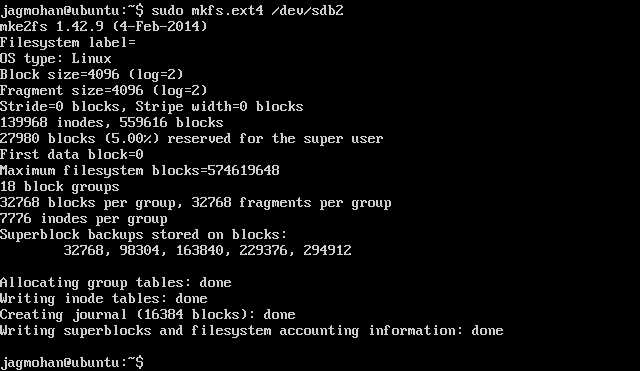
To create the file system types we can use the mkfs utility. Enter the following command to do that.
# mkfs ext4 /dev/sdb1
# mkfs ext4 /dev/sdb2
STEP (4) Mounting the partitions
Finally to access those partitions and to make their complete use , We need to mount them.Enter the following set of commands to mount these partitions.
# mkdir -p mount /sdb1
# mkdir -p mount /sdb2
# mount -t auto /dev/sdb1 /mnt/sdb1
# mount -t auto /dev/sdb2 /mnt/sdb2
Now after successful mounting of both the partitions, we can check whether the newly created partitions are available there for use or not. For that , use the df command.
# df -hT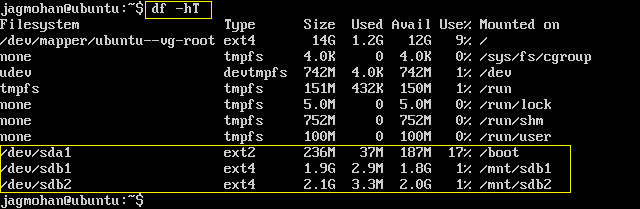
Here we can see /dev/sdb1 and /dev/sdb2 are succesfully created and all their details are displayed as shown above.
In this tutorial I had shown you how to create partition in linux easily. To make that much simpler I chose an unused hard disk volume, so that you can get a better understanding from scrap level.