Virtual Hard Disk is a type of disk image file which act as a hard drive capable of storing data similar to a physical drive. Likewise it act as a container similar to a physical drive. Basically it replicates a Hard drive with all the the data and structural features. It works similar to a physical hard disk drive. It contains its own file system. We can use it to store and run operating system. Apart from that , VHD can also be used to store data as well. Here we will learn to create VHD in ubuntu.
The major use of the VHD is in virtual machines, like virtualbox . In virtual box these virtual hard drives can be used to store operating systems . It also holds the data related to the particular Virtual machines.In this tutorial I will guide you through all the steps required to create VHD in ubuntu. We are creating a virtual hard disk on ubuntu of size 1 GB and EXT4 format file system.
STEP(1) Creating a new image to hold VHD volume
There are a number of ways to create a VHD volume. However we will be using the dd command to do that. Here we will create a VHD of size 1 GB. so to do that enter the following command.
# sudo dd if=/dev/zero of=unixcop.img bs=1M count=1200Here:
- if=/dev/zero Input file for initializing data storage
- of=unixcop.img Image file to be created as storage volume
- bs=1M read/write 1mb speed
- count=1200 copy limit of 1200 Mb input blocks

STEP(2) Format the VHD image
Subsequently after that ,format the VHD image file to EXT4 file system format. we will do that by using the mkfs utility. After that, answer with ‘y’ when prompted as shown in the screenshot.
# sudo mkfs -t ext4 /media/unixcop.img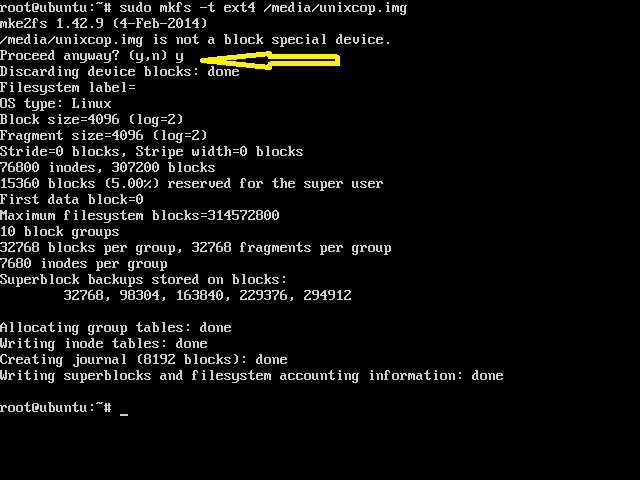
STEP(3) Mounting VHD volume
In order to access the VHD volume, we need to mount it to a directory. Enter the following commands to create a mount point . And then mount the VHD volume to the mount point.
# sudo mkdir /mnt/unixcop/
# sudo mount -t auto -o loop /media/unixcop.img /mnt/unixcop/
Here loop option indicates the device node under the /dev/ directory. unixcop filesystem will only remain mounted until the next reboot. To get it mounted automatically after every reboot, add the following lines to the /etc/fstab file.
/media/unixcop.img /mnt/unixcop/ ext4 defaults 0 0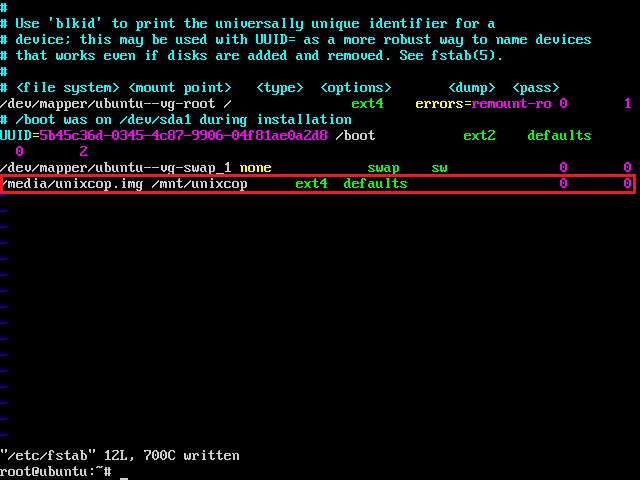
Finally we had created the required Virtual hard disk drive successfully.
STEP(4) Check the newly created VHD
The newly created VHD can be verified with its mount point using the df command as shown below
# df -hT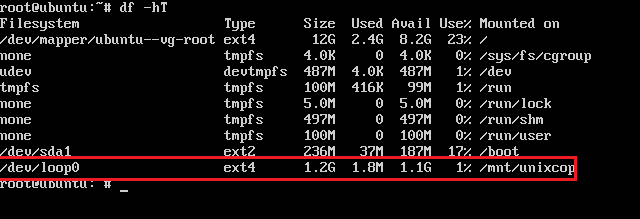
Removing the VHD volume
similarly , removing a VHD volume is also quite easy. Just unmount the VHD file system and delete the image file as shown below.
# sudo umount /mnt/unixcop/
# sudo rm /media/unixcop.img
Conclusion
In this article I gave you all the detailed wise steps to easily create a VHD volume in ubuntu. I hope this article will help you in understanding the key concepts of VHD creation and removal.