
Here, we will learn to install Apache webserver with Debian 11. In the previous article, we learned to install the LAMP stack with Debian 11. Apache is among the most popular web server. Apache is easy to deploy and manages the servers.
What are prerequisites?
In our example setup, we will use Debian 11 as OS. The Server IP address is 192.168.135.128. Ip address may vary per your local environment. Required packages include apache2 and any firewall like ufw.
Install package.
Update your server first.
#apt update
Install apache package
# apt install apache2
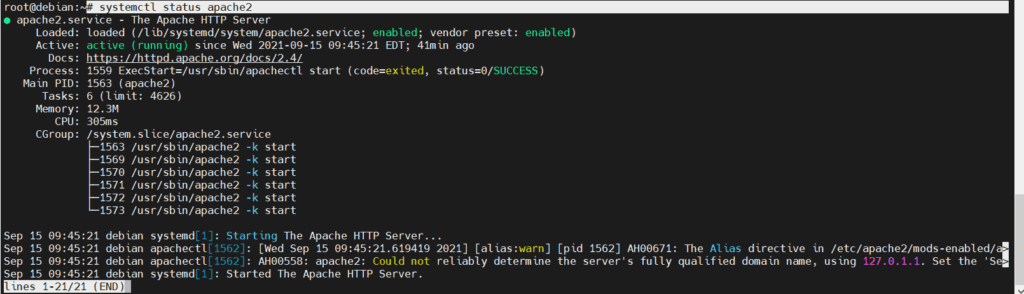
Check apache2 service status after installation.
# systemctl status apache2
Install ufw firewall to keep web server secure.
# apt install ufw
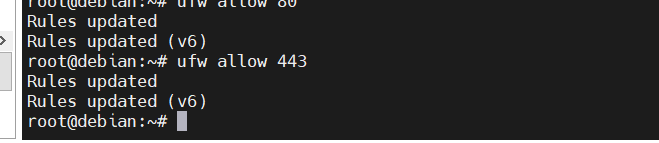
Allow TCP and UDP ports for the webserver.
# ufw allow 80
# ufw allow 443
Make sure the apache service is running after system reboot.
# systemctl enable apache2
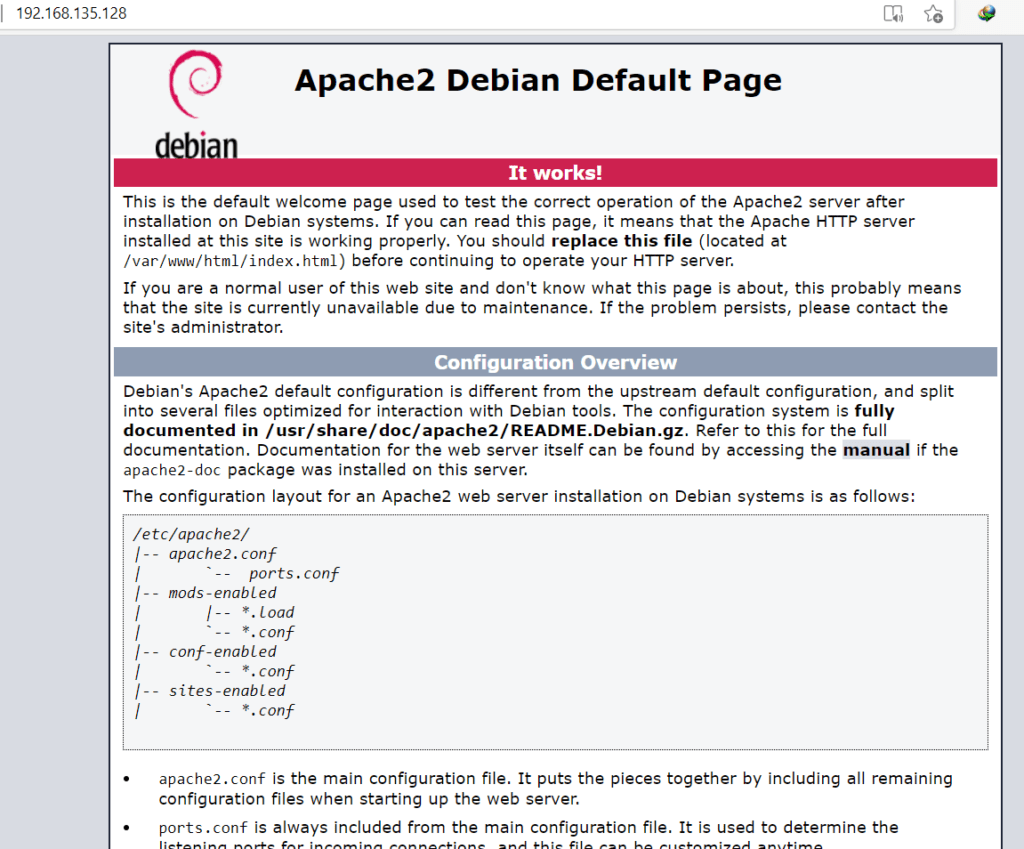
Have a look if the server is accessible or not?
Configure web server
Create a web directory under /var/www. In our case that will be unixcop.
# mkdir /var/www/unixcop
Change file permissions.
# chmod -R 755 /var/www/unixcop/
Assign rights to the web group
chown -R $USER:$USER /var/www/unixcop/
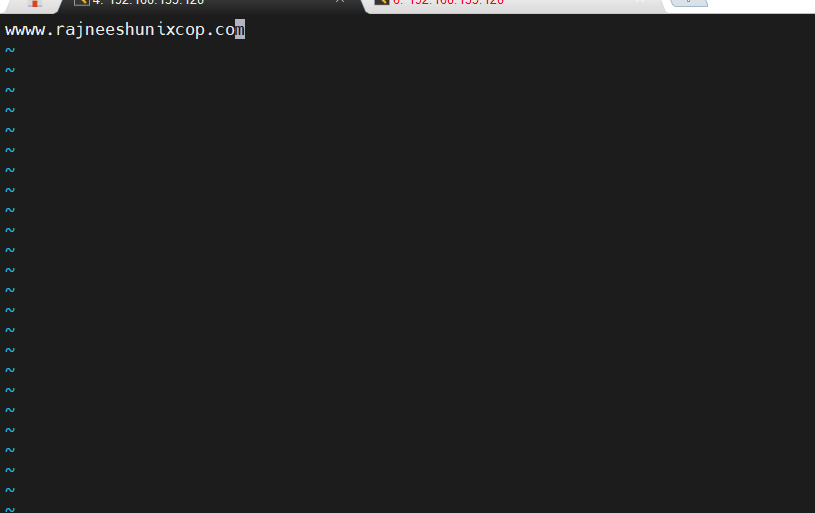
Create an index.html file under your newly created root directory for the webserver.
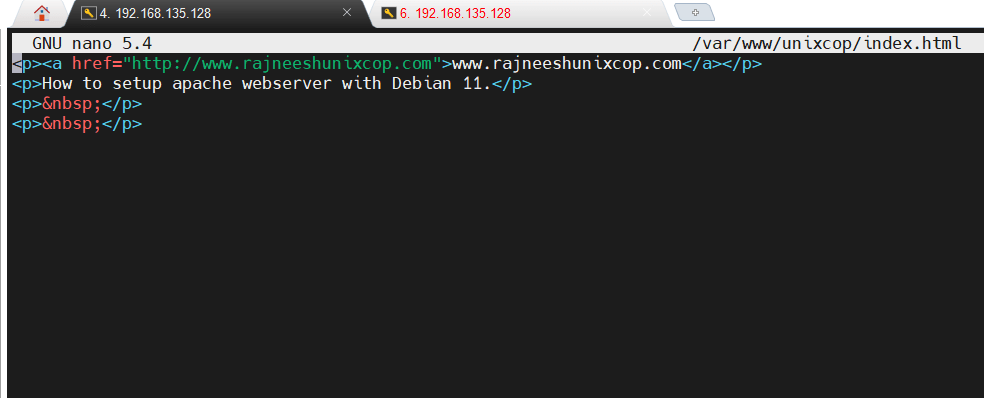
# vim /var/www/unixcop/index.html
Create your HTML file for your web server. I have named my webserver www.rajneeshunixmen.com.
<p><a href="http://www.rajneeshunixcop.com">www.rajneeshunixcop.com</a></p> <p>How to setup apache webserver with Debian 11.</p> <p> </p> <p> </p>
Save and exit.
Change web server settings.
To configure the web server, we require to amend few settings in apache2.
# cd /etc/apache2/sites-available/

We can see a default web file named 000-default.conf, disable that conf file first.
# a2dissite 000-default.conf
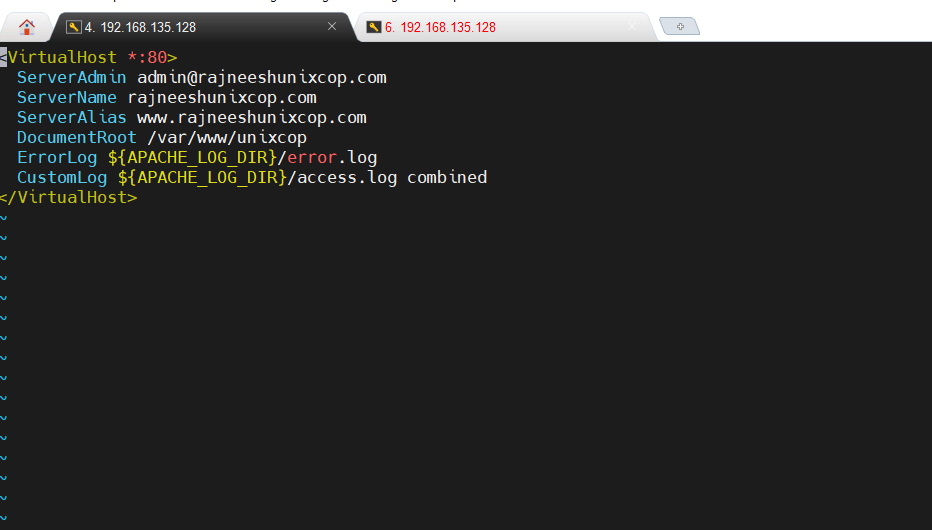
Create a configuration file for your own domain. In my case, that file will be unixcop.local.conf
Amend the following changes to the file.
# vim /etc/apache2/sites-available/unixcop.local.conf
<VirtualHost *:80>
  ServerAdmin [email protected]
  ServerName rajneeshunixcop.com
  ServerAlias www.rajneeshunixcop.com
  DocumentRoot /var/www/unixcop
  ErrorLog ${APACHE_LOG_DIR}/error.log
  CustomLog ${APACHE_LOG_DIR}/access.log combined
</VirtualHost>
Save and exit.
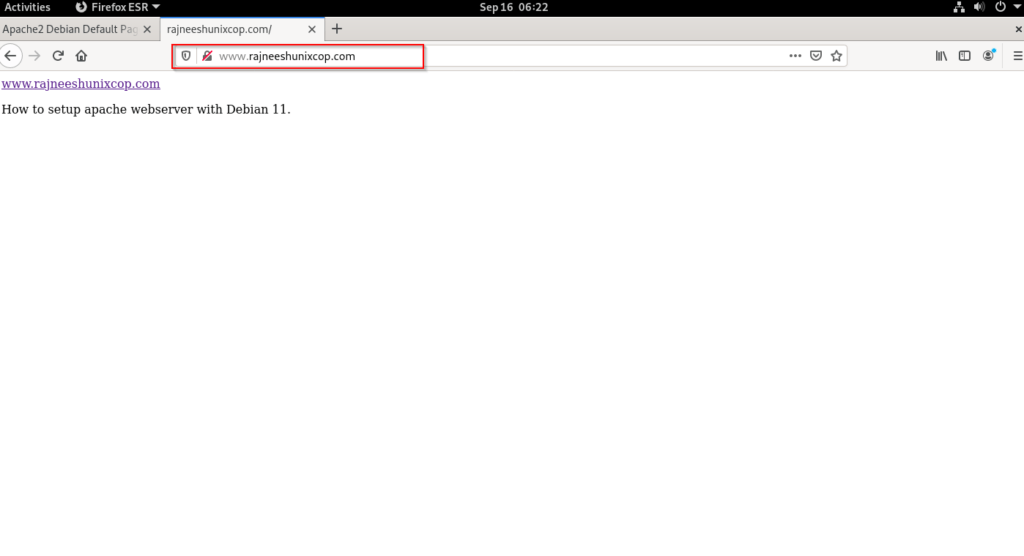
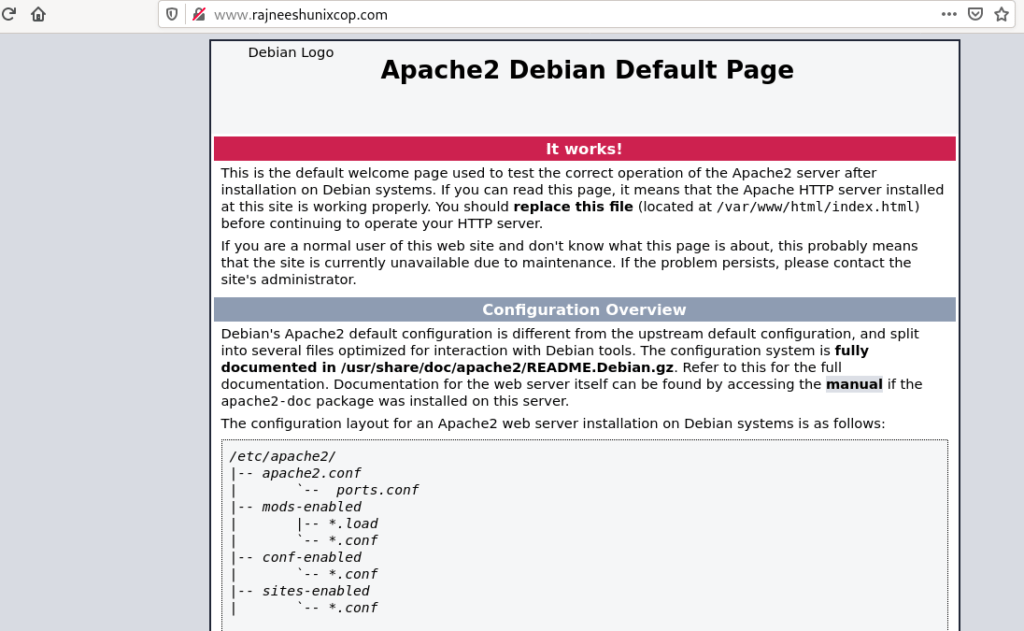
Restart the web service and check your web browser.
We can see a successfully running apache web server.
Key setting for apache web server
If you are setting the apache webserver for testing purposes, at your local machine make sure to amend the hostname.
# vim /etc/hostname
Amend /etc/hosts file and it should look something like below (define your own hostname).
# vim /etc/hosts
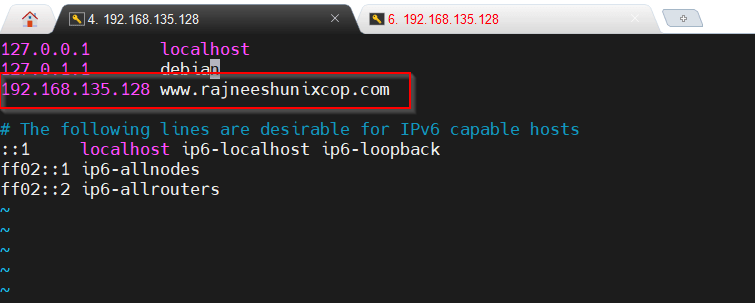
Provide your server’s hostname and IP address, save and exit.
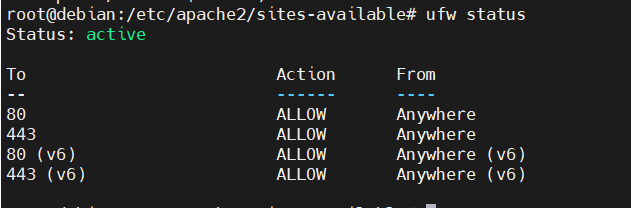
By default, ufw firewall settings are not running sometimes, check what is the current status of your firewall.
# ufw status
You can enable or disable firewall status as and when required.
# ufw enable

To enable to disable your running site, use the following command.
# a2dissite unixcop.local.conf
Restart the web service and see, if the site is available or not? content is changed.
Enable site and check again.
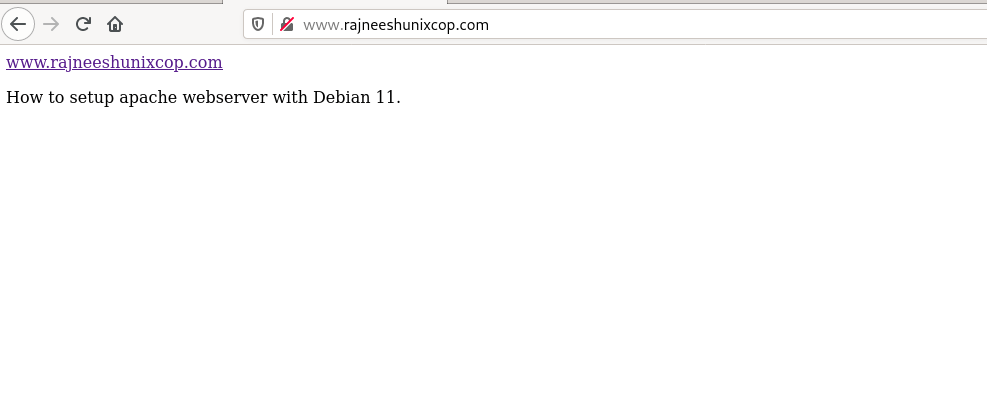
The site is up and running again.
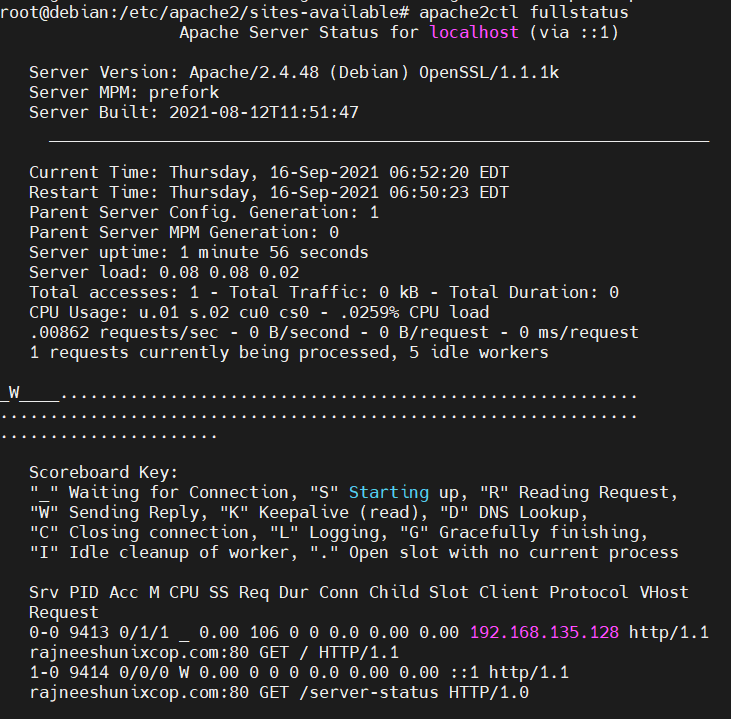
To check the configuration of the running webserver, use the apache2ctl status command.
# apache2ctl fullstatus
Check the configuration of apache.
# apache2ctl configtest
Output

We can see an error, the server is asking to set the ‘ServerName’ global directory. Let’s resolve that error and check again.
Create file.
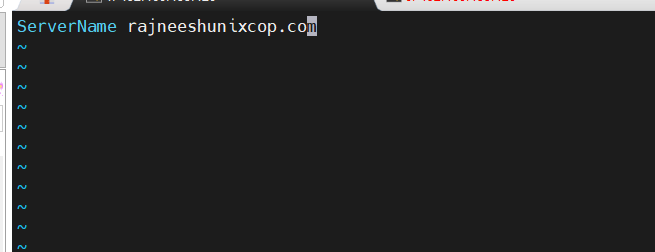
# vim /etc/apache2/conf-available/servername.conf
Amend the following line in the file.
vim /etc/apache2/conf-available/servername.conf
Enable servername. conf
# a2enconf servername
Restart the apache2 web service and run the config test again.
# systemctl restart apache2 && apache2ctl configtest
Now, we can see that the error is gone.

We have a successfully configured web server.
Conclusion
We have tested to install and configure a web server based on Debian 11 OS. Few things to consider.
- Change hostname and amend /etc/hosts file before starting server configuration.
- Debian do not have ufw by default, you need to install that.
- Check file configuratio with the help of mentioned command.