
Hello, friends. In this short post, you will learn how to deploy MariaDB and PhpMyAdmin using Docker. These are some simple images without so many additives, so you can by yourself edit it and improve it to your liking.
Let’s go.
Install Docker on Linux
As you can imagine, the first step is to have Docker on the system. This way, we can get started.
For this, we have several posts adapted to many distributions so that you can guide you accurately.
- How to install Docker on Debian 11
- How to install Docker CE on Rocky Linux 8
- How to install Docker on Ubuntu 22.04
Once you have it, now you have to install docker-compose this package is by default in most Linux distributions. In the case of Debian and Ubuntu, you just need to run.
sudo apt install docker-composeWith this, we will be able to start.
Deploying MariaDB and PhpMyAdmin using Docker
To make this deployment a bit easier, let’s resort to a yml file for Docker Compose.
So, open a text editor and create the file
nano docker-compose.ymlAnd add the following content
version: '3.1'

services:

  db:
    image: mariadb:latest
    restart: always
    environment:
      MARIADB_ROOT_PASSWORD: adminpass
      MYSQL_USER: "angelo"
      MYSQL_PASSWORD: "angelopss"
    volumes:
      - "./mariadb/data:/var/lib/mysql/data/"
      - "./mariadb/logs:/var/lib/mysql/logs/"


  phpmyadmin:
    image: phpmyadmin:latest
    restart: always
    ports:
      - 8080:80
    environment:
      - PMA_ARBITRARY=1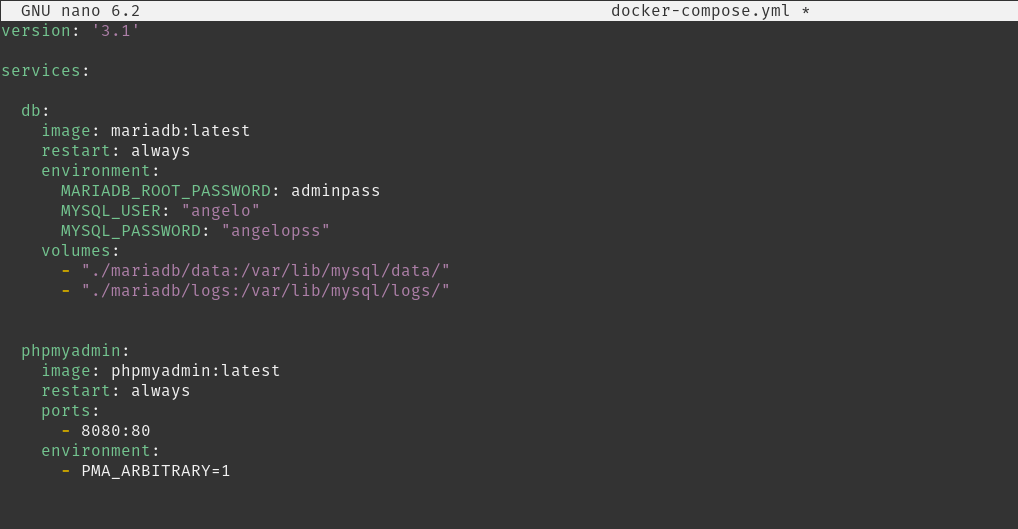
Let’s see, let’s go by parts
The first thing is that two services are raised and db is the one of MariaDB. In this service, it is indicated that we will use the image of MariaDB: latest so we will have the latest stable version of it. Then we define the environment variables that are a key for the root user, a regular user and its password.
Something important are the volumes that we will use to access, both to the data and to the logs that MariaDB generates. You can use another location, obviously.
The second service is called phpmyadmin and obviously, it is destined to PhpMyAdmin. There you only define the image to use, the port that you need to expose in your system and with which PhpMyAdmin will work. In this case, for the port 80 of the image we have exposed the 8080 that will have to be available in the firewall. Of course, you can use another one.
The PMA_ARBITRARY variable sets an arbitrary server, so you don’t have to tie PhpMyAdmin to a particular database or server.
Save the changes and close the editor. Now cross your fingers so that everything goes well.
Run in the same directory as the file
docker-compose up -d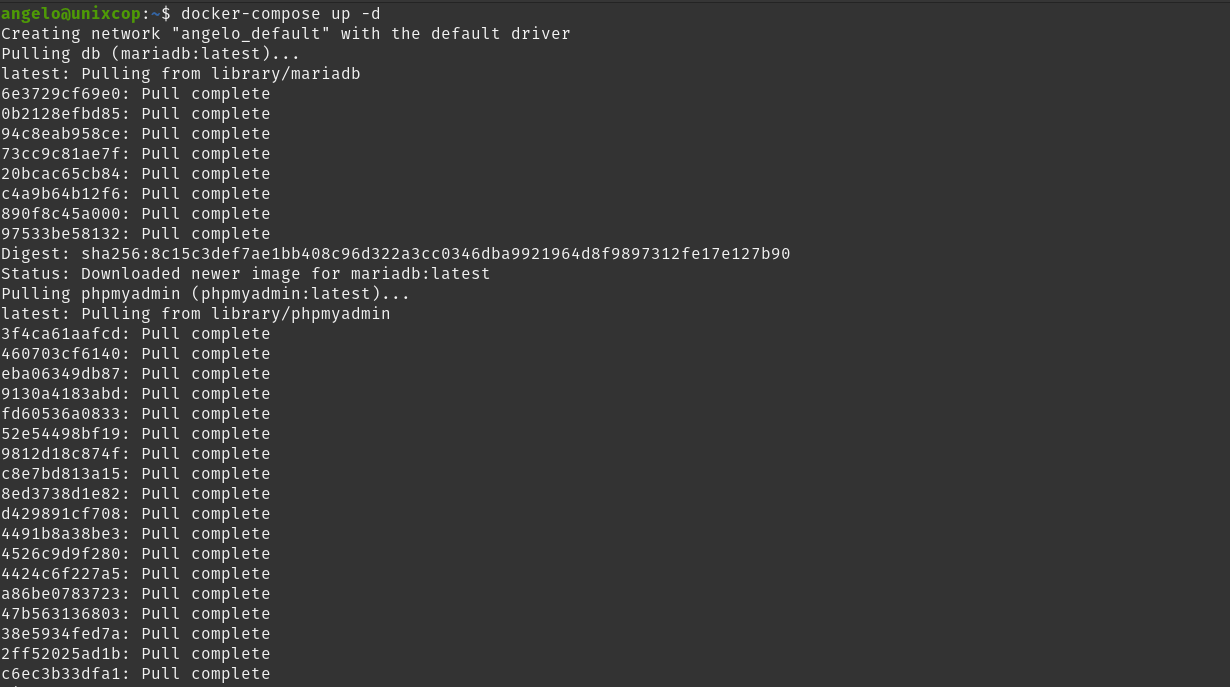
Then, you can open your web browser and access http://your-server:8080 to see the PhpMyAdmin home page. Log in with the root user or with the normal user.
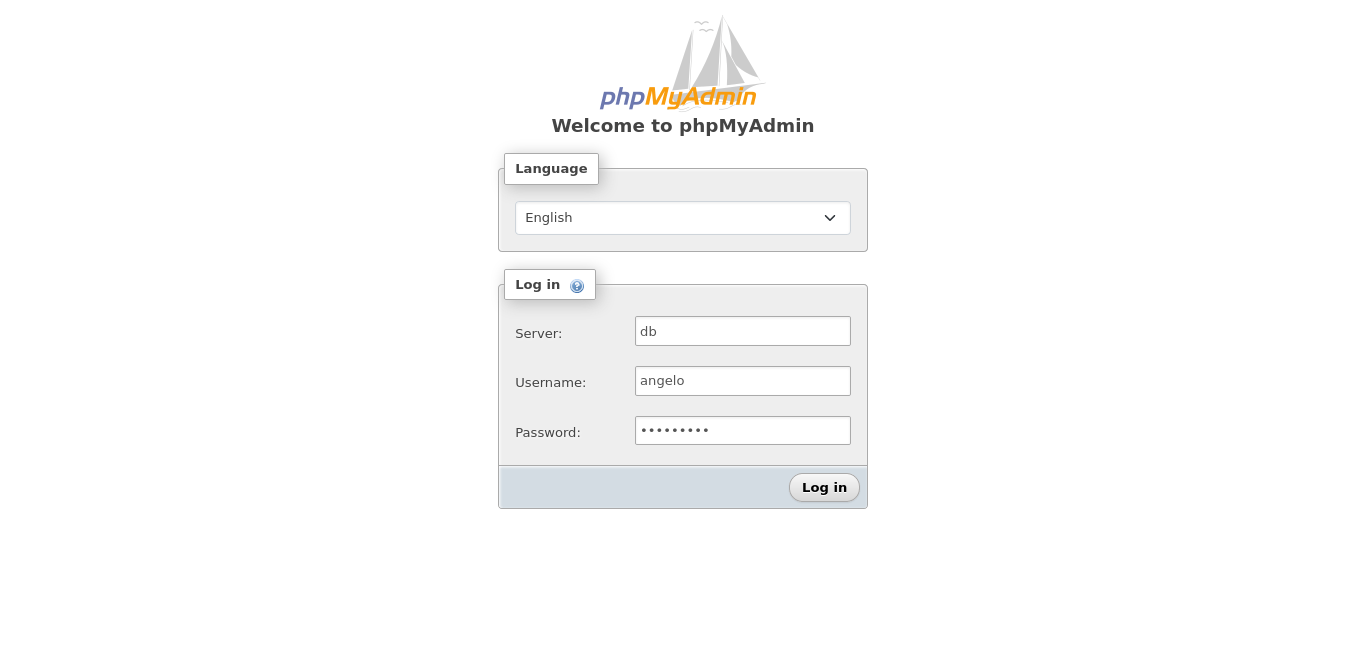
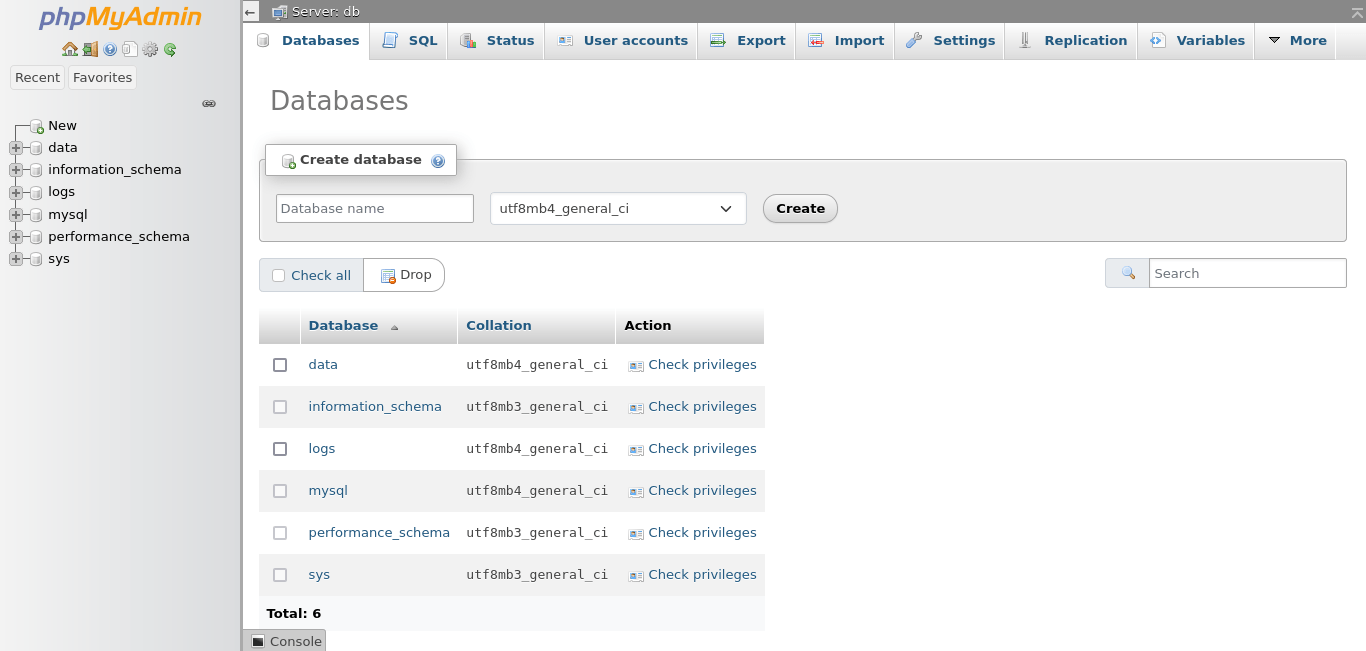
Of course, keep in mind that the root user is the one who has permissions to create databases and so on. If you want to change this, you will have to access the image and create a new database and give the regular user permissions on it.
Conclusion
In this post, you learned how to deploy MariaDB and PhpMyAdmin using Docker.