
Here we explain how to configure the VCS Veritas Cluster Server (New name InfoScale) three node cluster on CentOS 8/RHEL 8 step by step for high-availability server. We already Installed VCS, visit how to install veritas cluster server
https://unixcop.com/install-veritas-cluster-server-on-centos-8-rhel-8-step-by-step/
Now we are going to configure VCS cluster.
Start configuration
As we have been already installed Veritas Cluster server software, now we are login into system1 which is linux3 and run the command.
/opt/VRTS/install/installsfha -configureOr
/opt/VRTS/install/installsfcfsha -configure
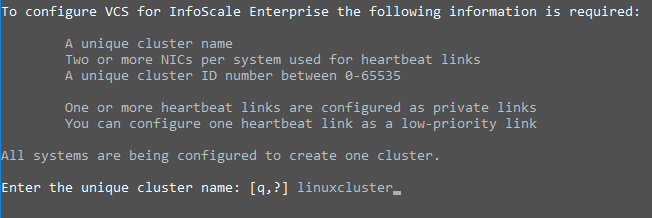
Add required cluster configure information, we are using the unique cluster name ‘linuxcluster’.
Use option 5 for Automatically configure heartbeat, it will configure heartbeat link on every system. If we configure manually configure the heartbeat, we should option 1.
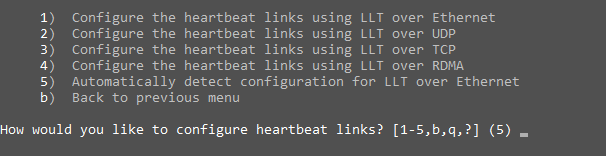
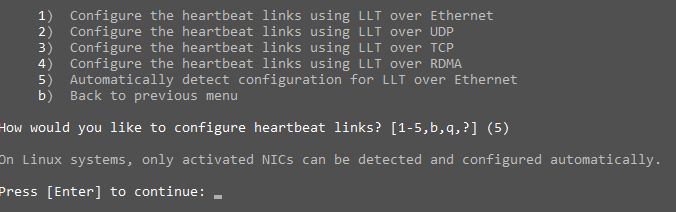
When we enter option 5 , on Linux systems, automatically activated NICs.
Now Select the default cluster ID by pressing ‘Enter’. Or you can use different unique cluster ID between 0-65535.

Press ‘Enter’ to perform a cluster ID check.
The cluster cannot be configured if the cluster ID is same it will show error.

Press ‘Enter’ to continue.

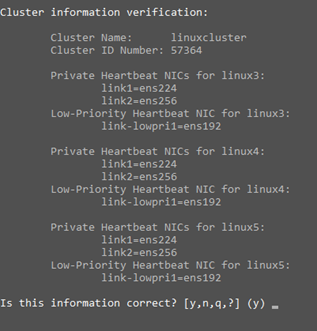
Check cluster information and select option ‘y’. Private Heartbeat NICs configured on every node, we can see the cluster information with interfaces
Configure the Virtual IP by selecting ‘y’.

Select ‘ens192’ as the Virtual IP NIC.

Confirm ‘ens192’ to be the public NIC used by all systems by selection option ‘y’. it’s configured on all nodes by selecting ens192 public NIC.

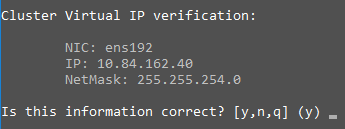
Configure the Virtual IP address. We are using IP ’10.84.162.40’.

Enter the appropriate netmask.

Confirm the Virtual IP Address configuration.
Do not configure the cluster in Secure Mode.

Accept default credentials.

Don’t add another user to the cluster.

1) Don’t add an SMTP server.
2) Don’t configure an SNMP server.
3) Don’t configure Global Cluster Option.
Stop InfoScale Enterprise processes by selection option ‘y’.

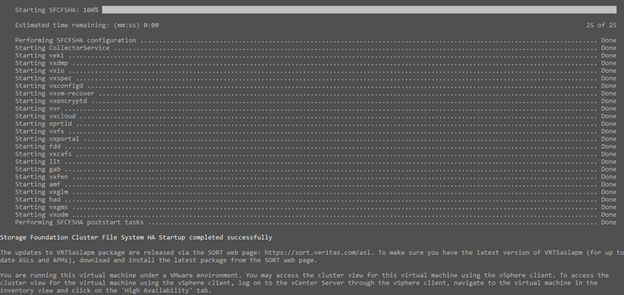
After configuration Cluster Starting
Don’t clean up communication by selecting option ‘n’.

Don’t view the summary file by selecting option ‘n’.

Done! VCS Configuration completed.
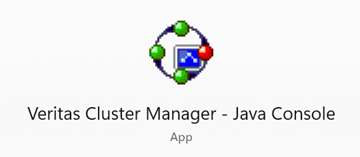
Once configuration complete. Go to veritas download site
and download Veritas Cluster Manager – Java Console and install it for accessing VCS java Console.
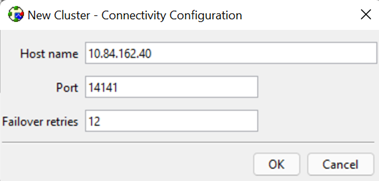
Enter the Virtual IP address of your cluster
Done! So you know how to configure VCS on CentOS 8.