
Vyatta is an Open Source networking software which gives you complete routing and firewalling features including static routing , dynamic routing ,network address translation , state full firewall filtering, bridging , web filtering and many other use full features .
In this guide we will demonstrate you how to install Vyatta 6.6R1 and give you some example of basic configuration to make the router work as internet gateway for internal private network.
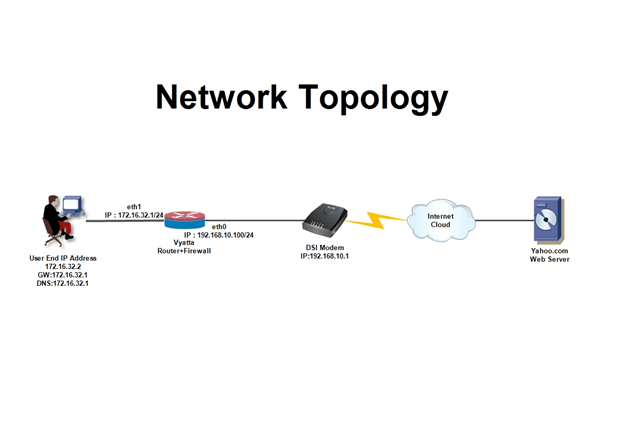
We will use below Network topology throughout this guide.
Pre-requisite
A desktop pc with at least two LAN card, 512 MB of Physical RAM, 5 GB hard disk or any virtualization software through which you can connect two different network.
How to install Vyatta – Internet Router And Firewall
Let’s get started
First we will make any Vyatta 6.6R1 Operating System bootable CD or usb flash drive using any burning utility software such as power ISO , daemon tools and etc , for bootable usb you can also use Rufus software .
Insert CD into cd-rom drive and boot from Vyatta 6.6R1 bootable cd or usb flash drive.
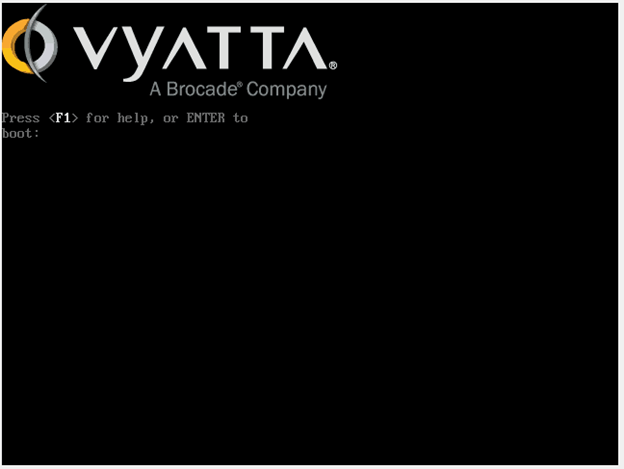
Press “enter key” or wait for loading bootloader.
After successful booting the setup will take you to the login prompt
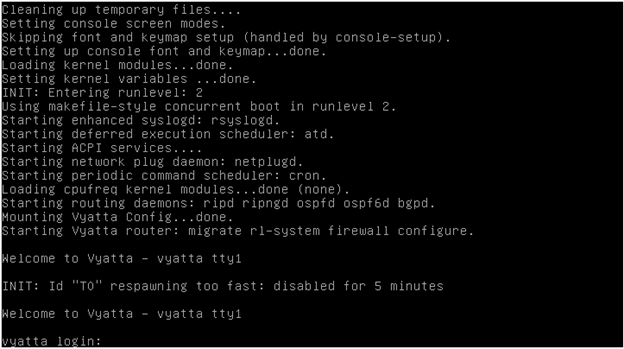
By default the setup starts in live cd mode in which you can also configure and use vyatta
without installing on hard drive but you cannot make the configuration persistent.
Whenever you restart the pc you will loss the configuration.
For persistent configuration we will install Vyatta on our pc hard drive.
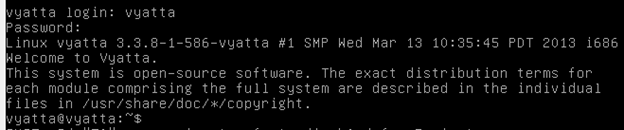
First login into Vyatta using default username and passwords that is “vyatta”.
process.
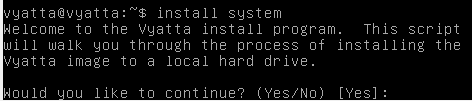
Type “Yes” and then press enter.
Vyatta installation process will ask you for disk partitioning.

partitioning if you have already setup the disk partition.
But this time we will select “Auto” for simplicity. Type “Auto” and then press “enter key”
Then it will show you the available disk and their capacity/size
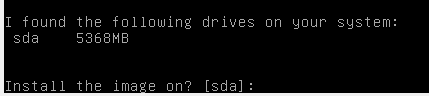
After selecting the disk the setup will ask you to format the disk.

Then it will ask you about disk partition size, for the demonstration purpose will use whole disk for the partition. Just press “enter key” and the setup will start creating the partition table and copying files into newly created partition as shown below.
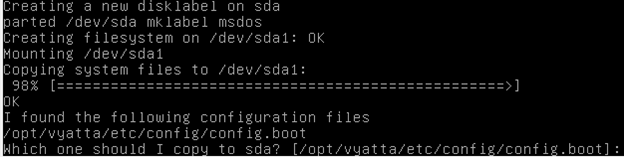
Then setup will find the default configuration file that is “ config.boot” and ask you about the
location to save the file on your disk.
Press “ enter key” to save the file on default location of the disk.
The setup will prompt you to setup default username and password for log in the Vyatta after
completing the installation.
We will use vyatta as user name and password as well to make our setup simple.


Here we simple press “enter key” to proceed the boot loader installation.

Here , we have successfully installed the Vyatta 6.6R1.
Reboot the Vyatta router (as shown below) and remove any installation media on POST screen
to boot Vyatta OS via disk.

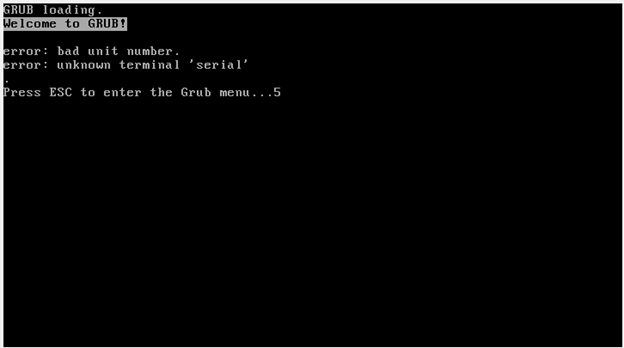
After successful installation and system reboot you will see the router showing you GRUB boot
loader welcome screen as shown below.
Login Vyatta router using the login credentials that you created during installation.
In our case we will use vyatta as default user name and password.
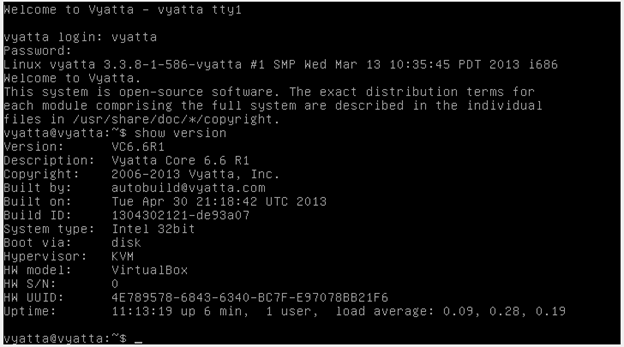
After successful login type “show version” and press “enter key” to check the Vyatta OS version and other details.
which will take internal user request to internet.
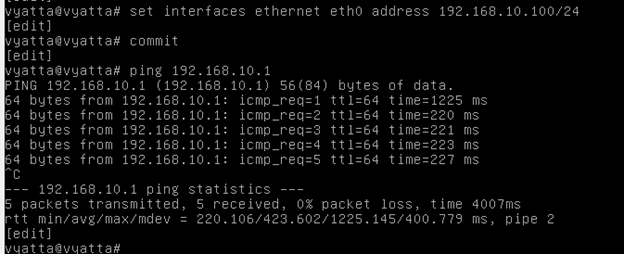
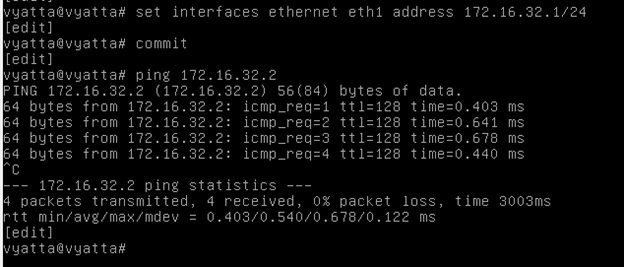
First, we assign IP 192.168.10.100/24 to interface eth0 which is connected with internet dsl
modem and IP 172.16.32.1/24 to eth1 which is connected with our internal network as you
have already seen in network topology diagram.
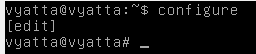
First we enter into global configuration mode using command “configure” and press “ enter
key”.
(dsl modem IP address) as shown below.
(172.16.32.2) as shown below.
Note:- the 172.16.32.1 work as default gateway for network 172.16.32.0/24
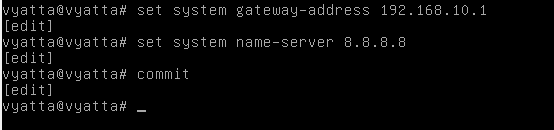
router. In our case we will use 192.168.10.1 as default gateway IP address which is actually a dsl
modem IP address and google’s dns server IP as name server for resolving name into IP address
as shown below.
Now , ping www.google.com to check both the internet access and name resolution for Vyatta
router.
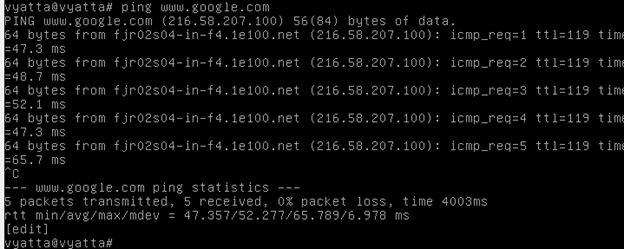
You can see in above snapshot that our router is able to get ping reply from www.google.com
which indicates that you have successfully established internet connection from Vyatta router.
Finally we configure DNS forwarding to forward dns query of internal PCs/end users and Source
Network address translation to translate internal IP address with internet connected interface
IP address so that the entire internal users/network can access the internet via Vyatta router.
first, we configure DNS forwarding .

Finally, we configure network address translation, there are two type of NAT one is source NAT
which used to translate or modify source IP address and the other one is destination NAT which
is used to change the destination IP address and its mainly used to publish any internal server
/service to the outside world that is internet.
In our case we only use source NAT so that our internal user which are using network
172.16.32.0/24 can access internet via Vyatta router.


Here, the entire basic configuration has done which is required to provide internet to our
internal network that is 172.16.32.0/24
Note:- We use “commit” command to make configuration active and “save” command to make
configuration persistent so that configuration will not erase whenever you reboot the router.
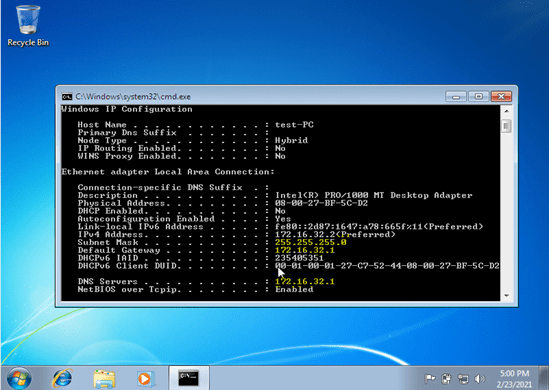
Now, we log in to our client PC and check whether the internet is working or not.
First, check the TCP/IP configuration via command prompt (ipconfig/all) then open the web
browser and browse and web site.
Finally, check the web browsing.

Congratulations you have successfully installed and configured Vyatta 6.6R1 .
Thank you very much for reading this article.